Patch Operations
14
Adjusting the Display’s Contrast (Sys: Contrast)
Parameter Explanation
Contrast Adjusts the contrast of the display.
Panel Lock Settings (Sys: Knob Lock)
Parameter Explanation
Knob Lock
If this is ON, patch selection using the [PATCH/VALUE] knob is disabled. This
prevents the patch number from being changed if your toe contacts the
[PATCH/VALUE] knob when you operate the pedal.
Auto O Settings (Sys: Auto O)
Parameter Explanation
Auto O
The GP-10 can turn o its power automatically. The power will turn o
automatically when 10 hours have passed since you last played or operated
the unit.
With the factory settings, this function is turned “ON” (power-o in 10 hours).
If you want to have the power remain on all the time, turn it “OFF.”
Limiting the Patches Selectable in the Play Screen (Sys: Patch Extent)
Parameter Explanation
Patch Extent
If this is “ON,” the patches that can be selected in the Play screen are limited
to the range you specify. You can use this to prevent unwanted patches from
being selected during a live performance.
Example: If you want to select only patch numbers 20–35, specify as follows.
• Patch Extent: ON
• Min: 20
• Max: 35
Min
Max
Adjusting the Expression Pedal (Calibration)
The GP-10’s expression pedal has been set for optimal operation at the factory.
However, extended use and certain operating environments can result in the pedal
going out of adjustment.
If you encounter problems such as the expression pedal’s ON/OFF switch not
functioning or the volume pedal not fully cutting o the sound, you can use the
following procedure to readjust the pedal.
1. Press the [SYSTEM] button several times to select the “Calibration.”
The display shows “Set EXP1 to MIN.”
2. Move the heel of the expression pedal all the way down, then release the pedal
and press the [WRITE] button.
The display shows “Set EXP1 to MAX.”
3. Move the toe of the expression pedal all the way down, then release the pedal
and press the [WRITE] button.
A value indicating the current stiness (EXP1Sw: Threshold) of the expression pedal switch
appears in the display.
Value: 1–16 (default: 8)
4. Use the [VALUE] knob to adjust the stiness (THRESHOLD) of the expression
pedal switch.
The lower the value, the more easily the switch will respond, even when pressed lightly.
* These values are not initialized when you execute Factory Reset.
Restoring the Factory Settings (Factory Reset)
Restoring the GP-10’s system settings (System parameters) to their original factory
default settings is referred to as “Factory Reset.”
1. Press the [SYSTEM] button several times until the “Factory Reset” appears.
2. Use the [VALUE] knob to specify the areas that will be returned to their factory-
set state.
Value Explanation
SYSTEM + PATCH System parameter settings + User patch settings
PATCH User patch settings
3. Press the [WRITE] button.
Conrmation screen appears.
If you decide to cancel, press the [EXIT] button.
4. If you want to proceed with the factory reset, press the [WRITE] button.
Patch Operations
& For details on saving a patch (Write), refer to “Saving a Patch” (p. 4).
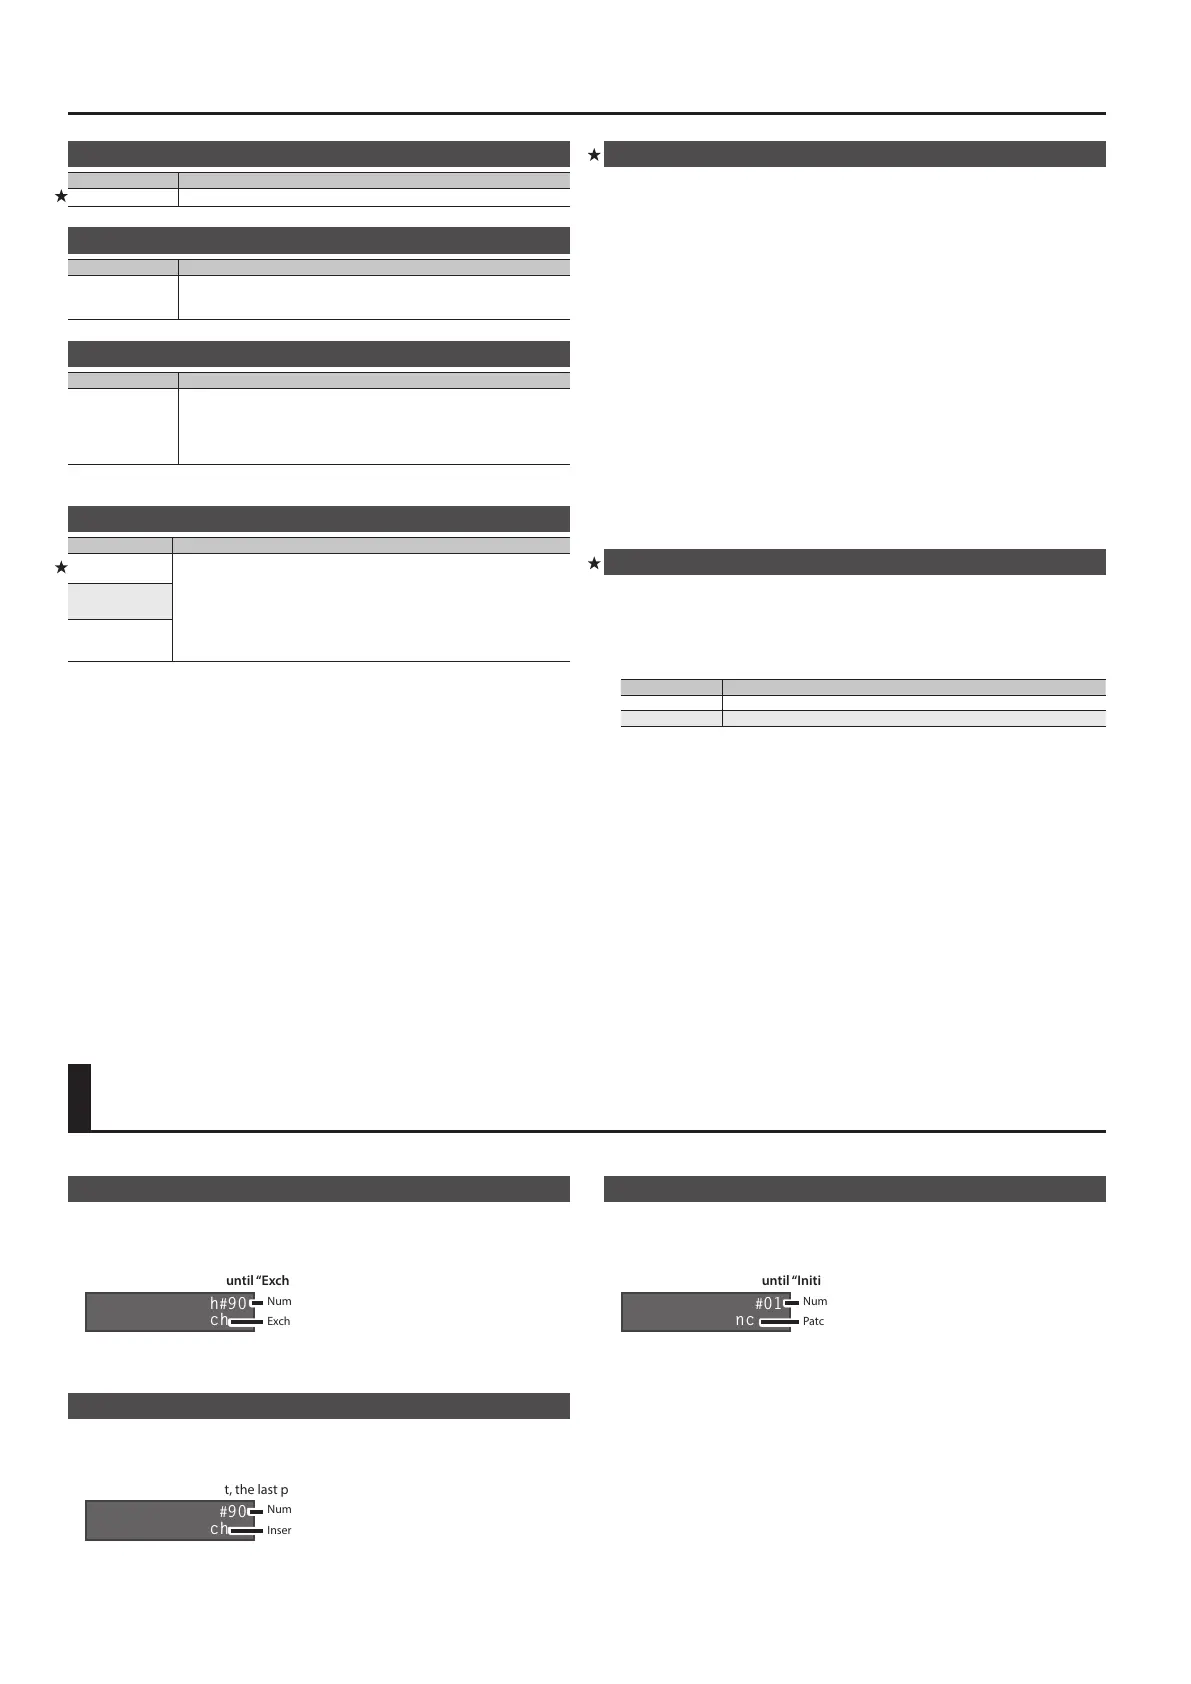
Exchanging Patches (Exchange)
You can exchange patches with one another, rearranging the patches.
1. Select an exchange-source patch.
2. Press the [WRITE] button.
3. Use the [K] [J] buttons until “Exchange” appears in the display.
Exchange-destination patch
Number
Exchange with#90
Init Patch
4. Turn the [VALUE] knob to select the exchange-destination patch.
5. Press the [WRITE] button; the patches will be exchanged.
Inserting a Patch (Insert)
To insert a patch, choose “Insert” in step 3 of the Exchange procedure.
Example: If you insert patch 1 at patch 30, patch 30 and subsequent patches shift
upward by one patch (patch 30 becomes patch 31).
* When you execute Insert, the last patch (patch 99) is deleted.
Insert-destination patch
Number
Insert to #90
Init Patch
Initializing a Patch (Initialize)
This operation initializes a patch.
1. Select the patch that you want to initialize.
2. Press the [WRITE] button.
3. Use the [K] [J] buttons until “Initialize” appears in the display.
Patch to be initialized
Number
Initialize #01
Dual Sync
4. Press the [WRITE] button; the patch will be initialized.
 Loading...