112
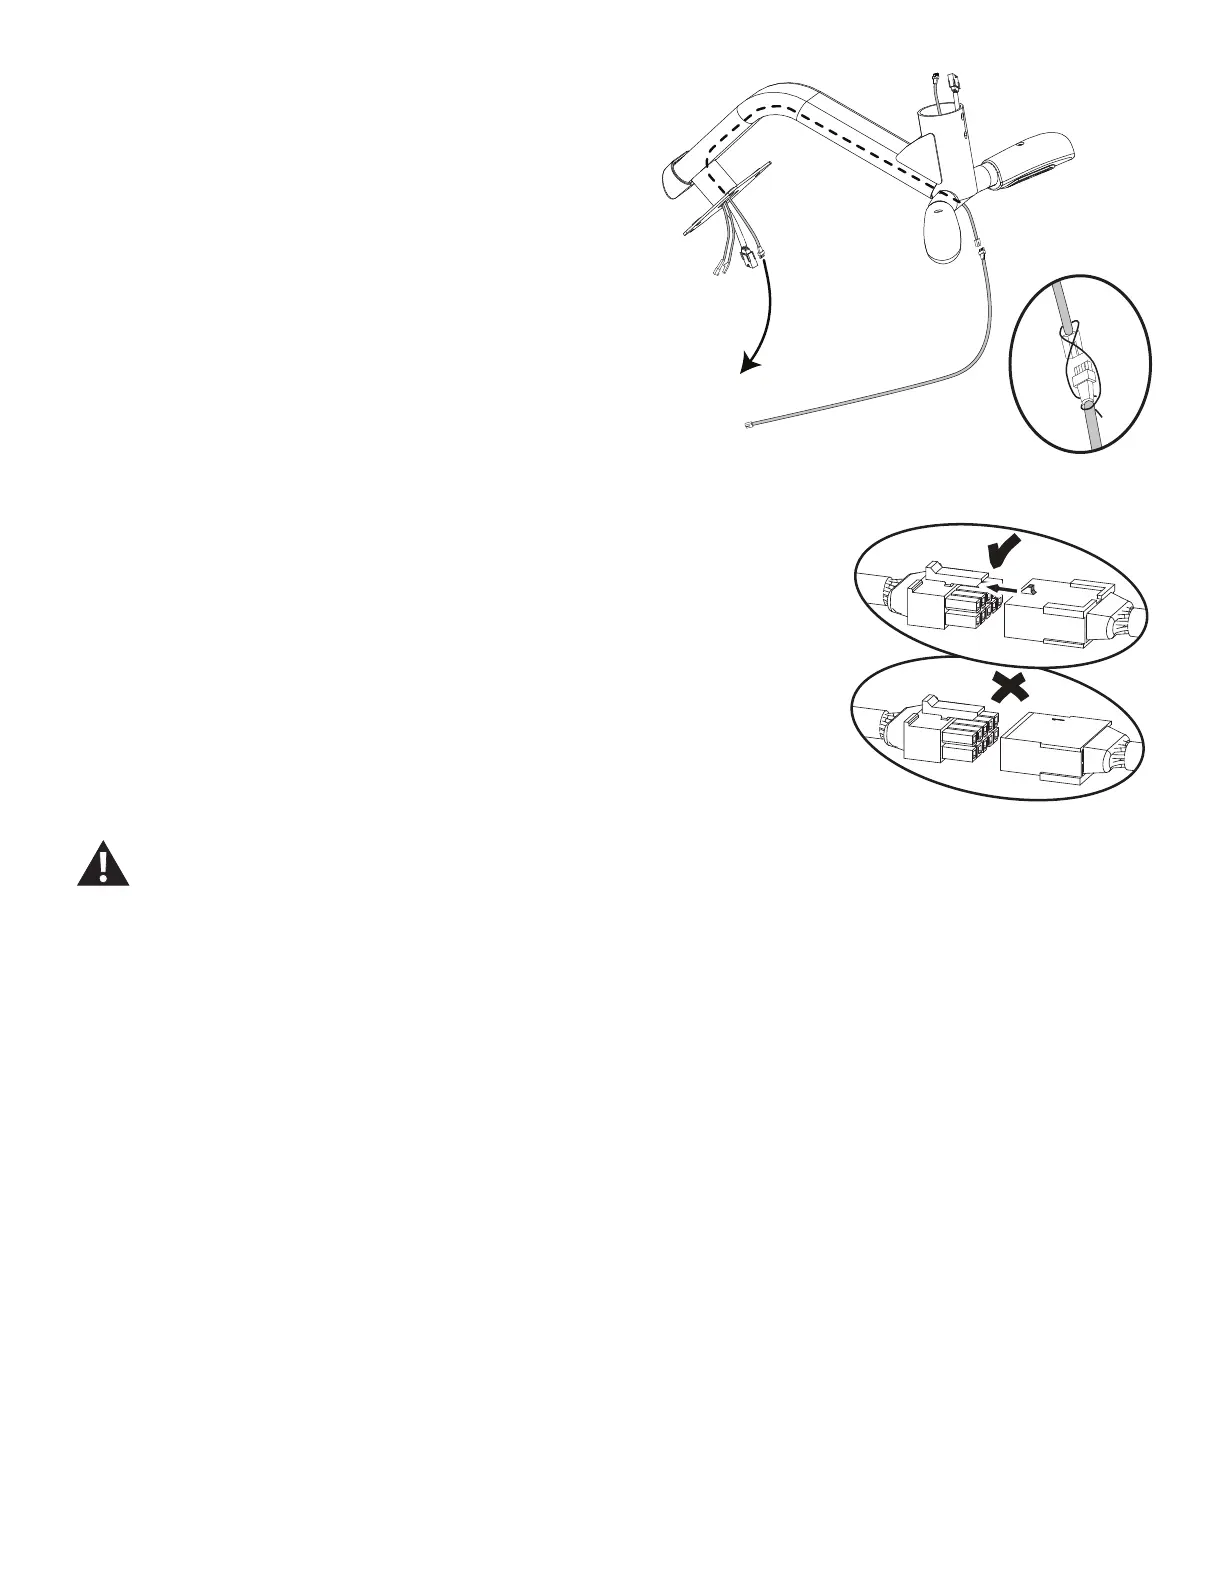
18. Using a piece of wire or string, attach the new Resistance Cable to the end of
old Resistance Cable where it connected to the Resistance Knob. Be sure to con-
nect the Cables so that when the new Resistance Cable is routed the connectors
will match the old Resistance Cable connectors
19. Gently pull the old Resistance Cable out of the top of the Static Handlebar,
routing the new Resistance Cable into place.
Note: Do not crimp any of the Console Cables.
20. Remove the piece of wire or string, and discard the old Resistance Cable.
21. Re-assemble the machine in the reverse order of when the parts were
removed.
Note: DonotcutorcrimptheCables.EachCableconnector(3-pin,4-pin,5-pin
and14-pin)hasacorrespondingendconnectorwiththatmanyopenings.Besure
to fully connect the cable connectors. When attaching the Console Assembly, do
not fully tighten the hardware until all hardware has been hand tightened.
22. Final Inspection
Inspect your machine to ensure that all hardware is tight and components are
properly assembled.
Do not use until the machine has been fully assembled and
inspected for correct performance in accordance with the Owner’s
Manual.