149
2. Remove the Right Stabilizer Shroud from the machine.
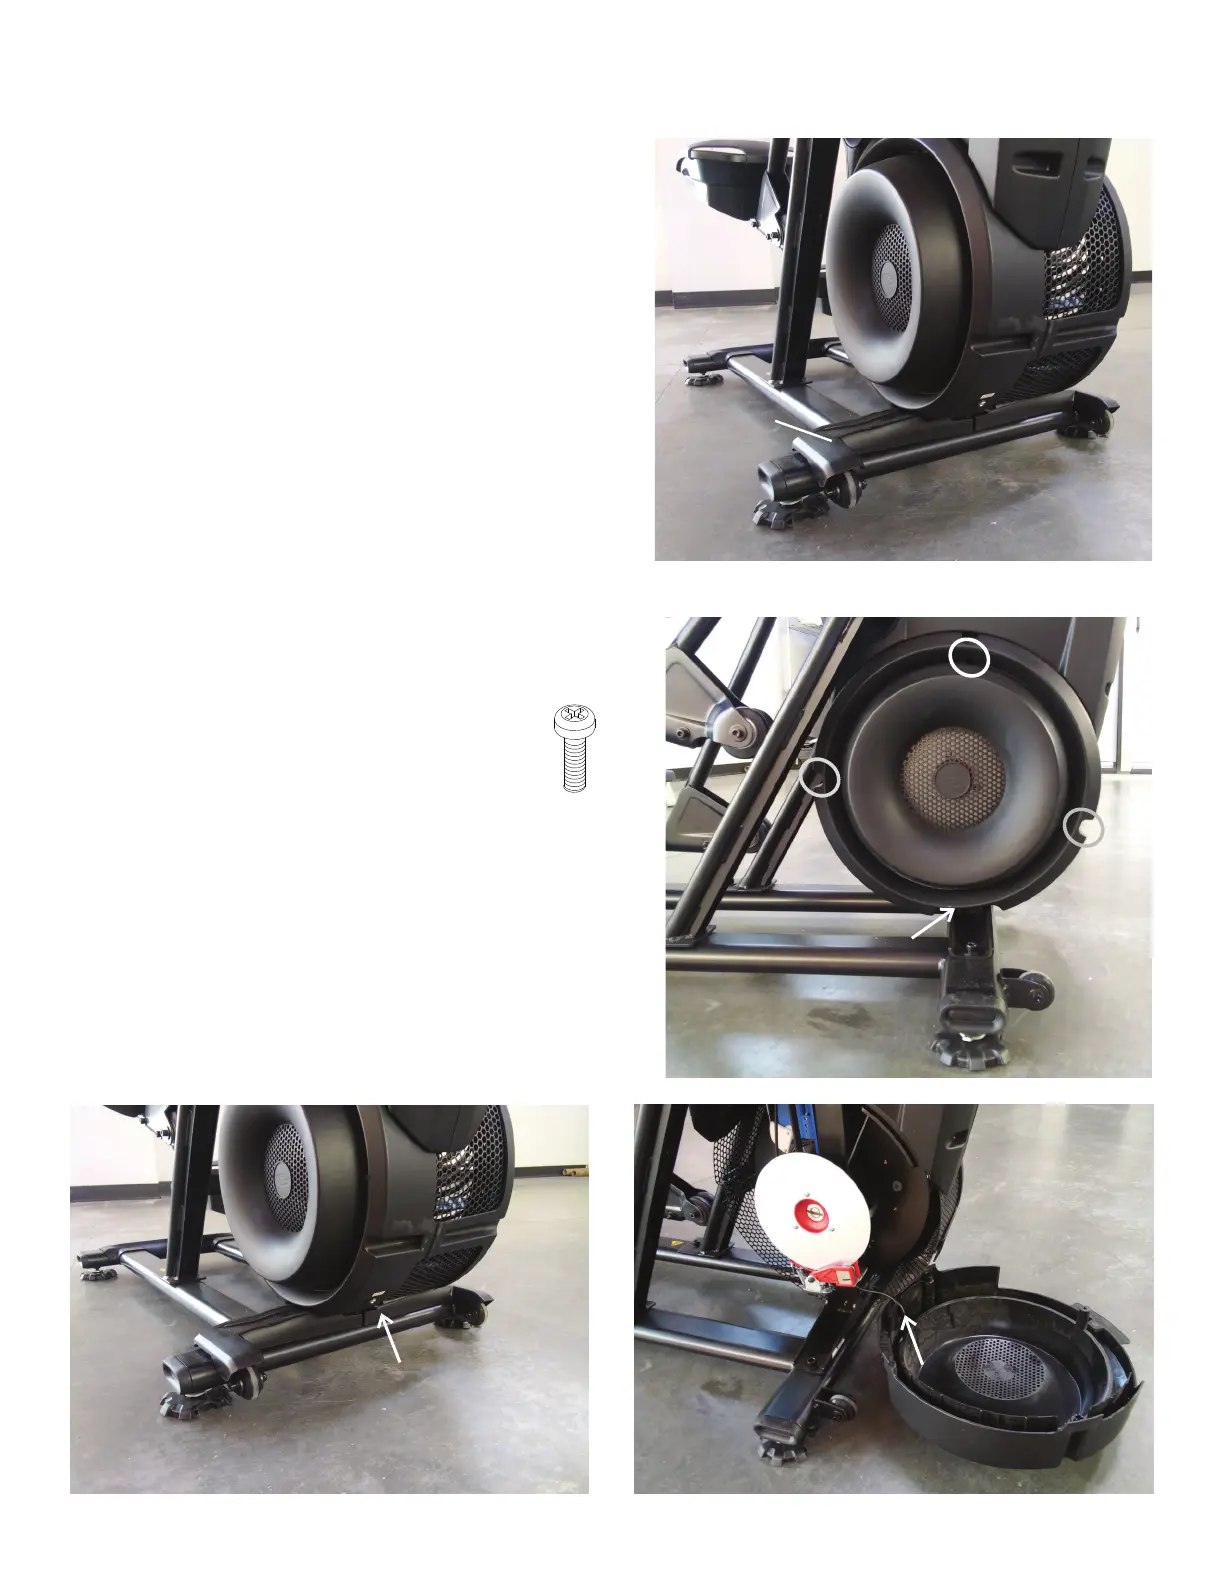
3.Usinga#2Phillipsscrewdriver,removetheindicated(byovals)screws
and only loosen the lowest indicated screw (arrow) from the Right Fan
Cover.
Note: Loosen the lowest screw by at least 3 full rotations.
To assist with re-assembly, note that the upper screw is a
machine screw and not a self-tapping screw.
4.TheRightFanCoverhasatabthatneedstobepushedupwardtoclear
the loosened screw. While pushing up on the tab, remove the Right Fan
Cover from the assembly.
Note: The Power Cable is attached to the inside of the Right Fan Cover.
Be sure not to crimp the cable by placing the Right Fan Cover close to the
front of the machine.
1. Unplug the AC Adapter from the wall outlet and machine.
Note: Your machine may not match the images provided exactly.
Right Stabilizer
Shroud
Power Cable
Power Inlet