59
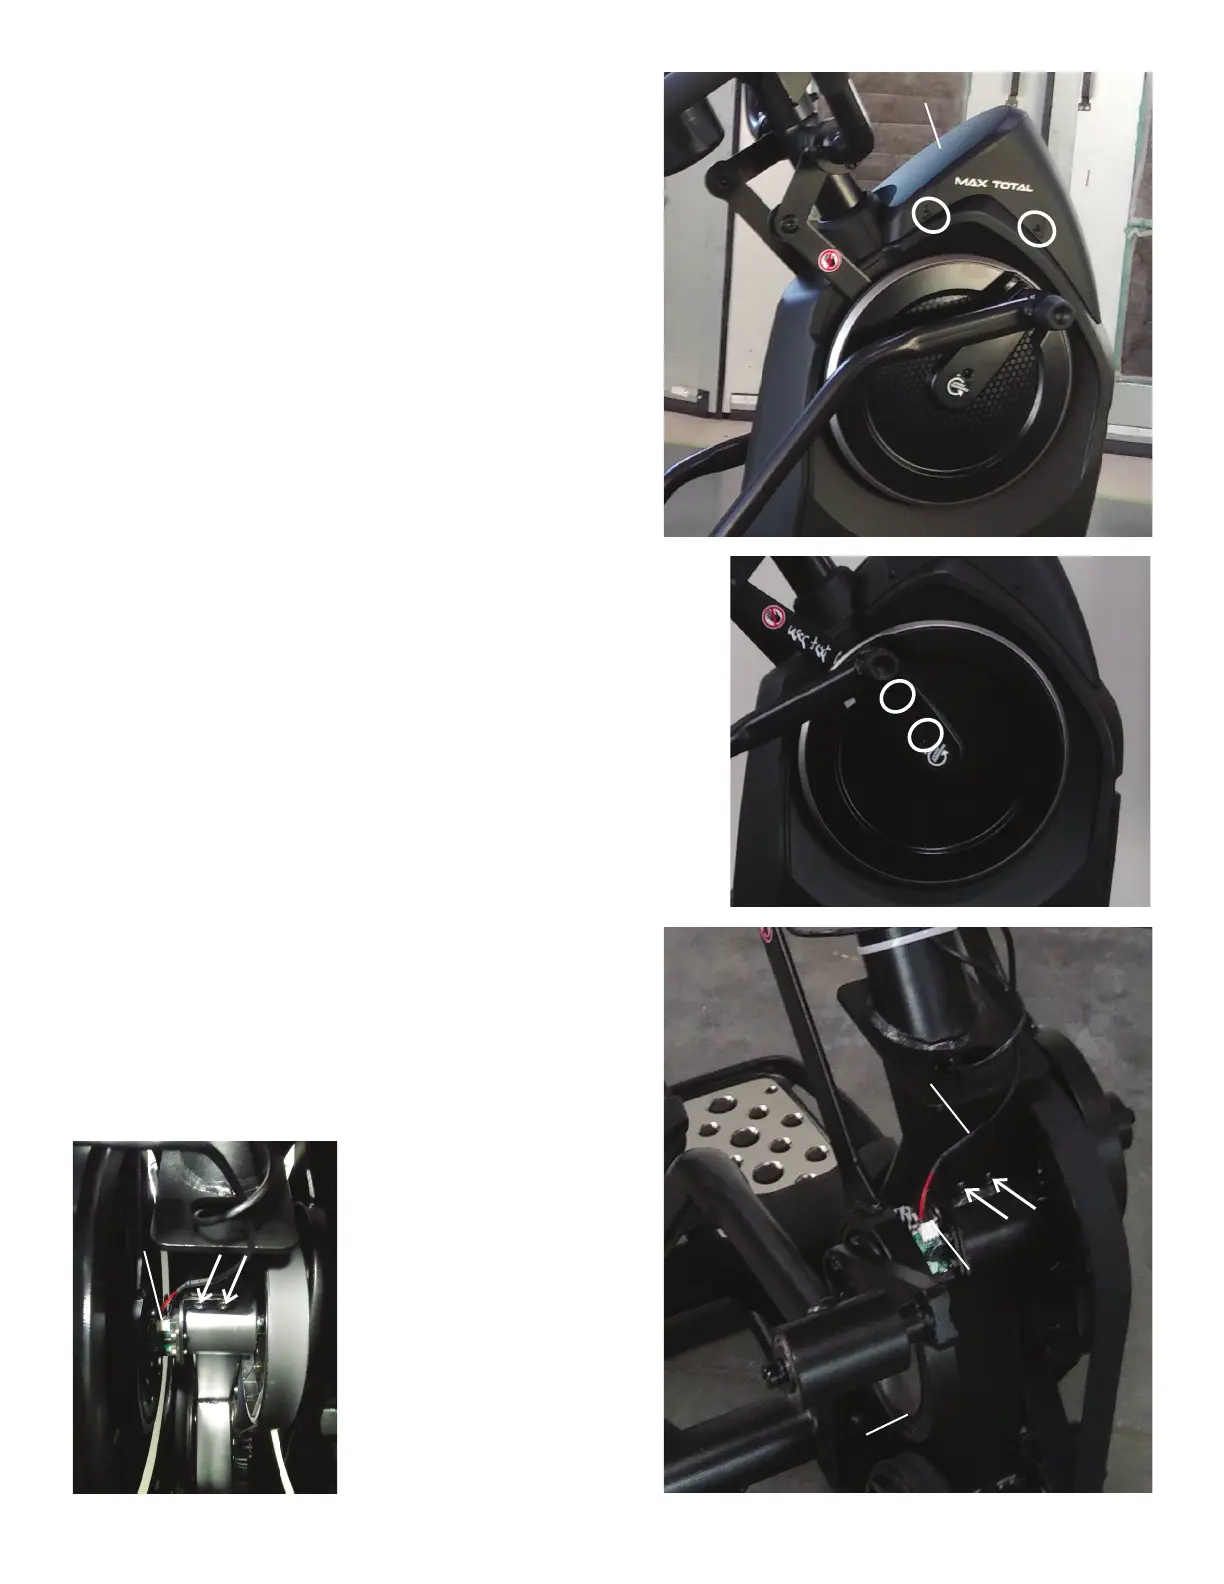
8.Usinga#2Phillipsscrewdriver,removethe4screws(2indicated
on one side) from the Upper Shroud.
9.Usinga#2Phillipsscrewdriver,removethe2indicatedscrews
from the Crank Cover.
Note: The Crank Cover screws may have been over-tightened when
installed. Try not to strip the screws when removing them.
10. Remove the Crank Cover from the machine.
11. Place a towel or rag inside of the machine below the indicated
screws (with arrows). The towel or rag should be placed so that it will
catch the screws if dropped.
12.Usinga#2Phillipsscrewdriver,removethescrews(indicatedby
arrows) that secure the Upper Body Sensor. Allow the Upper Body
Sensor to hang on the Cable, away from the Right Crank Arm.
Note: Shrouds are removed for clarity.
Crank Cover
Upper Body Sensor
Right Crank Arm
Upper Body Sensor
Cable
Note: View into Shrouds from above.
Upper Body
Sensor
Upper Shroud
Cap