REMOVING/REPLACING THE MAIN COMPONENTS PV 101+/PV 102+ Service Manual
3–6 BREAS MEDICAL Doc. No. 003259 En Issue: X-1
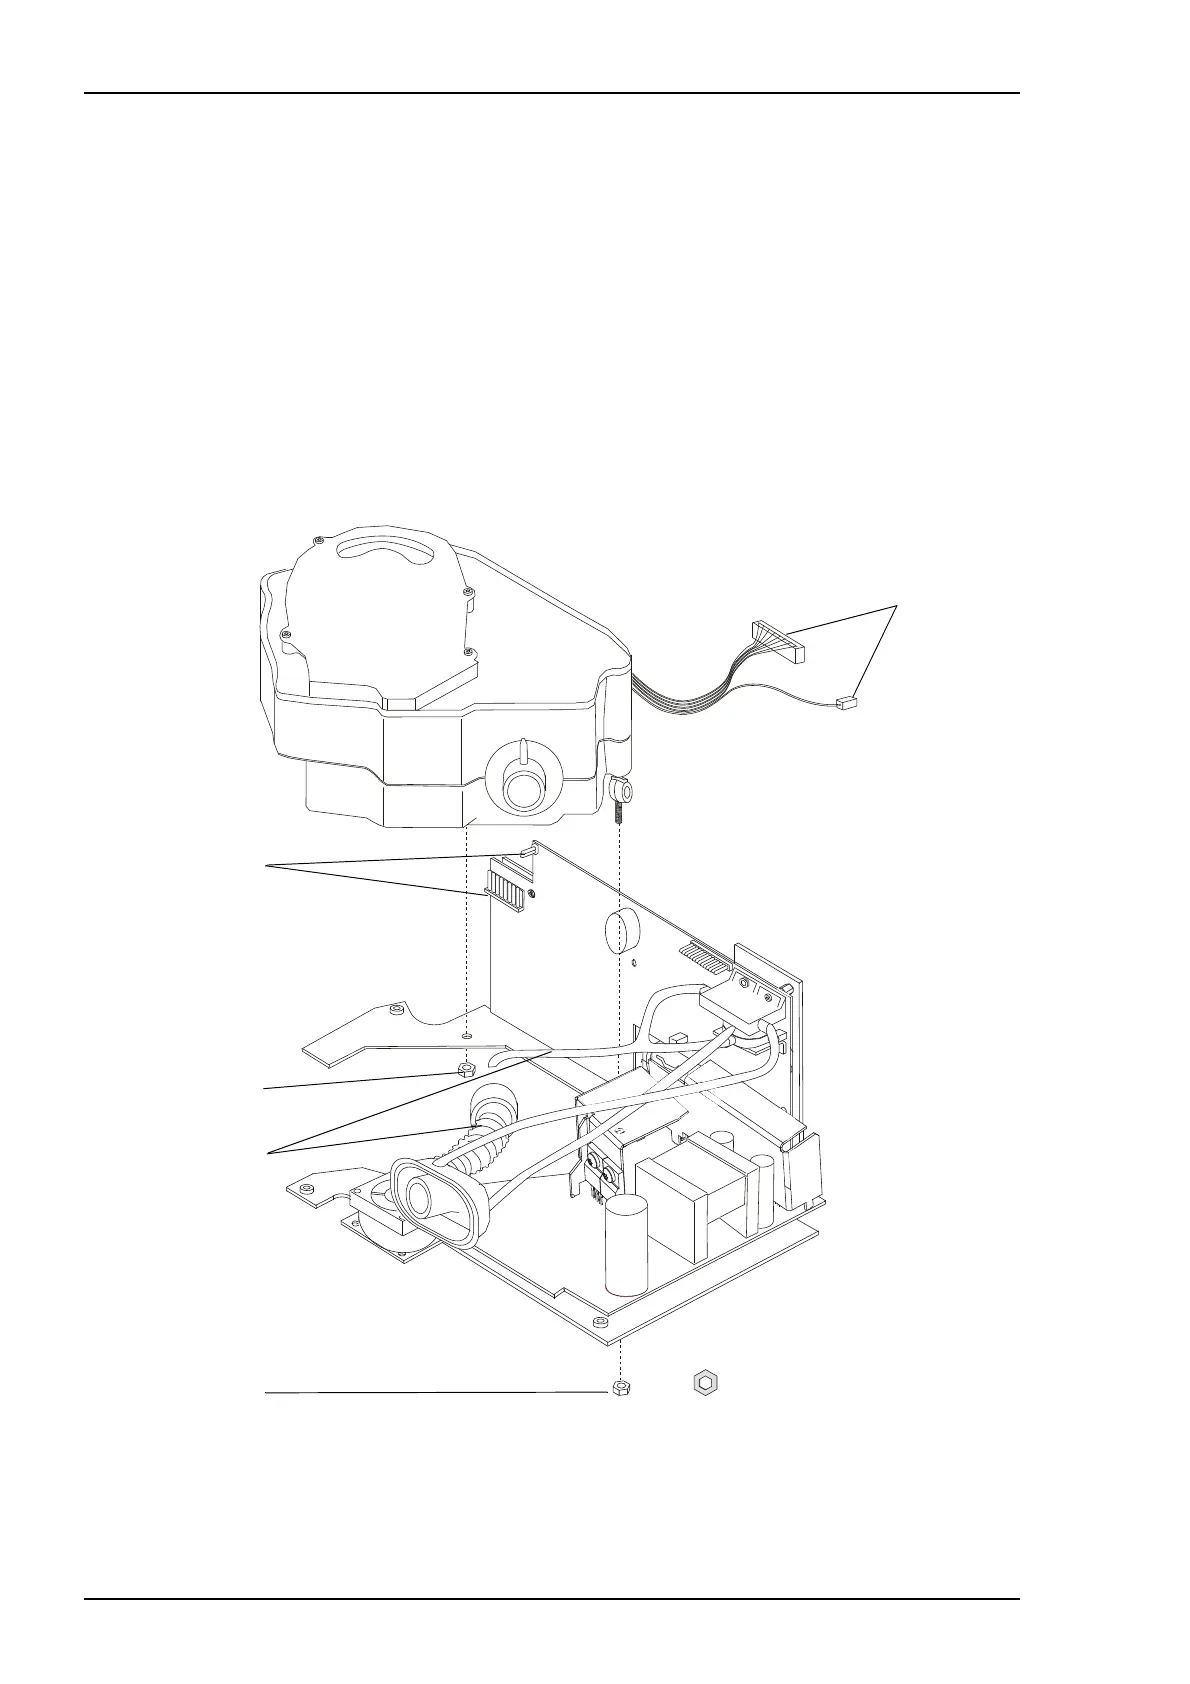
3.5 Removing and replacing the blower unit
To remove the blower unit:
1 Remove the upper casing (See section 3.2).
2 Remove the main assembly (See section 3.4).
3 Disconnect the motor connectors from the MDA board.
4 Disconnect the flex tube from the blower unit’s air outlet. Disconnect the red sen-
sor tube from the blower unit’s sensor connector.
5 Remove the remaining two nuts that hold the blower unit’s rubber mounts from
underneath the base plate.
6 Lift away the complete blower unit.
To reassemble the blower unit:
• Reassemble in reverse order.