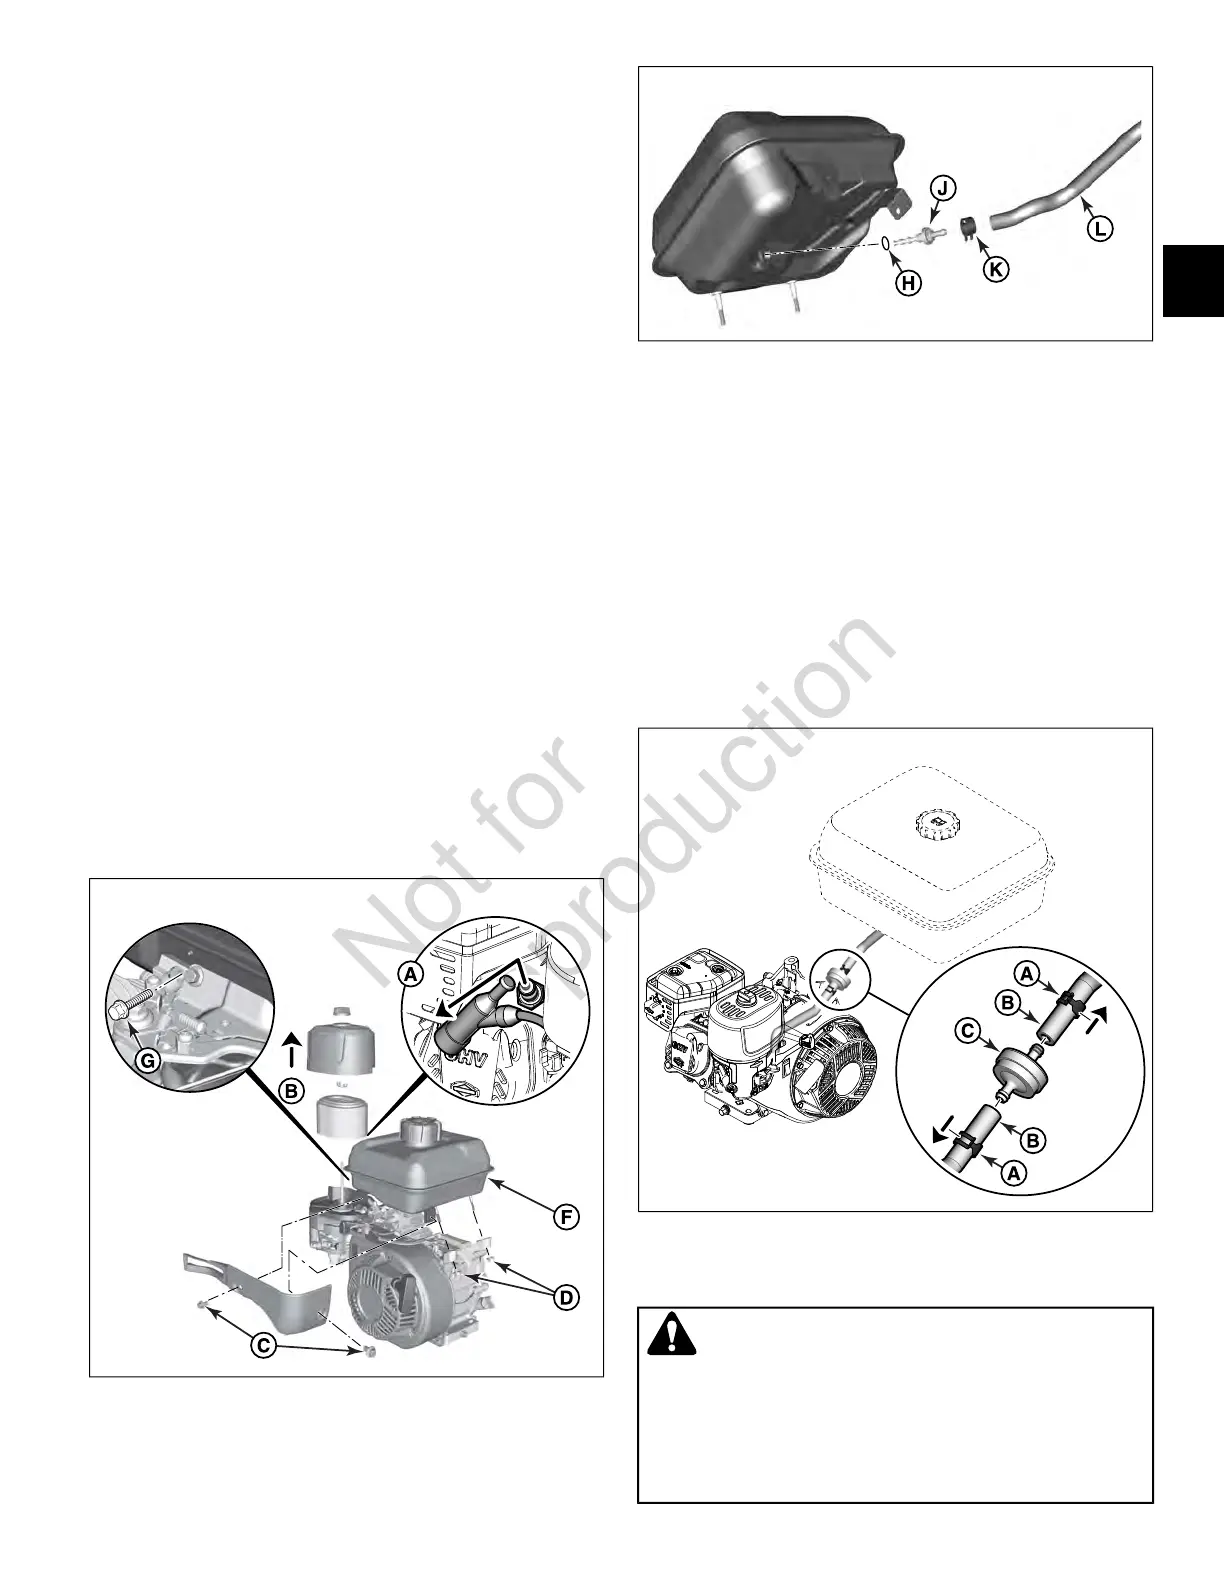
3. Remove the air cleaner cover and air filter (B) as
instructed in
Change Air Filter
found in this section.
4. If equipped, remove the control panel trim screws (C)
and then remove the control panel.
5. Remove the two nuts (D) from fuel tank.
6. Remove screw (G) from opposite side of fuel tank.
7. Lift fuel tank and slide fuel line clamp (K) away from
fuel filter (J). Remove fuel line (L) with fuel line removal
tool (p/n 19600).
8. Remove fuel filter (J) and O-ring (H) from fuel tank and
check for dirt or debris; clean or replace as necessary.
9. Install cleaned or new fuel filter and O-ring into fuel
tank. Torque fuel filter to the value listed in
Section 13
- Engine Specifications
.
Note:
Make sure o-ring is seated in groove of fuel filter.
10. Check the fuel line for cracks or leaks. Replace fuel line
if necessary.
11. Install fuel line with clamp (K) onto fuel filter making
sure clamp retains fuel line securely.
12. Place tank onto engine. Install screw (G) and nuts (D).
Torque screw and nuts to the values listed in
Section
13 - Engine Specifications
.
13. If equipped, install control panel trim using screws (C).
Torque screws to the value listed in
Section 13 -
Engine Specifications
.
14. Install the air filter and air cleaner cover (B) as
instructed in
Change Air Filter
found in this section.
15. Reconnect the spark plug wire to the spark plug (A).
2
3
In-Line Fuel Filter (Models 106200 and 10U200)
1. Drain fuel tank by running engine until fuel tank is
empty.
2. Slide the clamps (A) away from the fuel filter (C). Twist
and pull the fuel lines (B) off fuel filter. Discard the fuel
filter.
3. Check the fuel lines for cracks or leaks. Replace if
necessary.
4. Install a new fuel filter (C) between fuel lines (B) and
secure with clamps (A). Make sure arrow on fuel filter
points in the direction of fuel flow.
4
In-Carburetor Fuel Filter (Model 10R200)
WARNING
Before servicing the carburetor or other fuel system
components, drain fuel tank by running engine until fuel
tank is empty and turn OFF the fuel valve (if equipped).
Do not attempt to stop the fuel flow by plugging the fuel
hose.
13
2
 Loading...