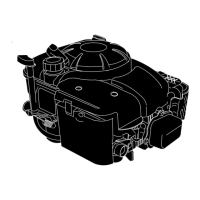
4. Install float and then install the float hinge pin (T).
5. Install new rubber gasket (U), bowl (V), old metal or
new fiber washer (Y) and bowl nut (Z).
Note:
Make sure rubber gasket is seated properly in groove
of carburetor.
Torque bowl nut to the value listed in
Section 13 -
Engine Specifications
.
6. Install drain plug (X) and washer (W). Torque drain plug
to the value listed in
Section 13 - Engine
Specifications
.
Install Carburetor
Note:
Always replace air cleaner gaskets and carburetor
mounting gaskets any time the carburetor has been
removed for service.
1. If not already Installed, slide gasket (L) and carburetor
spacer (K) onto studs.
Note:
Make sure gasket is properly orientated on carburetor.
An improperly orientated gasket will cause poor engine
performance. Refer to illustration at the beginning of the
carburetor section.
2. Slide new gasket (J) and carburetor (H) onto studs only
far enough so that linkage (AC) can be installed onto
throttle lever (AA). Refer to the following illustration.
Once linkage is installed, slide the carburetor completely
onto studs until it is against the engine. Slide new
gasket (G) onto studs.
Note:
Make sure gasket is properly orientated on carburetor.
An improperly orientated gasket will cause poor engine
performance. Refer to illustration at the beginning of the
carburetor section.
40
3. Install spring (AB) onto throttle lever (AA).
4. Install fuel line (B) with clamp onto carburetor fitting.
Make sure clamp retains fuel line securely.
5. Install control bracket (F) and air cleaner base (E) as
instructed in
Install Control Bracket
found in Section 5.
6. Perform static governor adjustment as instructed in
Perform Static Governor Adjustment
found in Section
2.
7. Install control panel trim (D) if equipped, as instructed
in
Install Control Bracket
found in Section 5.
8. Install air cleaner assembly (C) as instructed in
Change
Air Filter
found in Section 2.
9. Connect spark plug wire to spark plug (A).
39
4
 Loading...