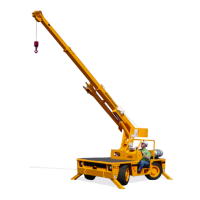
3-28
ELECTRICAL AND CONTROL SYSTEM
The electrical and machine control system of the IC-600 is built utilizing J1939 CAN technology
and consists of three major wiring harnesses that connect the machine’s sensors, modules, and
devices together.
Located in the operator’s compartment are two display units; the main machine display and the
RCL display. Also in the cab are the vehicle fuse and relay box. There is a single wiring har-
ness that connects the devices within the operator’s compartment to two electrical bulk head
connectors that are located at the RH side of the operator’s compartment. These two bulk head
connectors are the interface point for the electrical system between the operator’s compartment
and the rest of the machine.
The harness that runs the length of the chassis connects sensors and modules to the CAN net-
work of the machine. At the front and rear of the machine, the harness connects to pressure
transducers attached to each outrigger cylinder. In the center of the machine there is one con-
trol module that is mounted on the curb side of the turntable; this I/O module controls the sole-
noids, lights, and the other electrical components of the machine below rotation. On the top of
these control modules are status indicator lights that can aid in troubleshooting. Other electrical
components that are located below rotation, and under the dash of the operator’s compartment
include:
1. Brake Light Switch – attached to the brake pedal modulating valve; supplies current to
the brake light, when the brake pedal is engaged
2. Brake System Pressure Switch – attached to the brake accumulator charging valve;
monitors the brake system pressure, and when necessary, demands pressure from hy-
draulic system to change the brake system
3. Machine Level Sensor – located below the slewing bearing; monitors the machine’s
level status
4. Steer Position Sensors – located in each steer cylinder, integral to the axles; used to
indicate when the wheels are straight, to allow for steer-mode change of state
5. Outrigger Enable Valve – located in the outrigger control valve; diverts the load sense
signal to the pump through common shuttle valve at the inlet of the lower control valve,
when outrigger function is demanded
6. Park Brake and Arming Valves – located in the priority manifold on the curb side of the
chassis; solenoid-operated valves that allow hydraulic pressure to be transmitted to the
Park Brake; equipped with pilot-controlled valves (when these function are desired)
7. Range Shift and 4x4 Disconnect Solenoids – located on the curb side of the chassis;
controls the hydraulic logic to operate the range shift and 4x4 state of the drivetrain.
8. Electrical Interface with the Slipring – transmits electrical communication to/from
above rotation
9. Dump Valve – located on the curb side of the chassis; blocks the pilot supply pressure
for the HOIST UP, boom TOPPING UP, and boom EXTEND functions when an FKO
(Function Kick Out) or A2B condition is identified by the machine’s RCL system
10. Outrigger Cylinder Pressure Tranducers – one mounted on each O/R cylinder; trans-
mits pressure readings to the central system of the machine
11. Steer Mode Control Valves – located inside the left frame rail; controls the hydraulic
flow path for the three modes of steering operations
12. Horn – located in the chassis, on the front, right-hand side of the machine; creates an
audible blast when the horn button is actued by the operator
13. Back-Up Alarm/ Outrigger Alarm – located on the rear plate of the chassis; contains
two different tones of auible alarming: 1) when the machine is put into REVERSE, and 2)
when the outriggers are being deployed