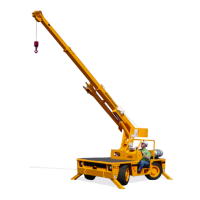
3-41
MECHANICAL ADJUSTMENTS
FASTENERS:
All fasteners on the IC-600 should be checked and retightened if required, as a part of the pre-
ventive maintenance program. Particular attention should be given to the drive axle mounting
bolts, pump mounting bolts, rotation bearing bolts, rotation gearbox bolts, winch bolts, bolts
holding extension cylinder to 2
nd
stage and 3
rd
stage. All bolts used in assembly are heat-
treated Grade 5 or better. Torque the wheel nuts to 475 ft-lbs (645 Nm). Torque the rotation
bearing nuts to 900-1000 ft-lbs (1220-1355 Nm) while holding the bolts stationary. Alternatively,
torque the rotation bearing bolts to 1200-1300 ft-lbs (1625-1760 Nm) while holding the nuts sta-
tionary. Note, these inspection torques are less than installation torques. See the Turret Sub-
assembly and Turret Installation in the Parts Manual for installation torques.
ROTATION GEARBOX:
The rotation gearbox assembly is attached to the chassis top plate by four cap screws. It is
held in proper engagement with the external teeth on the bull gear by three setscrews. It is fur-
ther restrained from torsional movement by three bolts on each side of the gearbox mounting
flange. The gearbox should be adjusted with the boom centered over front of the chassis. This
centers the gearbox pinion on the “high side” of the bearing gear teeth. Adjust the gearbox in-
ward until there is light contact (.008/.013 inch clearance) between pinion and bull gear teeth.
Metal shavings will occure if too tight. Swing function will appear loose if too much gap. Re-
tighten the four mounting bolts and the six side bolts.
RELIEVING HYDRAULIC PRESSURE
W A R N I N G
Failure to relieve trapped hydraulic pressure may result in high-pressure fluid penetra-
tion of the skin. If injured by escaping fluid, see a doctor at once. Serious reaction or
infection can occur.
Relieve all trapped hydraulic pressure before disconnecting lines to hydraulic parts. Note that
cycling the button pad or joystick controls with engine off will not release trapped pressure. The
hydraulic system requires pilot pressure to move the valve spools.
1. For steering system, turn steering wheel a few degrees each direction with engine off.
This may require a great deal of force.
2. For brake system, pump the brake pedal with the engine off and the key on. Pump the
brakes even after the brake warning icon appears on the dash display.
3. For outriggers, manually move the spools in the control valve using the override ports at
the ends of the solenoids and the master override simultaneously.
4. For the boom swing, topping/luffing, telescope, and hoist functions, an override handle is
provided. The boom swing spool is located on the chassis control valve. The other
boom functions are located at the upper control valve mounted to the side of the turnta-
ble. Use the provided emergency handle or a screwdriver to manually cycle the valve
spools, using the shaft at the end of each spool.
W A R N I N G
Failure to relieve trapped pressure in the brake circuit, prior to disconnecting brake hos-
es (or load sensing hoses), may result in the brake system accumulators discharging
pressure, which may result in injury due to escaping fluid.