3-41
Confidential
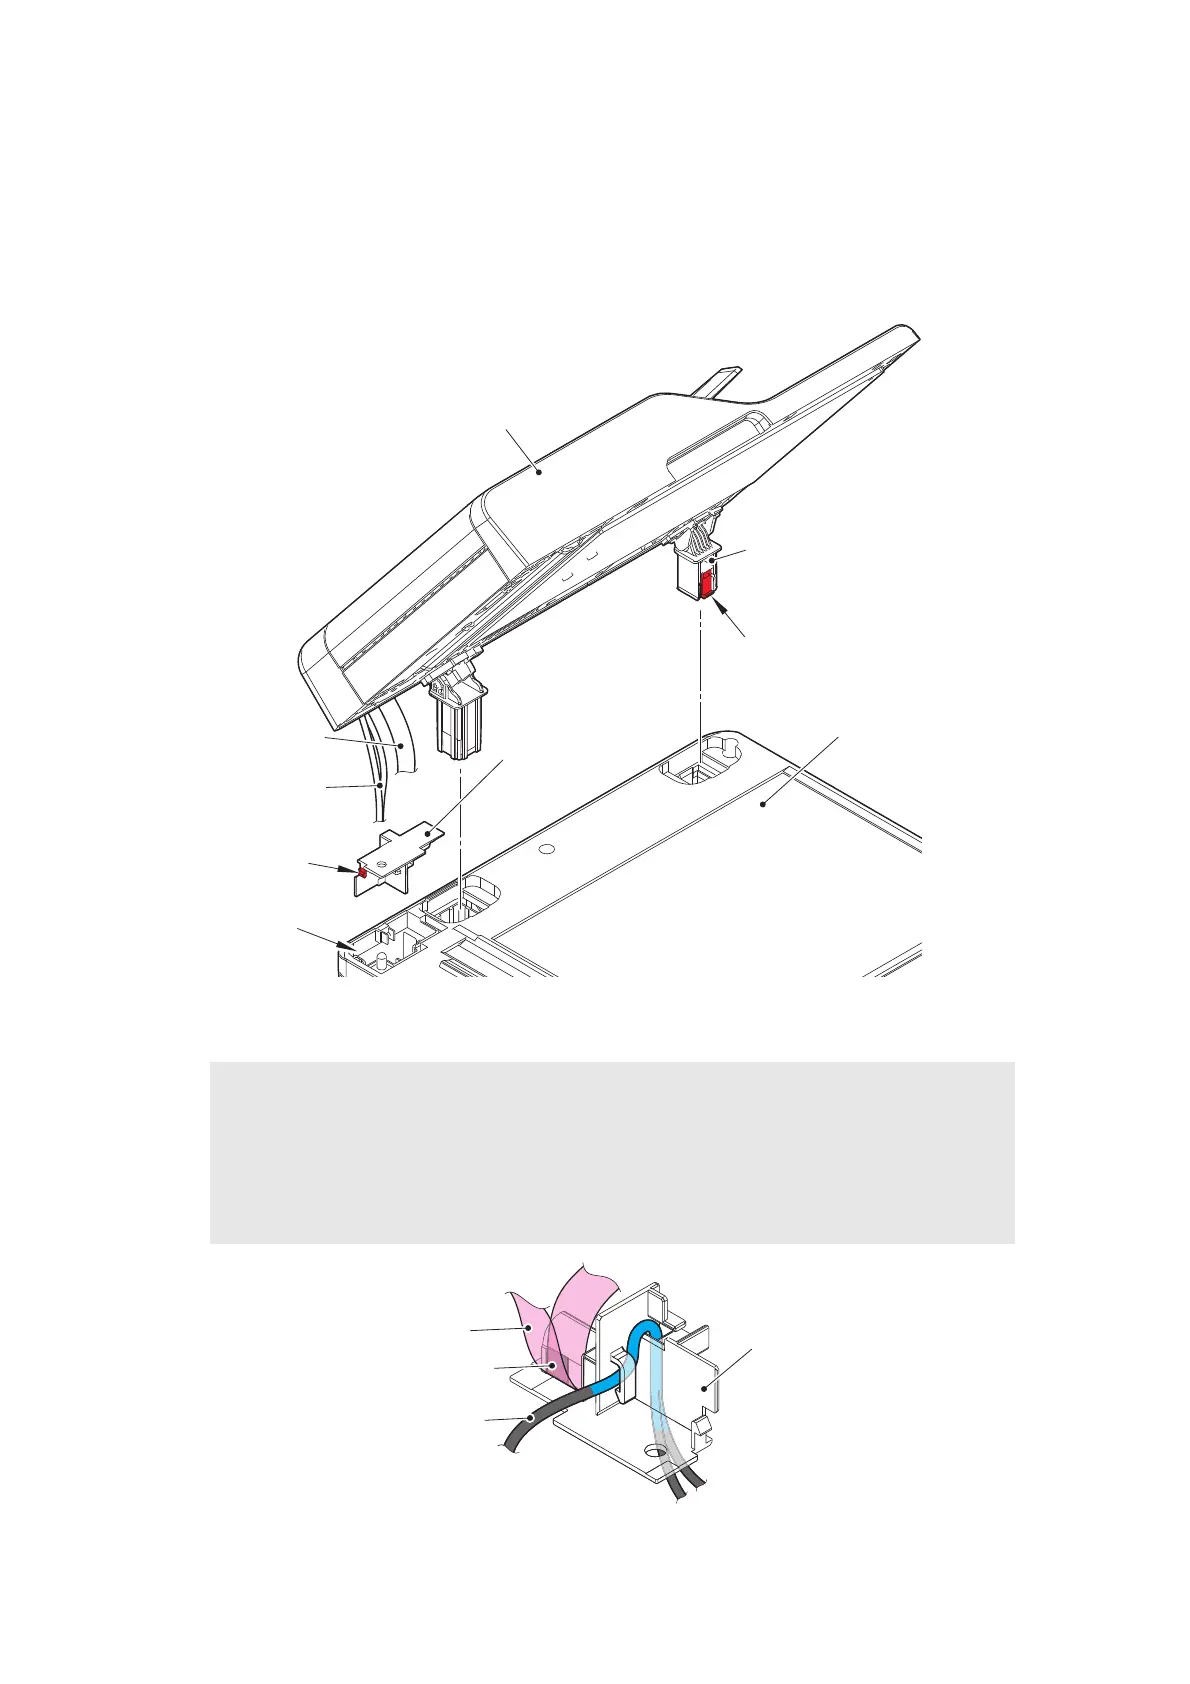
(3) Open the ADF unit. Release the Hook of the FFC holder ASSY, and remove the FFC
holder ASSY from the Document scanner unit.
(4) Lift the ADF unit, and remove the ADF unit from the Document scanner unit while pushing
the Hook of the Hinge R. Pull out the ADF sensor harness unit from the Hole.
(5) Remove the FFC holder ASSY from the ADF sensor harness unit and the Second side CIS
flat cable.
Fig. 3-30
Harness routing: Refer to “2. ADF unit”.
Fig. 3-31
Assembling Note:
• If you replaced the ADF unit, refer to “5. IF YOU REPLACE THE ADF UNIT, FIRST
SIDE CIS UNIT, SECOND SIDE CIS UNIT OR DOCUMENT SCANNER UNIT” in
Chapter 4 to configure settings.
• Attach the FFC holder ASSY to the ADF sensor harness unit and the Second side CIS
flat cable as shown in the figure below.
Hinge R
FFC holder ASSY
Hook
ADF unit
Hook
Document scanner unit
Hole
ADF sensor
harness unit
Second side CIS
flat cable
FFC holder ASSY
ADF sensor harness unit
Double-sided tape
Second side CIS flat cable
 Loading...