32
Ch. 2 Getting Started
Getting Started
1 Windows
®
: Right-click in the label view (or
text box), select [Symbols] in the menu that
appears, and then click [Insert/Change].
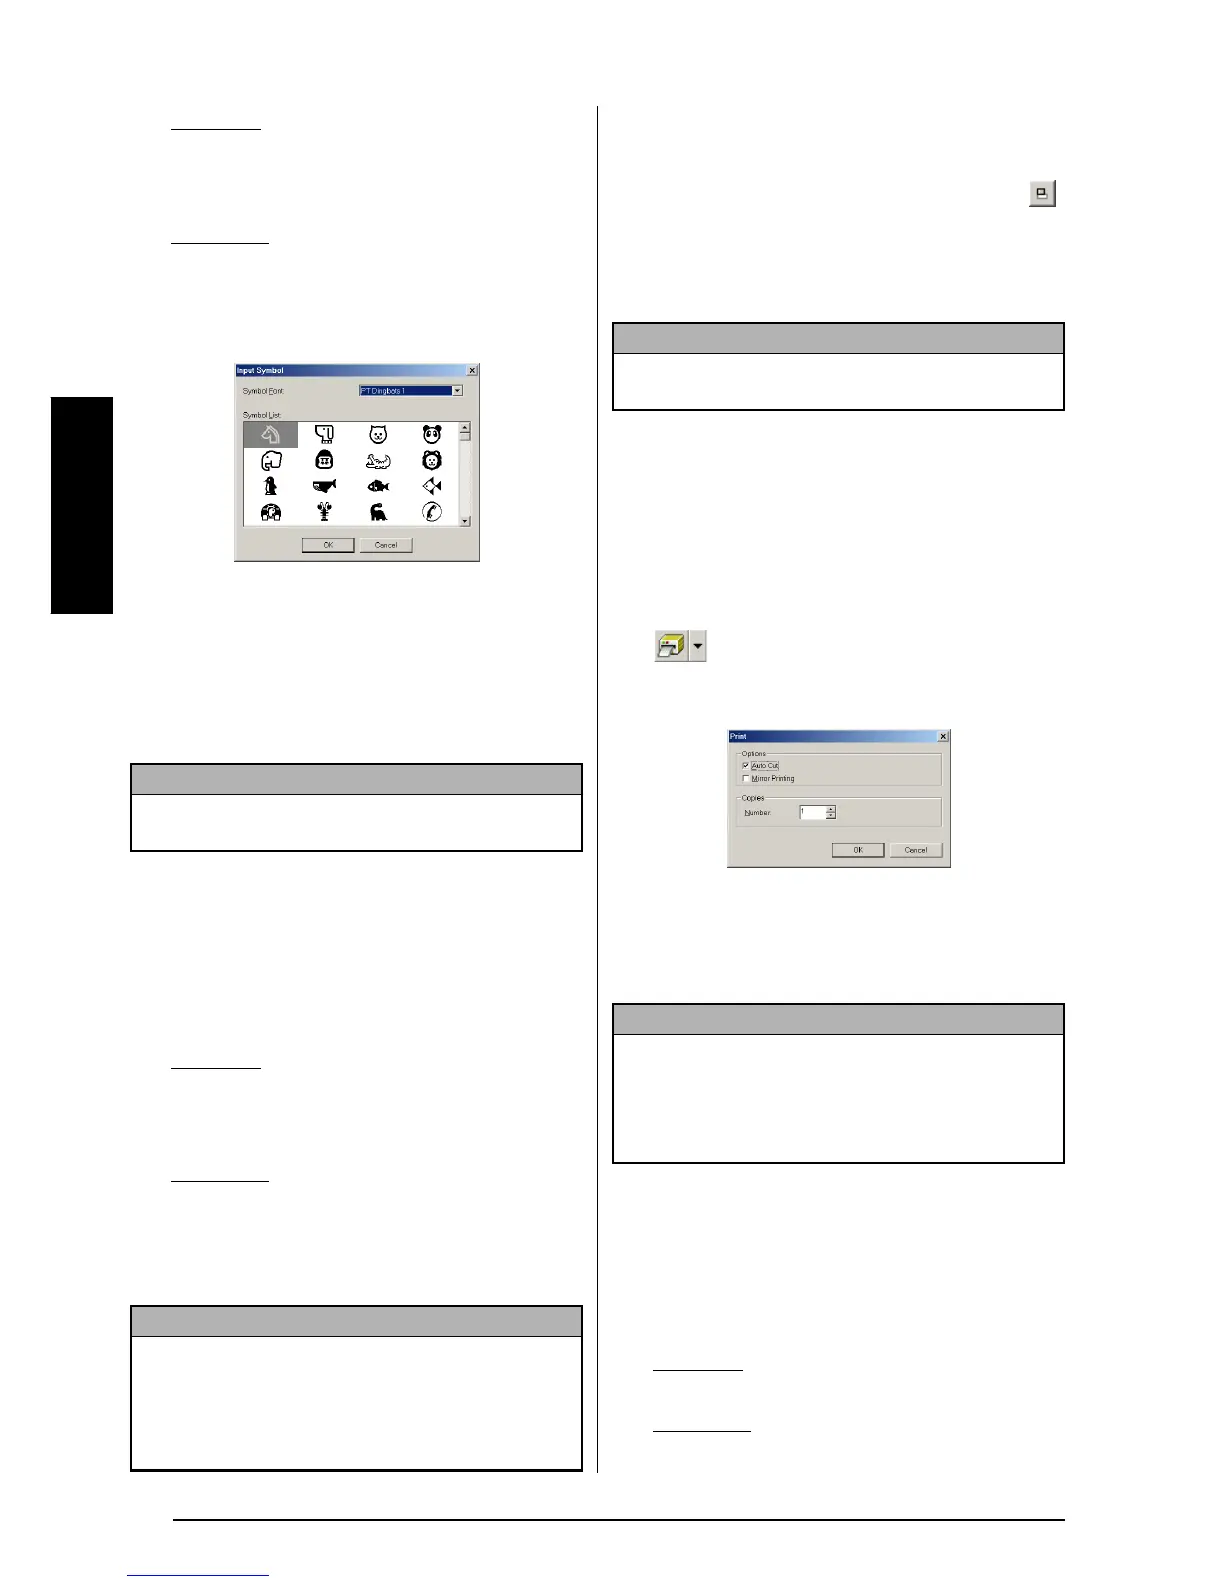
The Input Symbol dialog box appears.
Macintosh
: Hold down the Control key and
click in the label view (or text box), select
[Symbols] in the menu that appears, and
then click [Insert/Change]. A dialog box dis-
playing symbols appears.
2 In the Symbol Font list, select the desired
symbol font.
3 In the Symbol List view, select the desired
symbol.
4 Click the OK button. The selected symbol is
added at the left of the text.
Changing the background color
The background color of the layout can be
changed to suit your preference.
To change the background color:
● Windows
®
: Right-click in the label view (or
text box), select [Background Color] in the
menu that appears, and then click the
desired color from the list.
Macintosh
: Hold down the Control key and
click in the label view (or text box), select
[Background Color] in the menu that
appears, and then click the desired color
from the list.
Viewing the text
Layouts that are too long to fit in the screen can
be scrolled by clicking the Arrange button ( )
to view the left, the center, then the right side of
the layout with each click of the button.
Printing
Before printing labels, certain print options can
be selected.
To print a label:
1 Click the arrow beside the Print button (
) to display a drop-down menu.
2 Click [Print Options]. The Print dialog box
appears.
3 Select the desired print settings.
Auto Cut: This option allows you to select
whether or not to automatically cut off the
label after it is printed.
Mirror Printing (for TZ tape only): This
option allows you to print the text in reverse
so that it is perfect for attaching to the inside
of windows
®
.
Copies: This option allows you to enter the
number of copies to be printed.
4 Windows
®
: Click the OK button to start
printing.
Macintosh
: Click the Print button. The lay-
out is printed.
NOTE
If a symbol has already been added to the text, it
will be replaced by the newly selected symbol.
NOTE
To select a color other than those listed, select
[User Settings] (Windows
®
) or [User Settings]
(Macintosh) from the Background Color sub-menu,
create the desired color in the dialog box that
appears, and then click the OK button.
NOTE
If the label view (or text box) has been moved away
from the tool bar, it will be docked before scrolling.
NOTE
When printing multiple copies of AV labels with
the Auto Cut check box selected, each label is cut
off after it is printed. If the Auto Cut check box is
cleared, the string of labels are cut off only after
they have all been printed.
 Loading...