7. ADJUSTMENTS
RH-9820
171
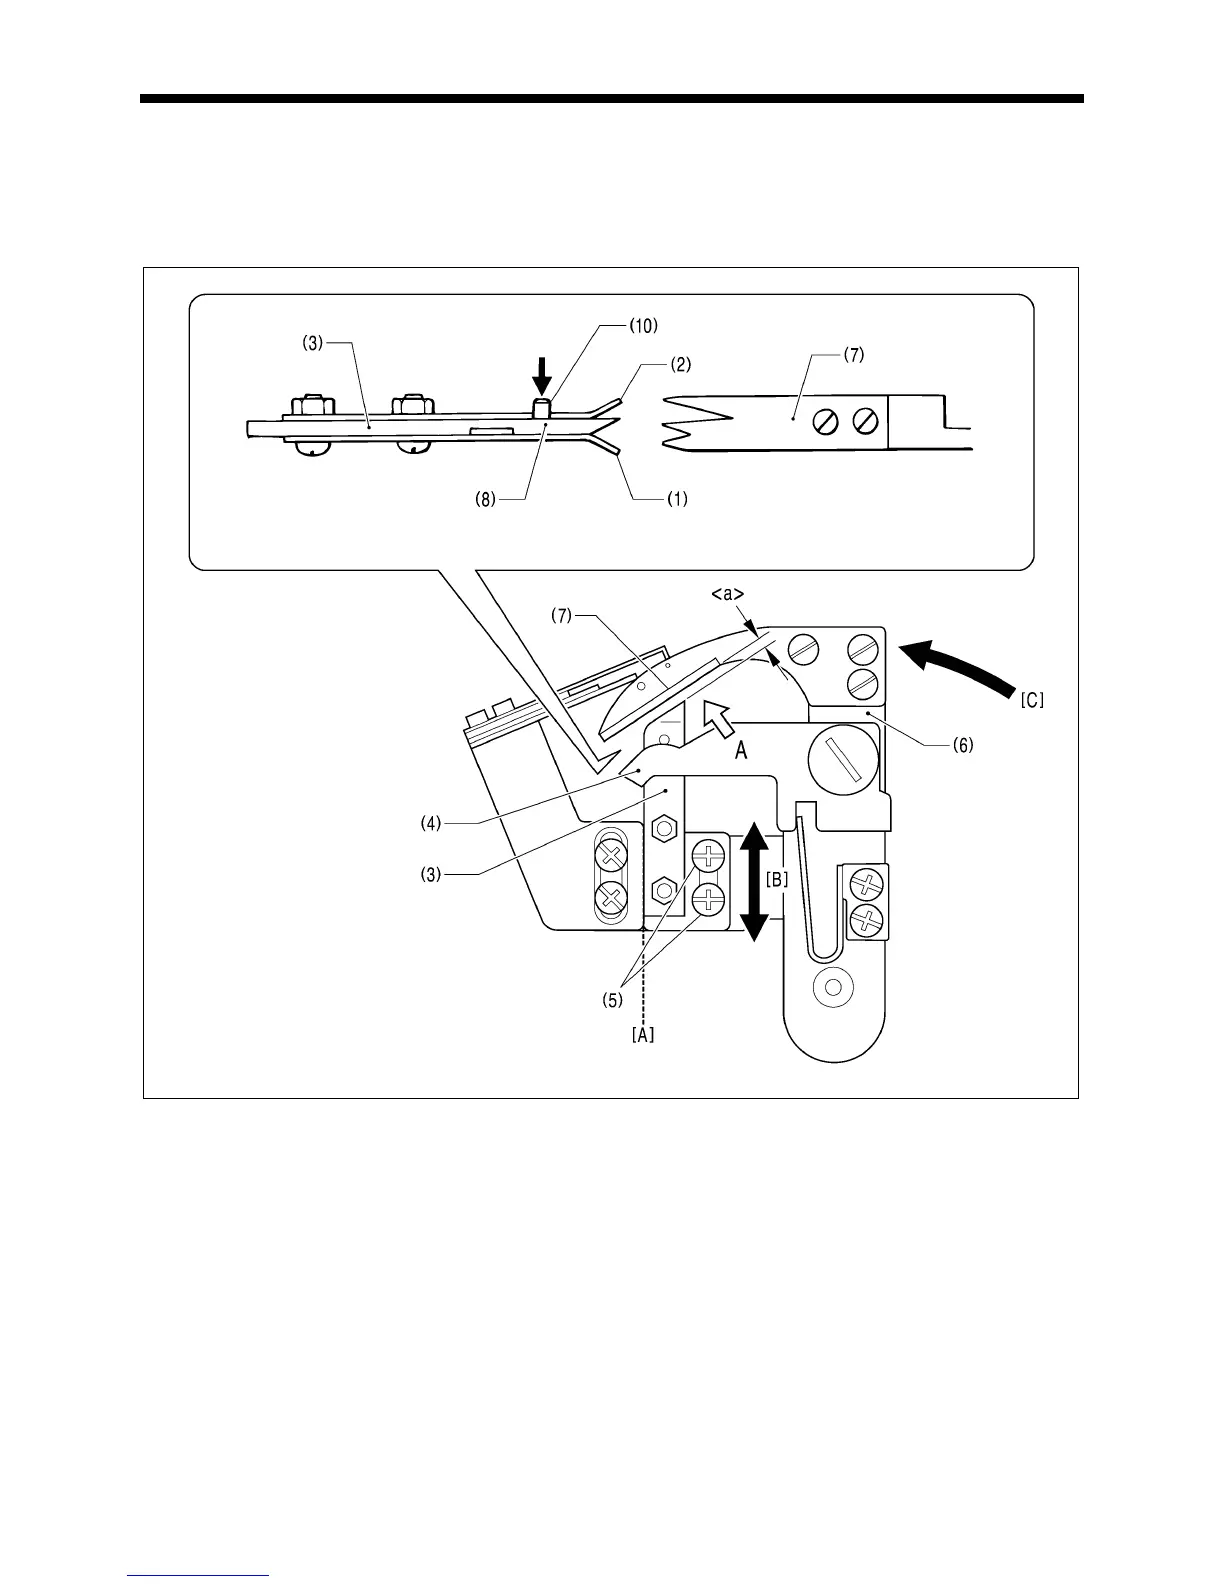
7-25-4. Adjusting the thread nipper assembly and opener
The lower thread must pass through thread nipper D (1) and the gimp thread must pass through thread nipper U (2). Therefore,
check that the thread nipper assembly (3) is installed in the correct position and that the thread nipper opener (4) moves
correctly.
NOTE:
The lower thread must be securely held by thread nipper D (1) at the sewing start.
(Side view of thread nipper assembly (3) and the thread handler (7) viewed from position A)
1. Loosen the two screws (5), and then move the thread nipper assembly (3) along the dotted line [A] in the illustration in the
direction of the arrow [B] to adjust.
* Adjust so that the gap <a> between the thread nipper assembly (3) and the thread handler (7) is as narrow as possible
without the two parts touching when the thread trimmer arm (6) is turned in the direction of the arrow [C].
NOTE:
• If the gap <a> is too wide, problems with the lower thread nipper will occur and the thread will be pulled out at the sewing
start.
• If the thread nipper assembly (3) is installed at an angle, thread nipper D (1) may touch the throat plate and fail to open,
and problems with the lower thread nipper will occur and the thread will be pulled out at the sewing start.
0523B
 Loading...