PARTS TO BE INSTALLED
tbl2014-007-213_a
RETAINING SC
REWS TO REMOVE
tbl2014-007-214_a
RETAINING SCREWS TO REMOVE
4. On both si
de of vehicle, remove support plates.
Keep scre
ws for reinstallation.
tbl2014-007-124_a
1. Support plates
2. Re taining screws to keep
5. Cut locking ties securing the seat belts.
tbl2014-007-123_a
1. Locking tie to cut
6. Remove rear lateral side panels.
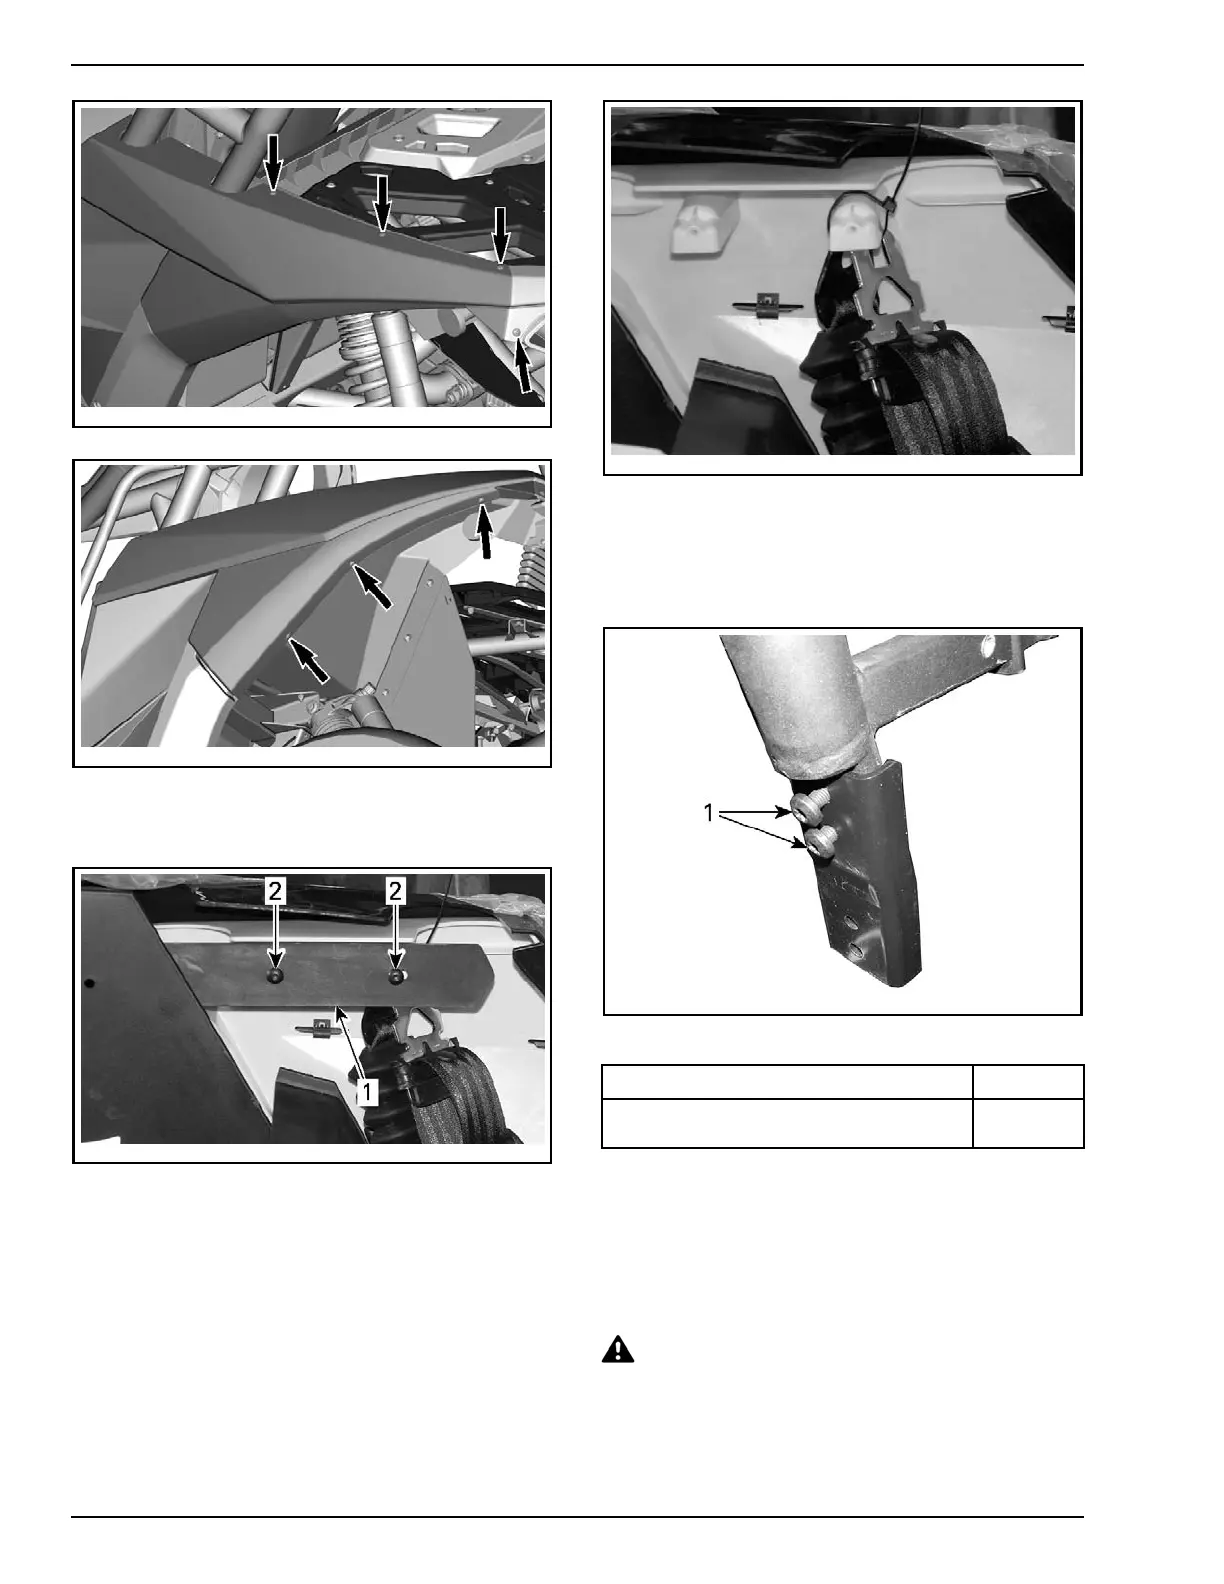
7. Install cage extensions onto rear section of
cage. Orientation of part is indicated on the
extension.
tbl2014-007-126_a
CAGE EXTENSION INSTALLED ONTO CA GE
1. M10 x 30 Torx screws
PDI KIT PARTS QTY
M10 x 30 Torx screws
4
8. Using a hoist, lift the rear and middle cage sub-
assembly over the vehicle and carefully position
it on vehicle.
NOTE: As an alternate method, one person at
each attachment point can position the cage on
the vehicle.
CAUTION To avoid injury or vehicle dam-
ages, never handle the cage alone.
12 / 34 2014-1 PREDELIVERY