PARTS TO BE INSTALLED
tbl2014-007-124_a
1. Support plate
2. Retaining screw previously removed
PARTS TORQUE
K50 x 16 Torx screws
(previously rem oved)
Hand torq ue
only
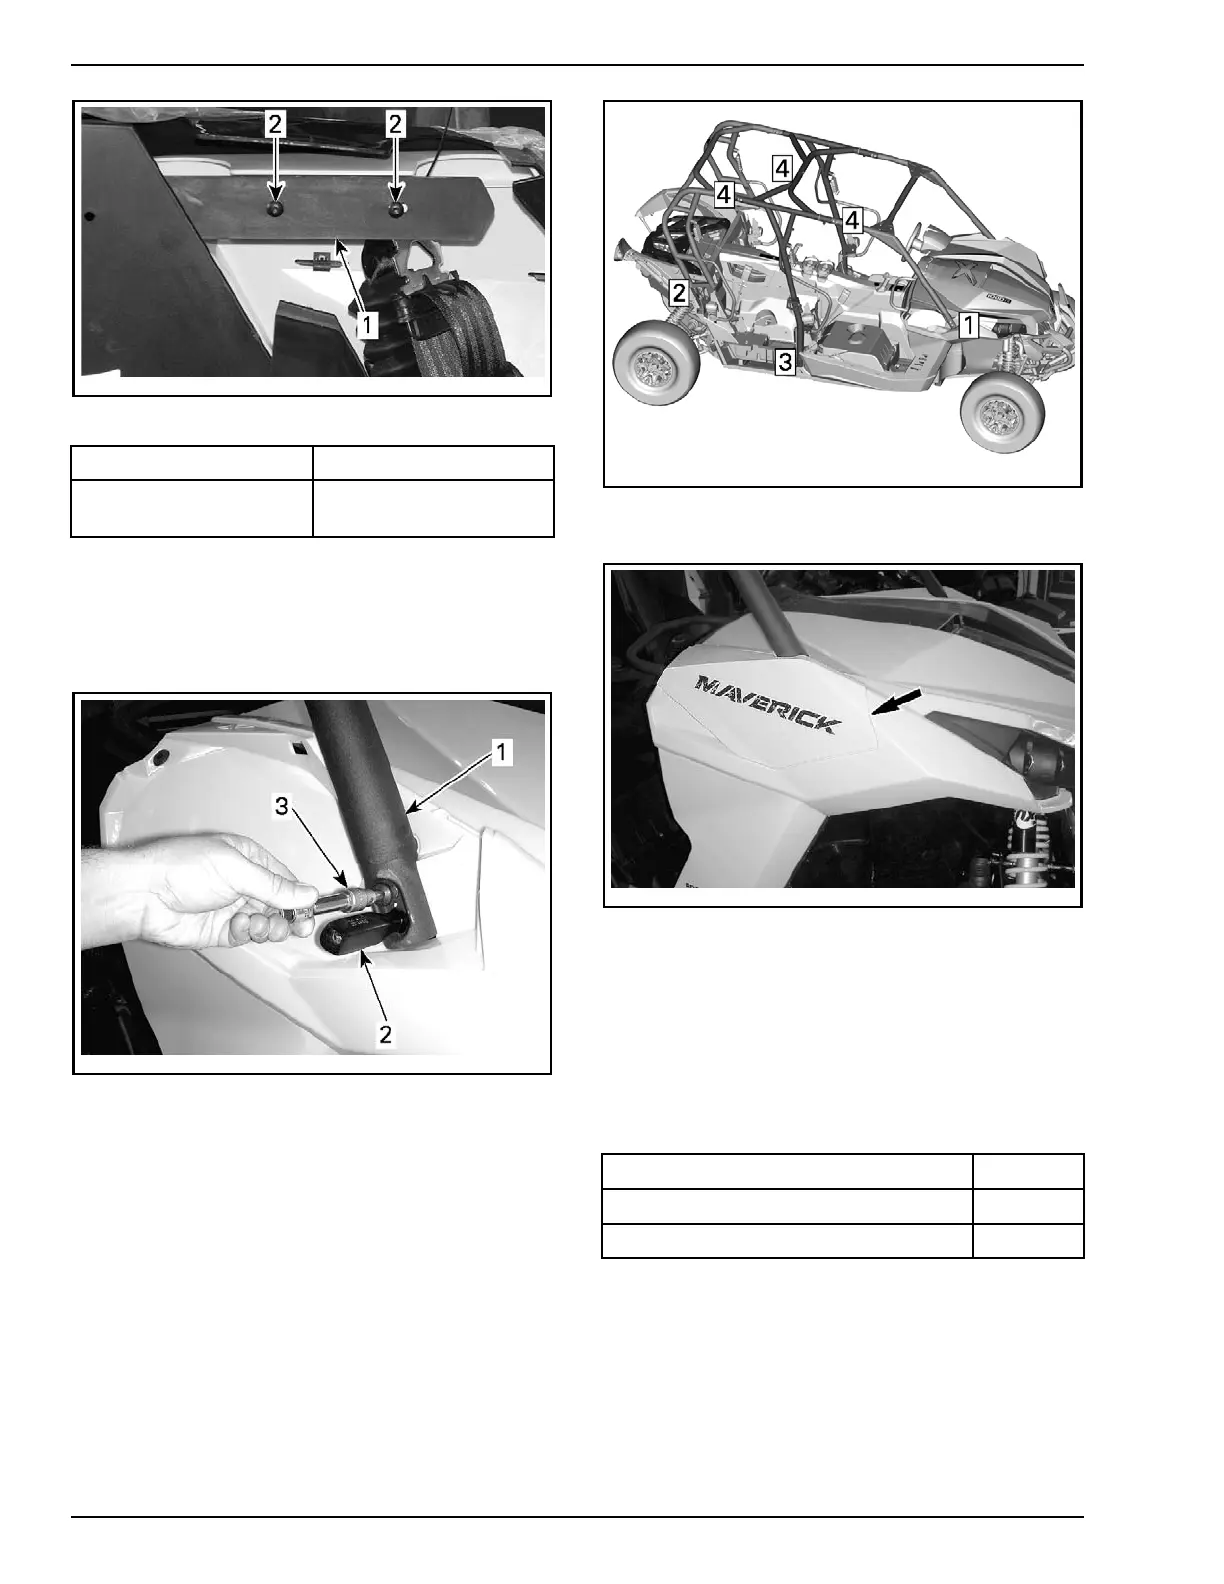
14. Install fr
ont section of cage onto vehicle.
NOTE: Insert a Phillips screwdriver into cage hole
and a lign with the frame hole, then loosely install
the t op screw. Thereafter, remove screwdriver
and install the 2
nd
screw.
tbl2013-009-034_a
TYPICAL - RH FRONT CA GE ATTACHMENT POINT
1. Front tube
2. Screwdriver to align holes
3. Installing screw
15. Tighten all cage screws in the order illustrated.
tmr2014-117-007_a
TYPICAL - FI
NAL TIGHTEN ING SEQUENCE
16. Install front side panels.
tbl2013-009-050_a
17. Reinstall rear fenders.
Seat Be
lt Installation
NOTE: Installation is the same for all seat belts un-
less otherwise specified.
1. Install safety belt retractor for driver and pas-
senger.
PDI KIT PARTS QTY
7/16-20 x 1 shoulder bolts 2
7/16-20 elastic nuts 2
14 / 34 2014-1 PREDELIVERY