25
©2011,2005 BRUNO INDEPENDENT LIVING AIDS, INC.®
SRE-2750 INSTALL 05-17-2011
INFRARED CALL/SEND TRANSMITTER
The call/send system on the Bruno SRE-2750 is based on infrared (IR) controls — the same type of
control used for televisions and stereos.
Like a television remote, the SRE-2750 hand-held transmitter may experience certain types of
interference. Receivers are mounted on both sides of the SRE-2750 carriage to minimize interference.
Should interference occur, the unit will stop. This feature has been integrated into the SRE-2750 to
ensure your safety.
The direct line between the transmitter to either of the (2) transmitters should be clear of obstacles
for optimal operation.
To reduce the possibility of interference:
• While riding in the seat, ALWAYS operate the Elevator using the rocker switch on the armrest.
Operating the SRE-2750 with a transmitter while riding in the seat can lead to signal interference.
• DO NOT mount the transmitters behind an obstacle such as a rail post.
• DO NOT allow direct sunlight to shine on the receivers (blinding the receivers on the carriage).
• DO replace transmitter batteries regularly.
Depleted or nearly-depleted batteries alter the effective range of the transmitter.
• DO keep the transmitter and receiver lens free of dirt and debris.
Use a non-abrasive cleaner suitable for glass or acrylic surfaces. Do not use polishes or cleaning
products containing wax. These products will leave a lm on the lens that will reduce the signal
transmission range.
ELECTRICAL
MOUNTING THE INFRARED CALL/SEND TRANSMITTER
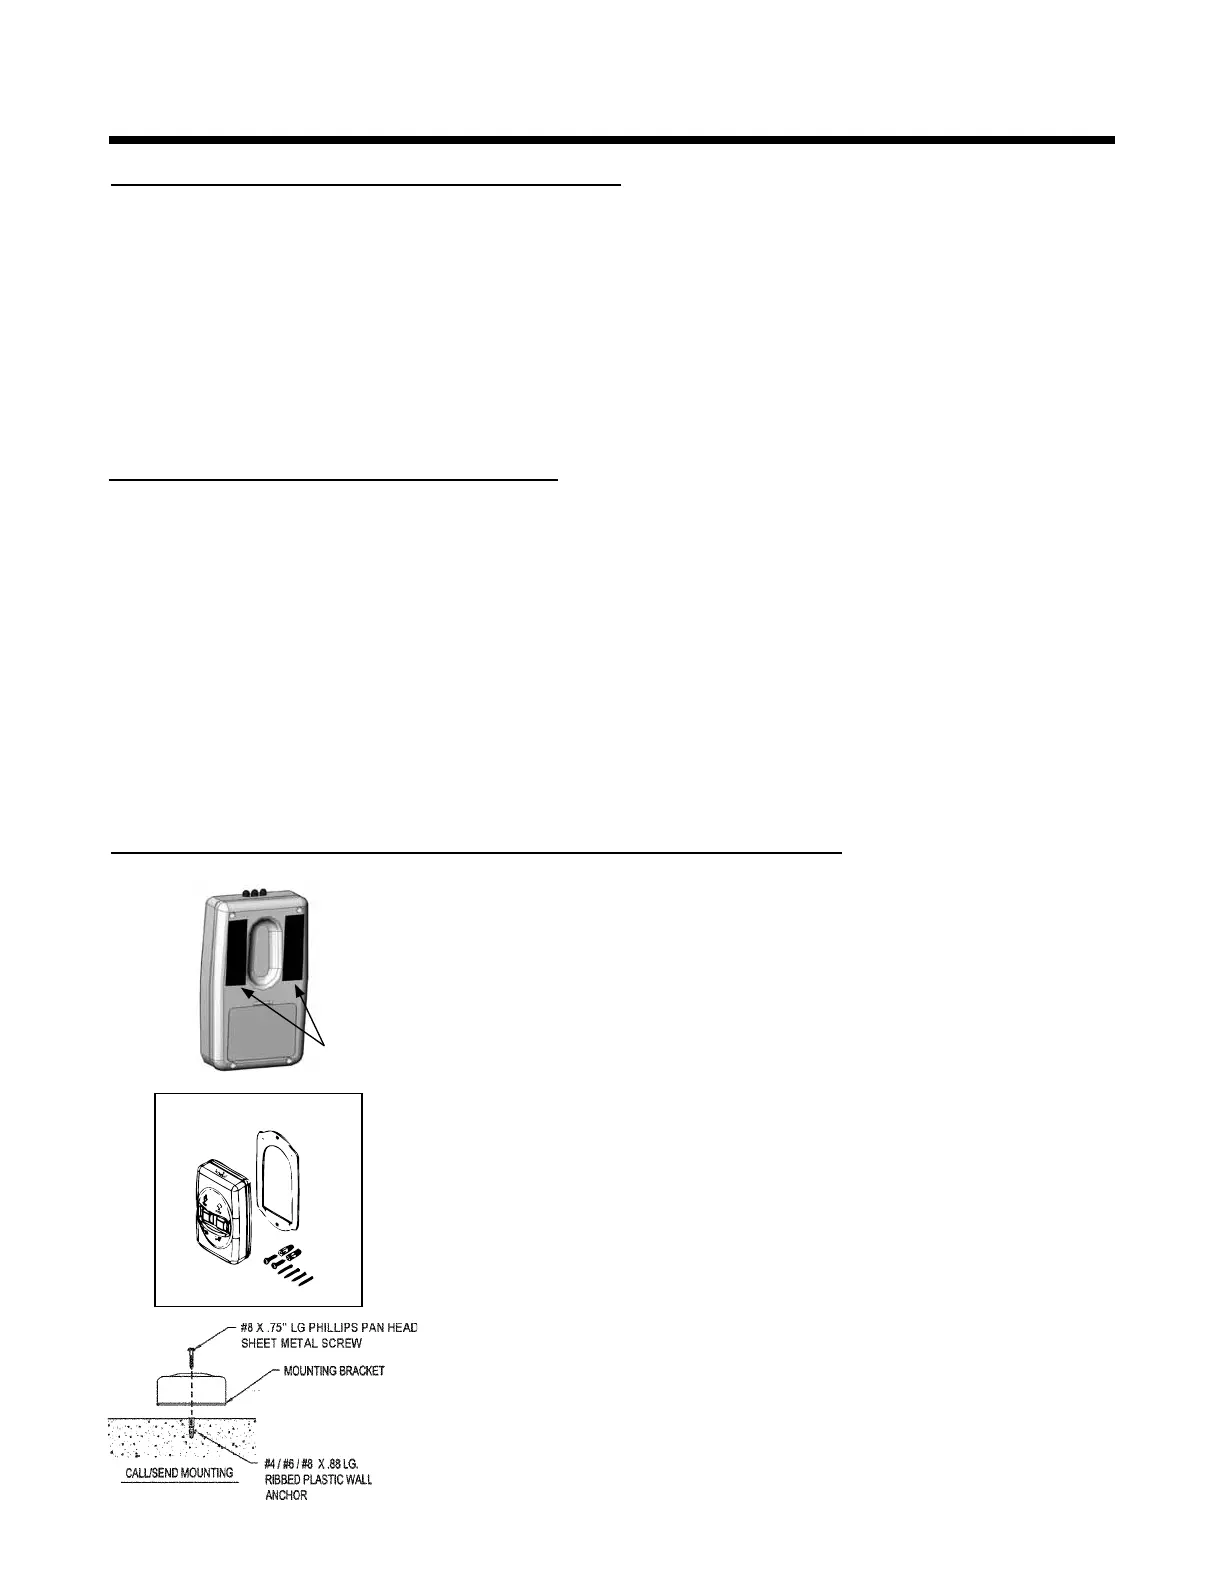
Mounting STANDARD transmitter:
1. Leaving the hook and loop halves of the (2) Velcro
®
strips
(provided) together, remove the backing from the hook half of
each strip.
2. Mount the (2) strips to the back of the transmitter as shown.
3. Remove the backing from the loop half of each strip.
4. Mount the transmitter to the desired surface (eg. wall, railing) by
gently pressing against the transmitter.
Mounting with OPTIONAL kit SRE-K-1580:
1. Mount the bracket to the back of the transmitter using the (4)
screws provided.
2. Position the bracket/transmitter unit in the mounting location
on the wall and mark the top and bottom bracket holes.
3. Drill a pilot hole slightly smaller than the anchors provided.
4. Gently pound the anchors into the wall with a rubber mallet.
5. Position the bracket/transmitter unit on the wall so that the
top/bottom bracket holes align with the anchors.
6. Secure the bracket/transmitter to the wall using the screws
provided.
Velcro


 To Next Page