EasyManua.ls Logo

Bryant 589A User Manual

Bryant 589A
52 pages
To Next Page IconTo Next Page
Page #1 background imageLoading...
Page #1 background image
CONTENTS
Page
SAFETY CONSIDERATIONS ........................1
General .........................................1
RECEIVING AND INSTALLATION .................10-22
I. Step 1 Check Equipment .................10
II. Step 2 Provide Unit Support ..............10
III. Step 3 Field Fabricate Ductwork ...........10
IV. Step 4 Provide Clearances ................10
V. Step 5 Rig and Place Unit ................10
VI. Step 6 Connect Condensate Drain .........13
VII. Step 7 Install Flue Hood ..................13
VIII. Step 8 Install Gas Piping .................13
IX. Step 9 Install Duct Connections ...........16
X. Step 10 Install Electrical Connections ......18
PRE-START-UP ................................22,23
START-UP ....................................23-44
I. Check for Refrigerant Leaks .................23
II. Start Up Heating Section and
Make Adjustments .........................23
III. Start Up Cooling Section and
Make Adjustments .........................26
MAINTENANCE ................................44-47
I. Air Filter ..................................45
II. Unit Top Removal ..........................45
III. Evaporator Blower and Motor ................45
IV. Flue Gas Passageways .....................45
V. Combustion-Air Blower .....................46
VI. Limit Switch ..............................46
VII. Burner Ignition ............................46
VIII. Main Burners .............................46
IX. Condenser Coil, Evaporator Coil, and
Condensate Drain Pan ......................47
X. Condenser Fan ............................47
XI. Electrical Controls and Wiring ...............47
XII. Refrigerant Circuit .........................47
XIII. Gas Input .................................47
XIV. Evaporator Airflow .........................47
XV. Metering Device Acutrol™ Device ..........47
XVI. Liquid Line Strainer ........................47
TROUBLESHOOTING ...........................48-50
START-UP CHECKLIST ..........................CL-1
NOTE TO INSTALLER Before the installation, READ
THESE INSTRUCTIONS CAREFULLYAND COMPLETELY.
Also, make sure the Users Manual and Replacement Guide
are left with the unit after installation. This unit is NOT to
be used for temporary heating of buildings or structures un-
der construction.
SAFETY CONSIDERATIONS
Installation and servicing of air-conditioning equipment can
be hazardous due to system pressure and electrical compo-
nents. Only trained and qualified personnel should install,
repair, or service air-conditioning equipment.
Untrained personnel can perform basic maintenance func-
tions of cleaning coils and filters. All other operations should
be performed by trained service personnel. When working on
air-conditioning equipment, observe precautions in the lit-
erature, tags and labels attached to the unit, and other safety
precautions that may apply.
Follow all safety codes. Wear safety glasses and work gloves.
Use quenching cloth for unbrazing operations. Have fire ex-
tinguisher available for all brazing operations.
WARNING:
Improper installation, adjustment, alter-
ation, service, maintenance,oruse can cause carbon mon-
oxide poisoning, fire, or an explosion which can result
in personal injury or unit damage. Consult a qualified
installer, service agency, or gas supplier for informa-
tion or assistance. The qualified installer or agency must
use only factory-authorized kits or accessories when modi-
fying this product.
WARNING:
Before performing service or mainte-
nance operations on unit, turn off gas supply then unit
main power switch. Electrical shock could cause per-
sonal injury.
GENERAL
The 588A, 589Aunits (see Fig. 1) are fully self-contained, com-
bination Category I gas heating/electric cooling units de-
signed for outdoor installation. See Fig. 2-9 (pages 2-9) for
unit dimensions. All unit sizes have discharge openings for
both horizontal and downflow configurations, and are factory
shipped with all 4 duct openings covered. Units may be in-
stalled either on a rooftop or a ground-level cement slab. See
Fig. 10 for roof curb dimensions.
Fig. 1 Unit 589A Shown With Optional Base Rail
installation, start-up
and service instructions
SINGLE PACKAGE GAS HEATING/
ELECTRIC COOLING UNITS
588A
Sizes 018-060
589A
Sizes 024-060
Cancels: II 588A-18-8 II 588A-18-9
9/15/98

Table of Contents

Question and Answer IconNeed help?

Do you have a question about the Bryant 589A and is the answer not in the manual?

Bryant 589A Specifications

General IconGeneral
BrandBryant
Model589A
CategoryAir Conditioner
LanguageEnglish

Summary

Safety Considerations

General

General safety precautions for installation and servicing.

Receiving and Installation

Check Equipment

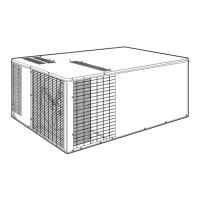
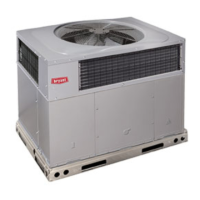
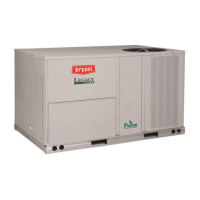
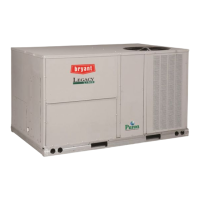
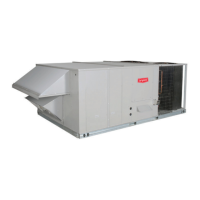
Identify and inspect unit for shipping damage and missing parts.

Provide Unit Support

Install roof curb or concrete pad for proper unit support.

Field Fabricate Ductwork

Secure field-fabricated ductwork to building structure and unit flanges.

Provide Clearances

Ensure required operating and service clearances for combustion and ventilation.

Rig and Place Unit

Use proper rigging and lifting techniques to place the unit level.

PRE-START-UP

Safety Warnings and Inspections

Observe safety warnings and perform inspections for shipping damage, leaks, and connections.

START-UP

Check for Refrigerant Leaks

Locate and repair refrigerant leaks, then charge the unit.

Start Up Heating Section and Make Adjustments

Check heating control operation, burner ignition, and gas input.

Start Up Cooling Section and Make Adjustments

Check cooling control operation, compressor, and fan startup.

MAINTENANCE

Air Filter

Inspect and clean/replace air filters monthly for optimal performance.

Unit Top Removal

Procedures for safely removing and reinstalling the unit top.

Evaporator Blower and Motor

Clean and lubricate blower motor and wheel annually.

Flue Gas Passageways

Inspect and clean flue collector box and heat exchanger areas.

Combustion-Air Blower

Clean blower wheel periodically for proper airflow and heating efficiency.

Limit Switch

Locate limit switch on gas partition for service.

Burner Ignition

Unit has direct spark ignition with a 100% lockout system.

Main Burners

Inspect main burner flames and adjust if necessary each heating season.

Condenser Coil, Evaporator Coil, and Condensate Drain Pan

Inspect and clean coils and drain pan annually for proper operation.

Condenser Fan

Keep condenser fan free from obstructions for proper cooling operation.

Electrical Controls and Wiring

Inspect electrical controls and wiring annually for tightness and operation.

Refrigerant Circuit

Inspect tubing connections for oil accumulation annually.

Gas Input

Check gas input only if improper heating performance is suspected.

Evaporator Airflow

Check airflow if improper performance is suspected; ensure grilles are open.

Metering Device - Acutrol™ Device

Fixed orifice metering device located in evaporator coil header.

Liquid Line Strainer

Wire mesh strainer protects metering device in liquid line.

TROUBLESHOOTING

Cooling

Troubleshooting common cooling system problems and their remedies.

Compressor and condenser fan will not start.

Diagnose and fix issues preventing compressor and fan startup.

Compressor will not start but condenser fan runs.

Troubleshoot issues when compressor fails to start but fan operates.

Three-phase scroll compressor (Units 588A048,060 and 589A036-060 only) makes excessive noise

Address noise and pressure issues with three-phase scroll compressors.

Compressor cycles (other than normally satisfying thermostat).

Troubleshoot short cycling or improper compressor operation.

Compressor operates continuously.

Diagnose and resolve continuous compressor operation.

Excessive head pressure.

Identify causes and remedies for high head pressure.

Head pressure too low.

Troubleshoot and resolve low head pressure issues.

Excessive suction pressure.

Address and fix issues causing high suction pressure.

Suction pressure too low.

Diagnose and resolve problems with low suction pressure.

Heating

Troubleshoot common heating system problems and their remedies.

Burners will not ignite.

Diagnose and fix issues preventing burner ignition.

Inadequate heating.

Address causes of inadequate heating performance.

Poor flame characteristics.

Identify and resolve issues causing poor flame quality.

LED Troubleshooting Error Code

Hardware failure. (LED OFF)

Troubleshoot hardware failures indicated by a blank LED.

Limit switch fault. (LED 2 flashes)

Diagnose limit switch faults indicated by 2 LED flashes.

Flame sense fault. (LED 3 flashes)

Troubleshoot flame sense faults indicated by 3 LED flashes.

4 consecutive limit switch faults. (LED 4 flashes)

Address 4 consecutive limit switch faults indicated by LED.

Ignition lockout. (LED 5 flashes)

Troubleshoot ignition lockout indicated by 5 LED flashes.

Induced-draft motor fault. (LED 6 flashes)

Diagnose induced-draft motor faults indicated by 6 LED flashes.

Rollout switch fault. (LED 7 flashes)

Troubleshoot rollout switch faults indicated by 7 LED flashes.

Internal control fault. (LED 8 flashes)

Diagnose internal control faults indicated by 8 LED flashes.

SERVICE TRAINING

Packaged Service Training

Information on training programs for equipment knowledge.

Classroom Service Training

Details on hands-on training for faster troubleshooting.

START-UP CHECKLIST

PRE-START-UP

Verify pre-start-up items are completed before unit operation.

START-UP

Record electrical, temperature, and pressure readings during startup.

Related product manuals