Printer Tips
Adjusting the
Banks together
Head 3 Bank A
Head 3 Bank
Head 2 Bank A
Head 5 Bank B
Head 4 Bank B
Head 6 Bank B
Head 5 Bank B
Head 4 Bank B
Head 6 Bank B
Head 2 Bank
Head 1 Bank A
Head 1 Bank
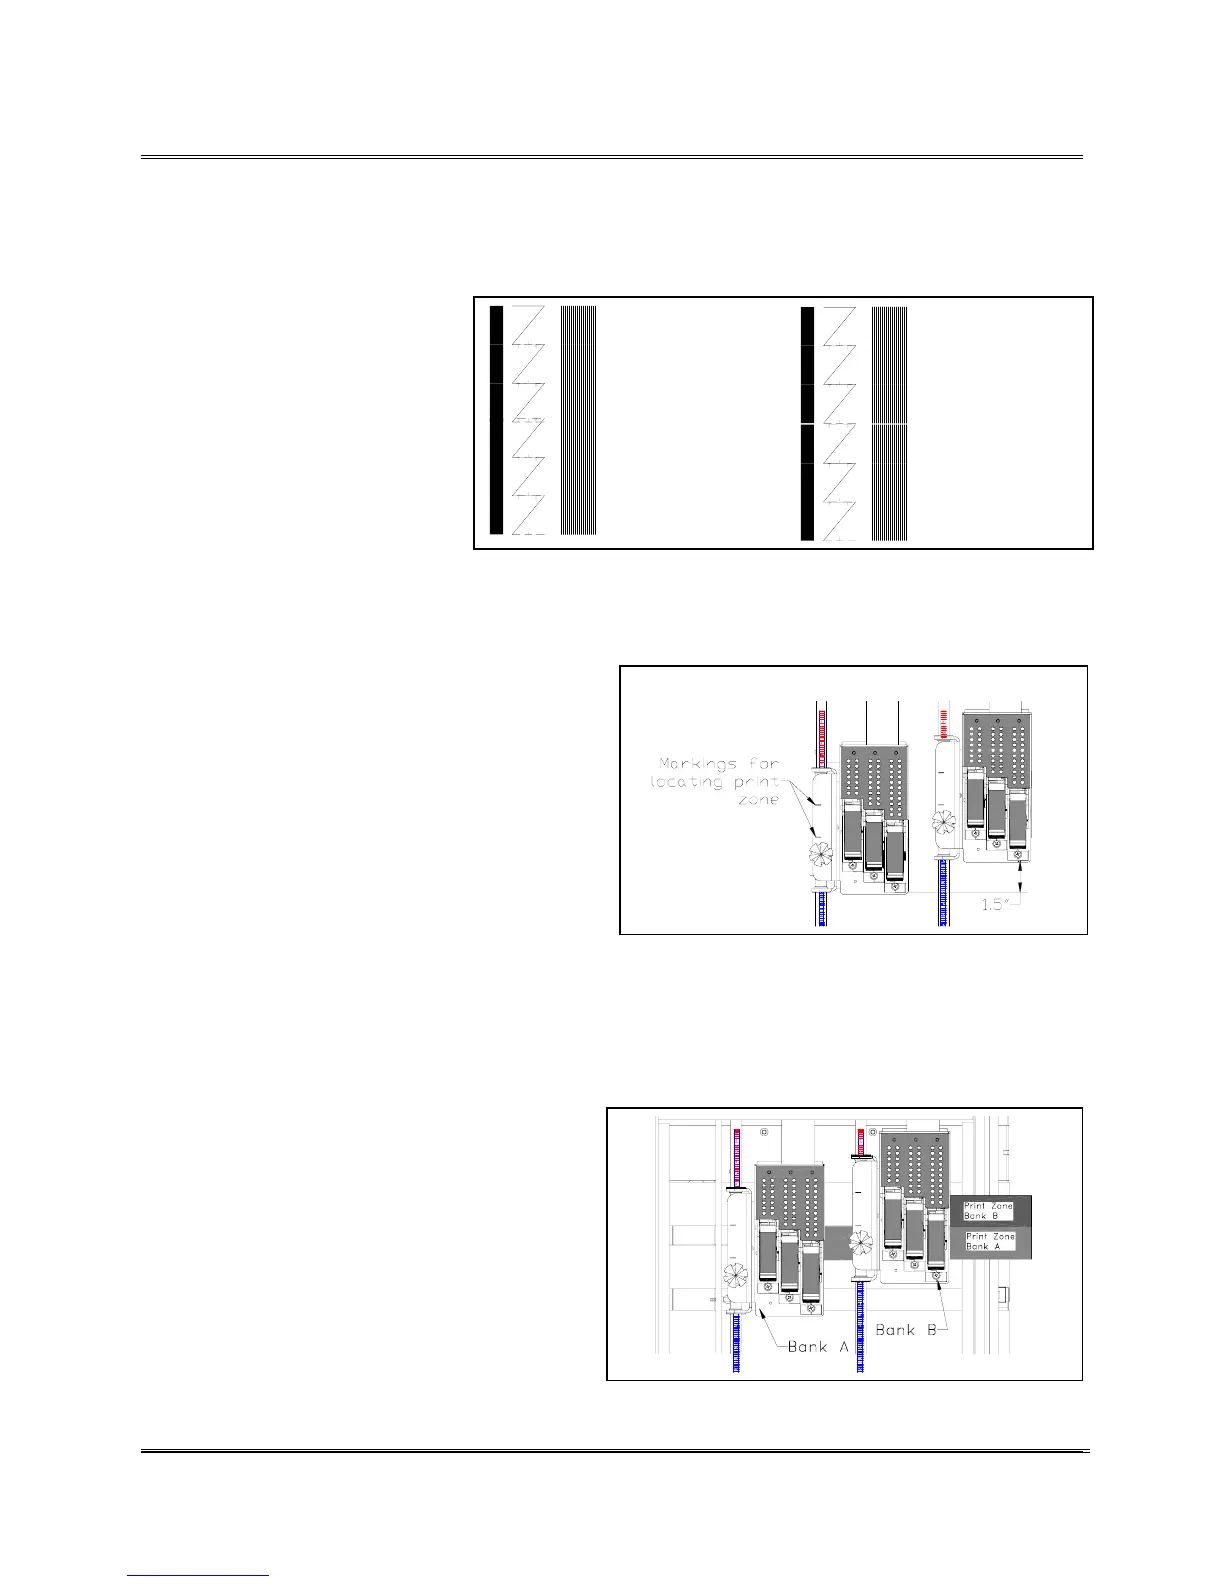
The two Banks of print cartridges can be combined and used
as one large block of print heads. This is best done for large
fonts and big graphics or two dimensional bar-coding. To
synchronize two or more 3 Print Head Assemblies together
requires mechanically adjusting
the banks together and using the
menus to horizontally
synchronize the banks together.
The graphic to the right shows
that Bank A and Bank B have
to be moved or adjusted to
combine both carriages.
Note: If the print is smearing a
iper or two on Bank B may need
to be removed or relocated to a
open area near the back of the Print
Head Assembly.
See Section Moving
the Wipers.
Use the following steps to adjust the two 3 Print Head
Assemblies together.
1. Move the 3 Print Head Assembly to the
area that Bank A will be printing on the
piece.
2. Secure Bank A in place. In this
example the other Bank of print
cartridges are going to get set relative
to Bank A.
3. Move the front of the right Print Head
Assembly (Bank B) 1.5 inches (3.81
cm) forward from Bank A. Note: The markings on the
brackets are there to help locate where the bank of
print heads is going to print. The scale on the shafts is
there to help align the two Banks together.
4. Print out a Adjust Print test message.
5. Make adjustments by moving Bank B
in or out. Look for the Adjust Print
test pattern to make a solid pattern
across both banks.
Revision C 30K USERS MANUAL Section 4 -
P/N 90-00203-001
9