Quick Reference Guide QRG
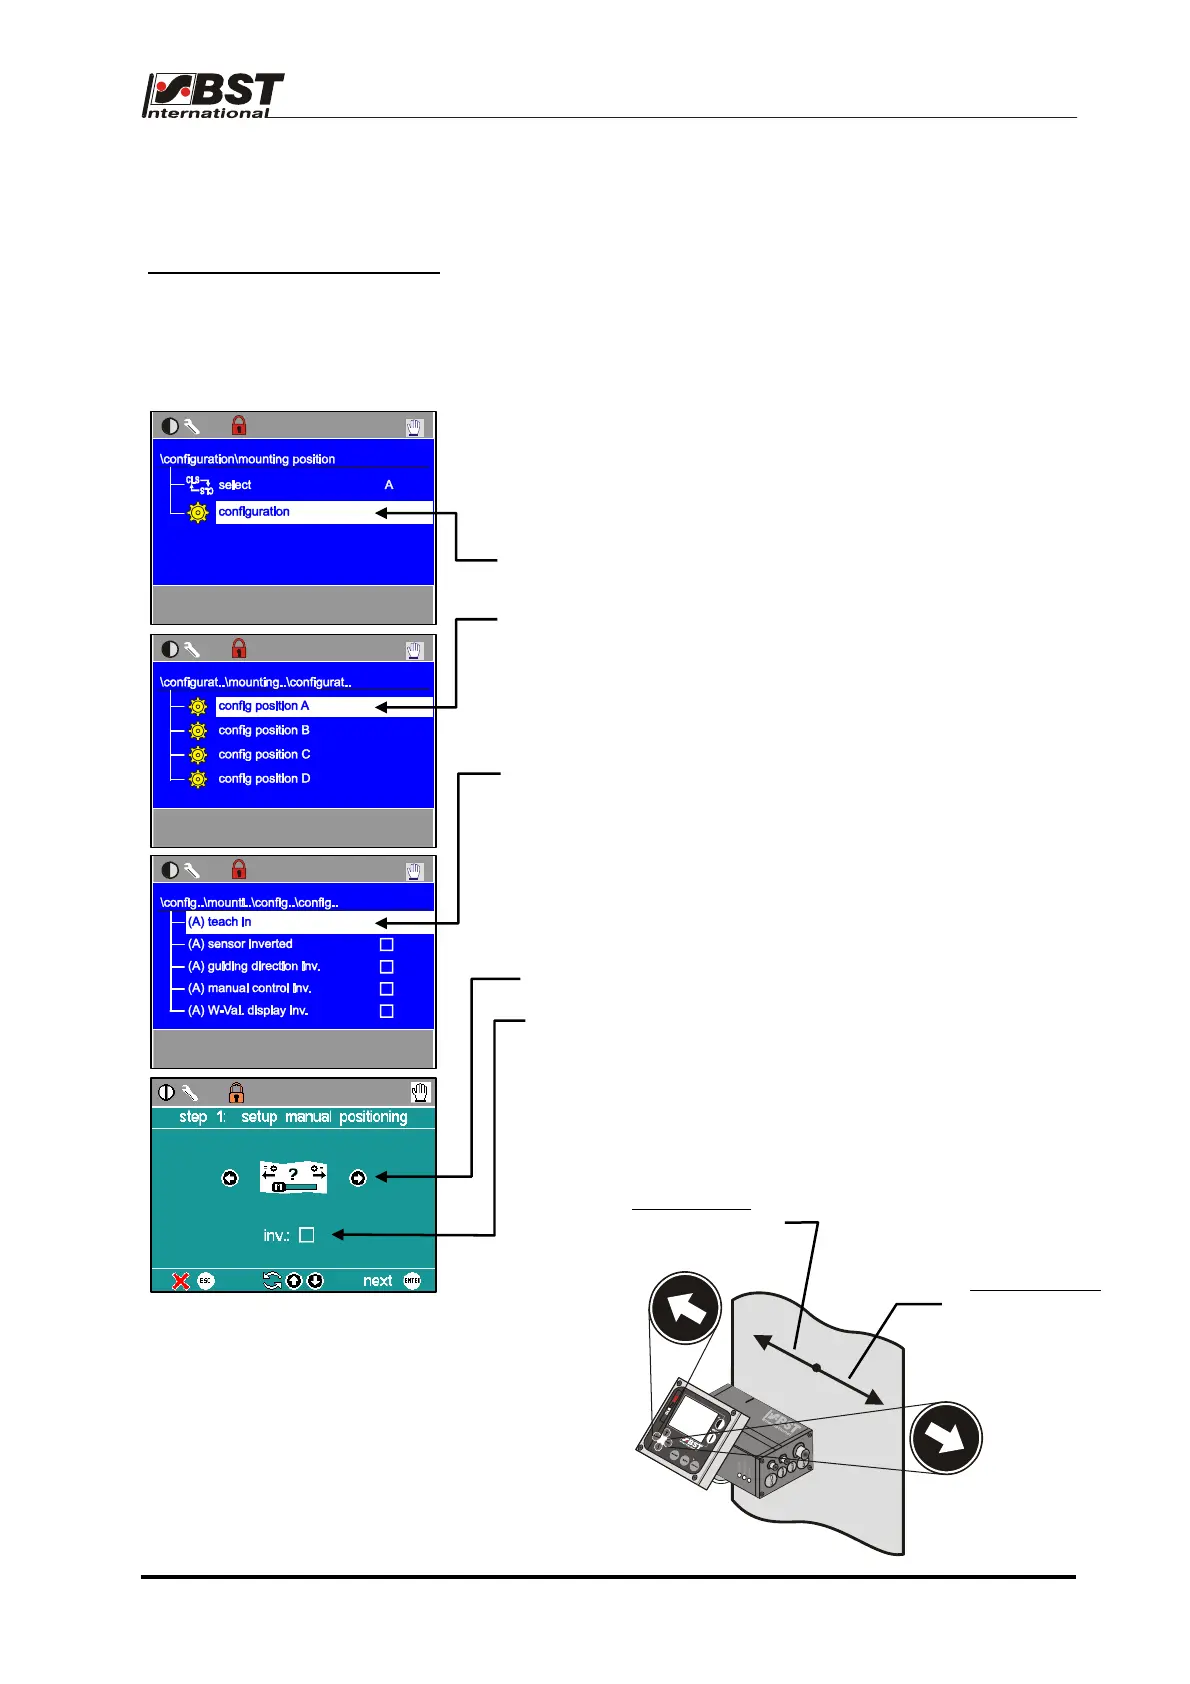
3.4 Configuration
Open the Mounting-Position in the Configuration sub-menu and
teach-in the sensor’s mounting position.
The system must be in operating mode MAN.
This procedure consists of 4 sub-steps.
Use the teach-in model shown in the operating manual (annex 5)
to carry out the teach-in process.
Mounting position A is shown as the example in this procedure:
Note that mounting positions B, C and D must first be activated
before you can use them.
configuration
mounting position
1. Call up and open the sub-memnu configuration.
2. Select config positon A.
3. Start the teach-in process fort his mounting position.
Select the teach in parameter and confirm your selection by
pressing ENTER. The teach-in process has now started.
3a) The first step is to set up the manual adjustment.
Use the left / right arrow keys to move the guiding
device.
The actuator has to be moved in the respective
direction.
The settings can be inverted from here if the arrow
key assignments are incorrect. This is realized by
using the up / down arrow keys.
Press ENTER to confirm your settings.
!
arrow key left
moving direction of
the actuator
arrow key right
moving direction of
the actuator
Quick Reference Guide EDV no.: MD.341.01.01
ekr 500 Plus with CLS Pro 600 Issue Date: 31.03.2009 Page: 13/18
 Loading...