Initial start-up2
Wall-mounted condensing gas boiler Buderus 800 - Subject to modifications resulting from technical improvements!
32
2.2.6 Measuring the carbon monoxide content
Measuring point see fig. 40 on page 31.
The carbon monoxide values under vacuum must be
smaller than 400 ppm and/or 0.04 Vol%.
Values around or exceeding 400 ppm indicate a faulty
burner adjustment, a dirty gas burner or heat exchanger
or a defective burner.
Find and eliminate the cause.
2.2.7 Checking the operation
During commissioning and the annual inspection and
servicing routine the working order of all control,
regulating and safety devices must be checked to see if
they are correctly set (provided these devices can be
adjusted).
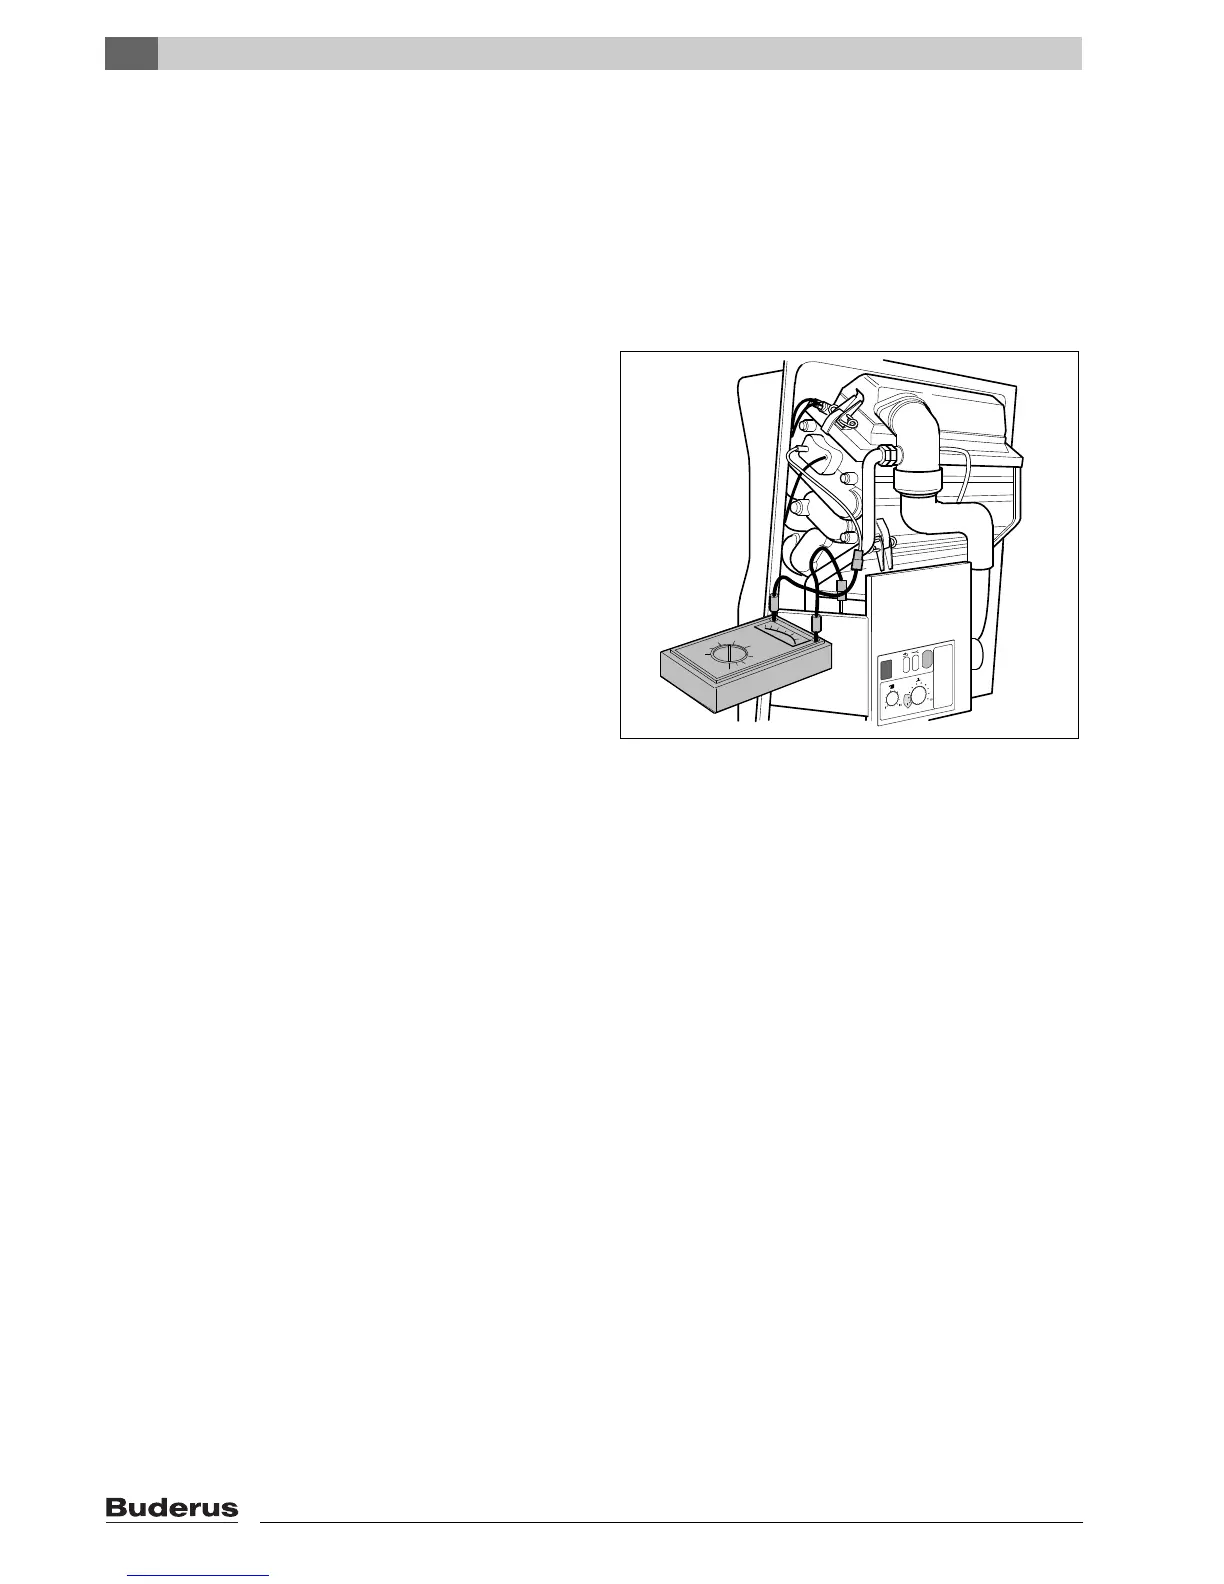
Measuring the ionisation current
Move the mains switch to "0".
Loosen the plug-and-socket connector of the moni-
toring cable and connect the measuring device in se-
ries (fig. 41).
Select on the measuring device the µA direct current
range. The measuring device must have a resolution
of at least 1 µA.
Move the mains switch to "I" and the chimney sweep-
er switch to "1".
After the burner has fired, press the service button
(fig. 37) until "Y" is shown on the display.
Move the hot water temperature controller to "1".
Measure the ionisation current. The ionisation cur-
rent must be > 2 µA direct current under partial load.
Enter the measurement in the certificate.
Move the mains switch to "0".
Remove the measuring device and restore the origi-
nal condition of the plug-and-socket connection.
Move the chimney sweeper switch to "0".
Close the cover of the 2nd control level.
Set the temperature on the hot water temperature
controller to the desired value.
Move the mains switch to "I".
When the display shows "7" and the service button is
pressed, the display turns to "c".
Press the reset button until "r" is shown on the dis-
play.
Close the cover.
fig. 41 Measuring the ionisation current