9
MA201435_13.1 [Original Instructions] 6/25/2012
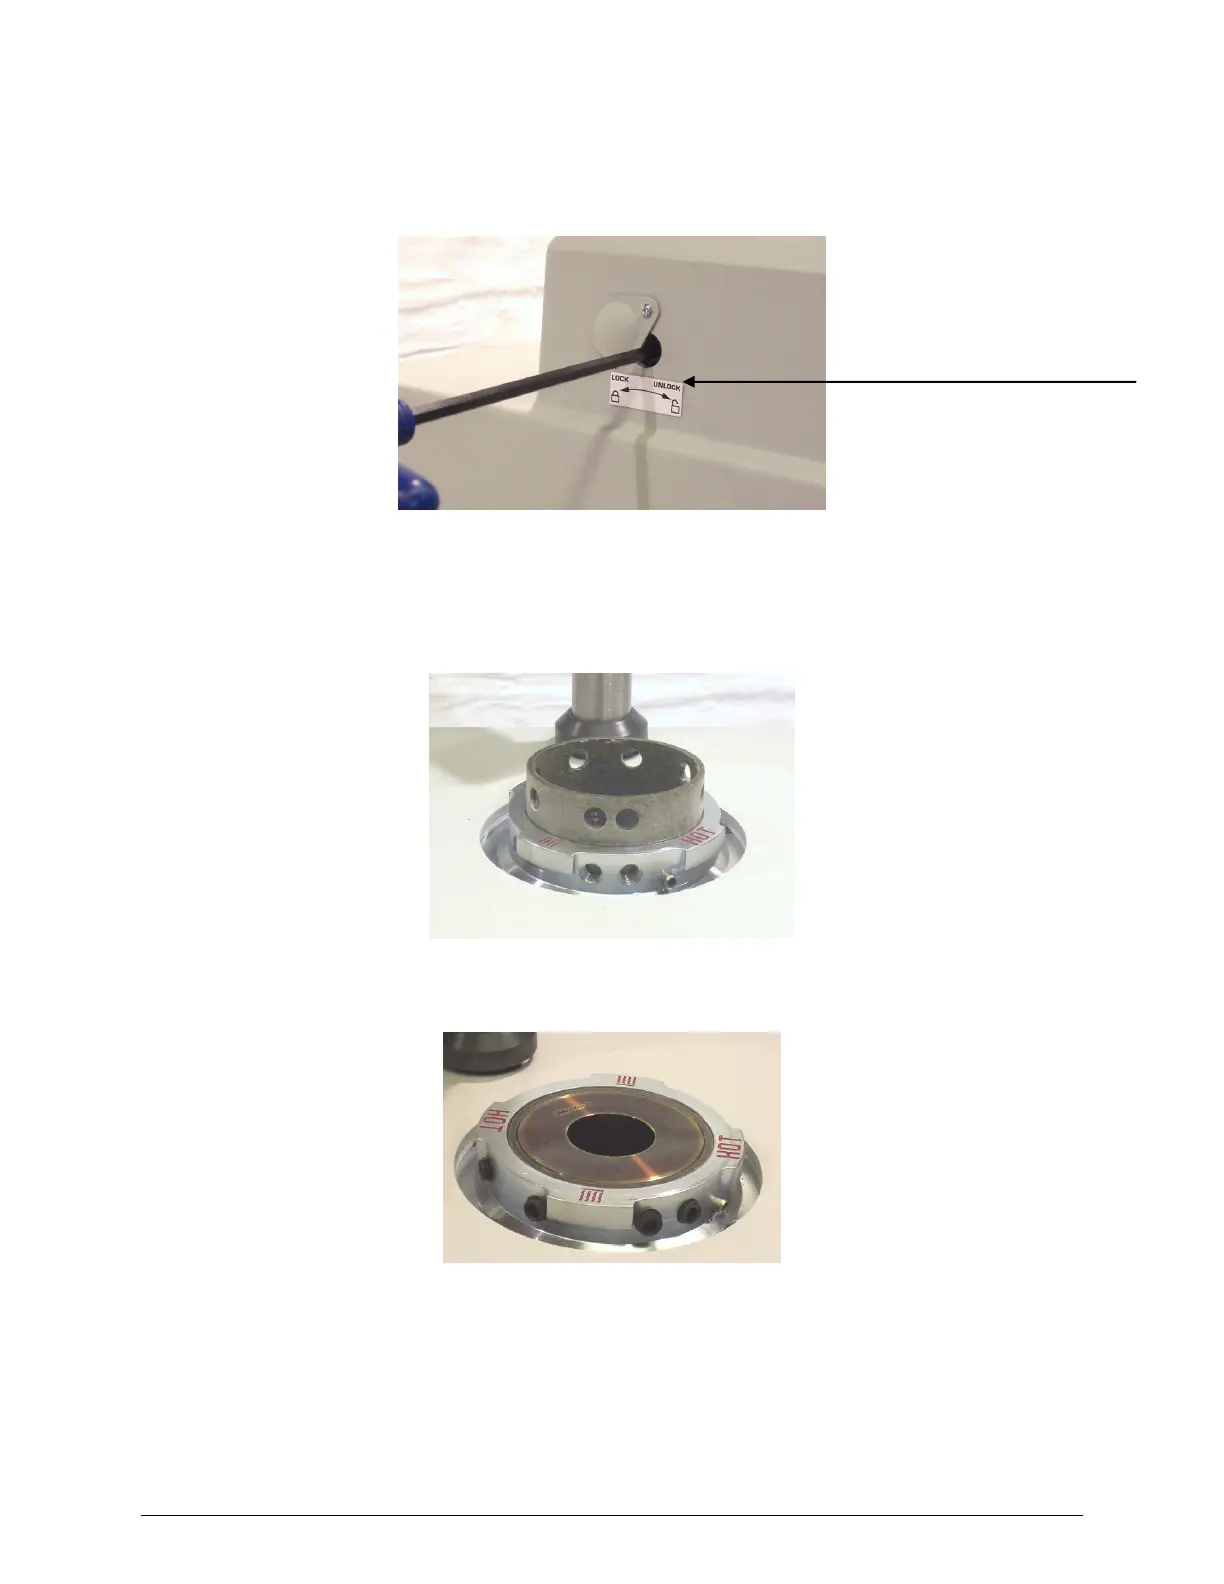
4. Using the supplied 6 mm hex wrench, turn the Mold Cylinder Clamp Screw clockwise (unlock
position) until strong resistance is felt, approximately three to four rotations (see Figure 4). This will
open the Mold Closure to fit the Mold Assembly.
Figure 4 Mold Cylinder Clamp Screw
5. Remove the shipping tube.
6. Insert the Mold Cylinder Insulator Ring into the Mold Closure. Align the holes of the Insulator Ring
with the screws (see Figure 5).
Figure 5 Mold Cylinder Insulator Ring
7. Insert the Mold Assembly until it sits level with the top of the Mold Closure (see Figure 6).
Figure 6 Mold Assembly in the Mold Closure
8. Install the eight setscrews (P/N: R10496). Do not tighten.
The Cylinder Lock Label (P/N 1430S119)
is supplied in the Accessory Kit and is
optional for customer use.