11
MA201435_13.1 [Original Instructions] 6/25/2012
13. Alternately tighten the eight setscrews on the sides of the Mold Closure (see Figure 6).
This will maintain the mold in the center of the Mold Cylinder.
14. Back off each setscrews ½ turn once snug against the Mold Assembly.
Equipment Damage. Over tightening the eight setscrews may cause misalignment of the mold and
make it difficult to remove the Upper Ram from the Mold Cylinder after a molding cycle.
15. Release the Upper Ram. Center the Mold Assembly in the Mold Cylinder.
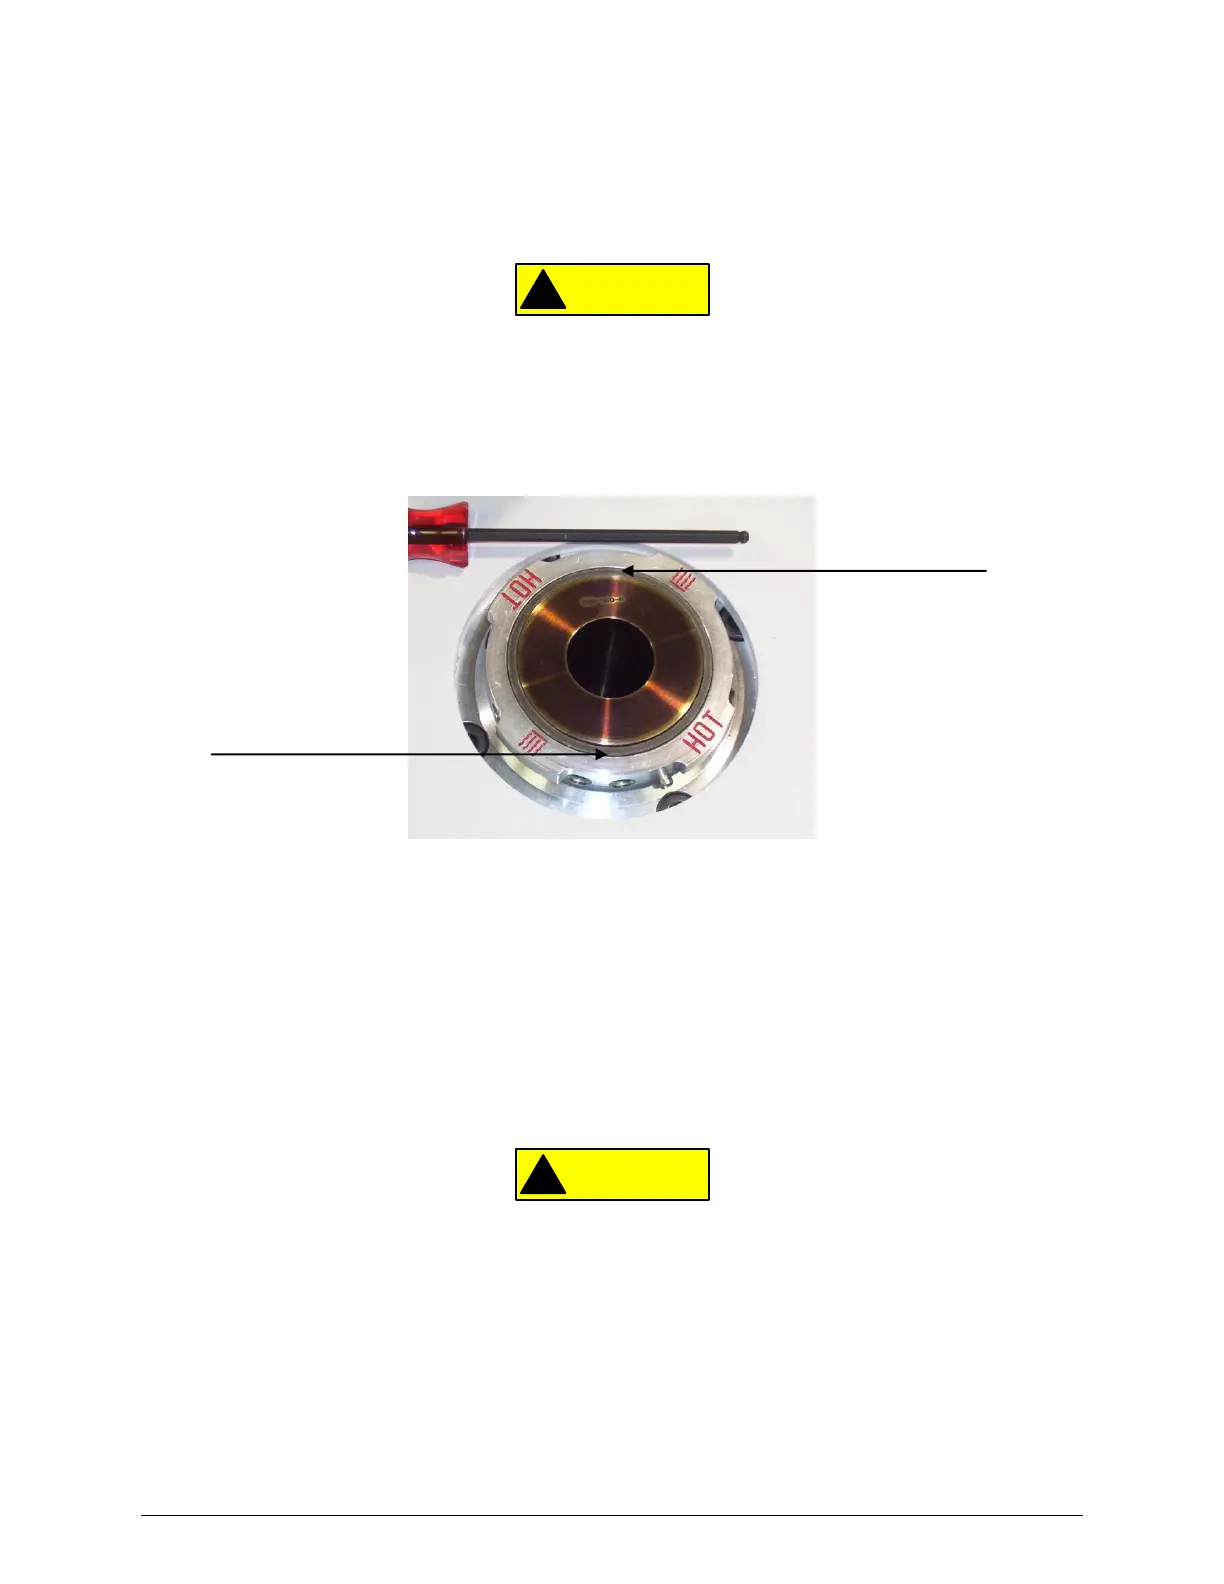
Figure 10 details an off-centered Ram Assembly caused by over-tightening of the setscrews.
Figure 10 Off-centered Ram Assembly
16. Raise and lower the Ram Assembly to verify smooth operation.
Before making a mold, check that the Upper Ram easily locks and disengages from the Mold
Cylinder. Lower the Upper Ram into the Mold Cylinder and turn the bayonet cap handles
clockwise to lock the Upper Ram into the Mold Cylinder.
17. The SimpliMet 3000 is now ready for operation.
To avoid unexpected and extended heating and cooling times and poor mounts, check that the
Mold Cylinder Clamp Screw is loose. This indicates the Mold Assembly is clamped and secure.
Too close to the Mold
Closure, no gap.
Too far from the Mold
closure, too much gap.