TRI-FLEX II BED - OPERATION MANUAL 21
Assembly/ Disassembly Instruction
NOTE: MOVE BED TO AN OPEN AREA, LARGE ENOUGH TO UNFOLD THE BED.
UNFOLDING THE BED FOR USE
1. Set the head and foot boards aside to be assembled
later. Also remove the two turnbuckles, two foot rails
and set aside for later use.
2.
WARNING: Lock the four transport casters to prevent
the bed from moving when you unfold the head and
foot sections, as movement could cause injury.
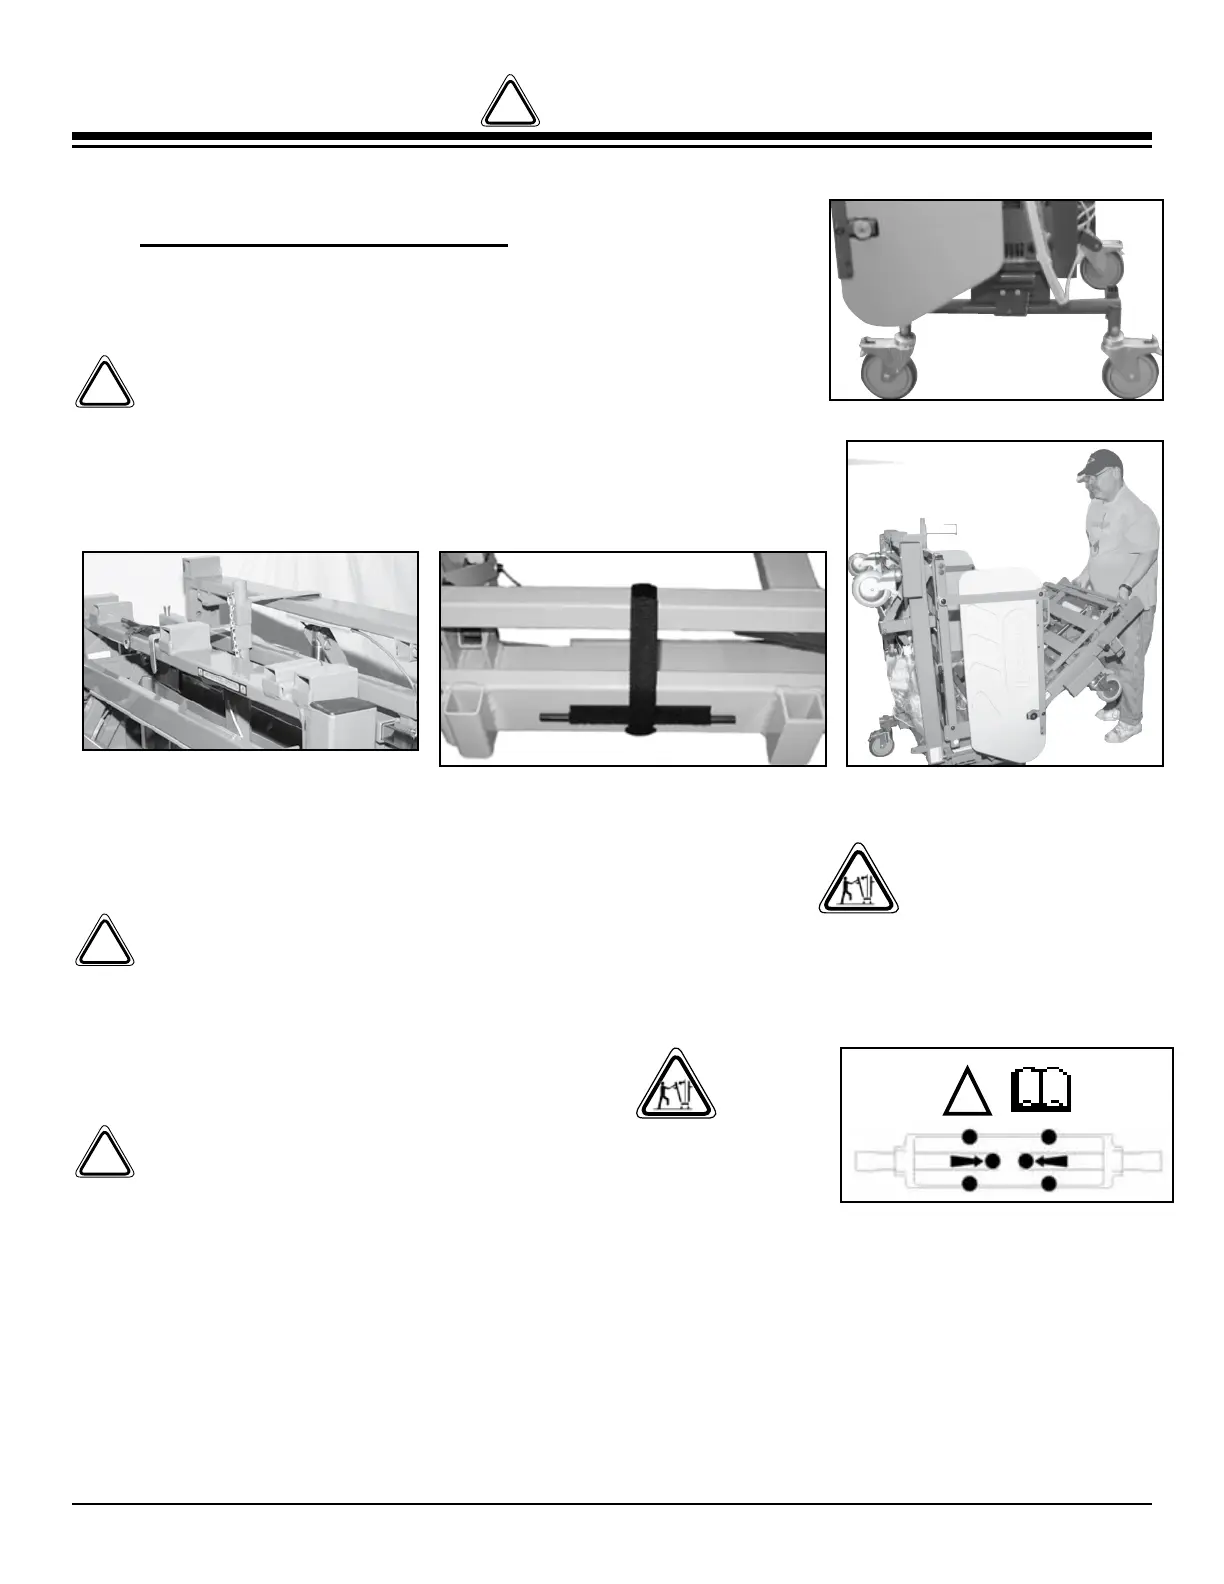
The locked casters should be facing outward (caster lock out)
towards the head and foot ends of the folded bed (See Figure 8).
3. Remove the “L” shaped foot end transport latch located on the transport pole. (See Figure 9)
4. Gently lower the foot end section of the bed. (See Figure 11)
5.WARNING: Make sure that the black woven safety strap located at the head end of the bed
is securing the head gatch patient support surface to the base (See Figure 10) .
6. Remove the head end transport latch bracket located on the transport pole placed vertically
in the center of the bed.
7. Gently lower the head end section of the bed
8. WARNING: Release the black woven safety strap located
at the head end of the bed and remove the Turnbuckle Tool
(See Figure 10).
9. Pin the turnbuckle in place at the connection points
below the head and foot sections of the bed. (PERFORM THIS STEP ONE SIDE AT A TIME)
Using the Tool provided, place one end through the center of the turnbuckle. Locate for the
dots on the end of the screws and reference them to the marks on the turnbuckle body
(See Figure 12). As you adjust the turnbuckle body the dots on the screws will move toward
each other when tightening and away from each other when loosening.
•Observethecorrectmovementinward/outwardasyouinstall/removethispiece.
•Installoneturnbucklemakingsurenottoovertighten.Installandtightenthe
oppositeturnbucklethesameastherst.
Figure 8
Figure 9
Figure 10 Figure 11
Figure 12
!
!
!
!
!


 To Next Page