Type 2000
Installation
24
For control function A pressurise the pilot air port 1 with compressed air (5 bar). Valve opens.
For control function A with pilot valve: Manually switch device with pilot valve. To do this, follow the op-
erating instructions for the control unit. Valve opens.
Place a suitable open-end wrench on the wrench flat of the body connection.
Unscrew actuator from the valve body.
7.4.2 Removing actuator from the valve body for devices with
installed control unit
Clamp valve body into a holding device.
ATTENTION!
Damage to the valve seat seal or seat contour.
▶ When removing the actuator, the valve must be in the open position.
For control function A pressurise the pilot air port 1 with compressed air (5 bar). Valve opens.
For control function A with pilot valve: Manually switch device with pilot valve. To do this, follow the op-
erating instructions for the control unit. Valve opens.
Place a suitable open-end wrench on the wrench flat of the body connection.
Unscrew actuator from the valve body.
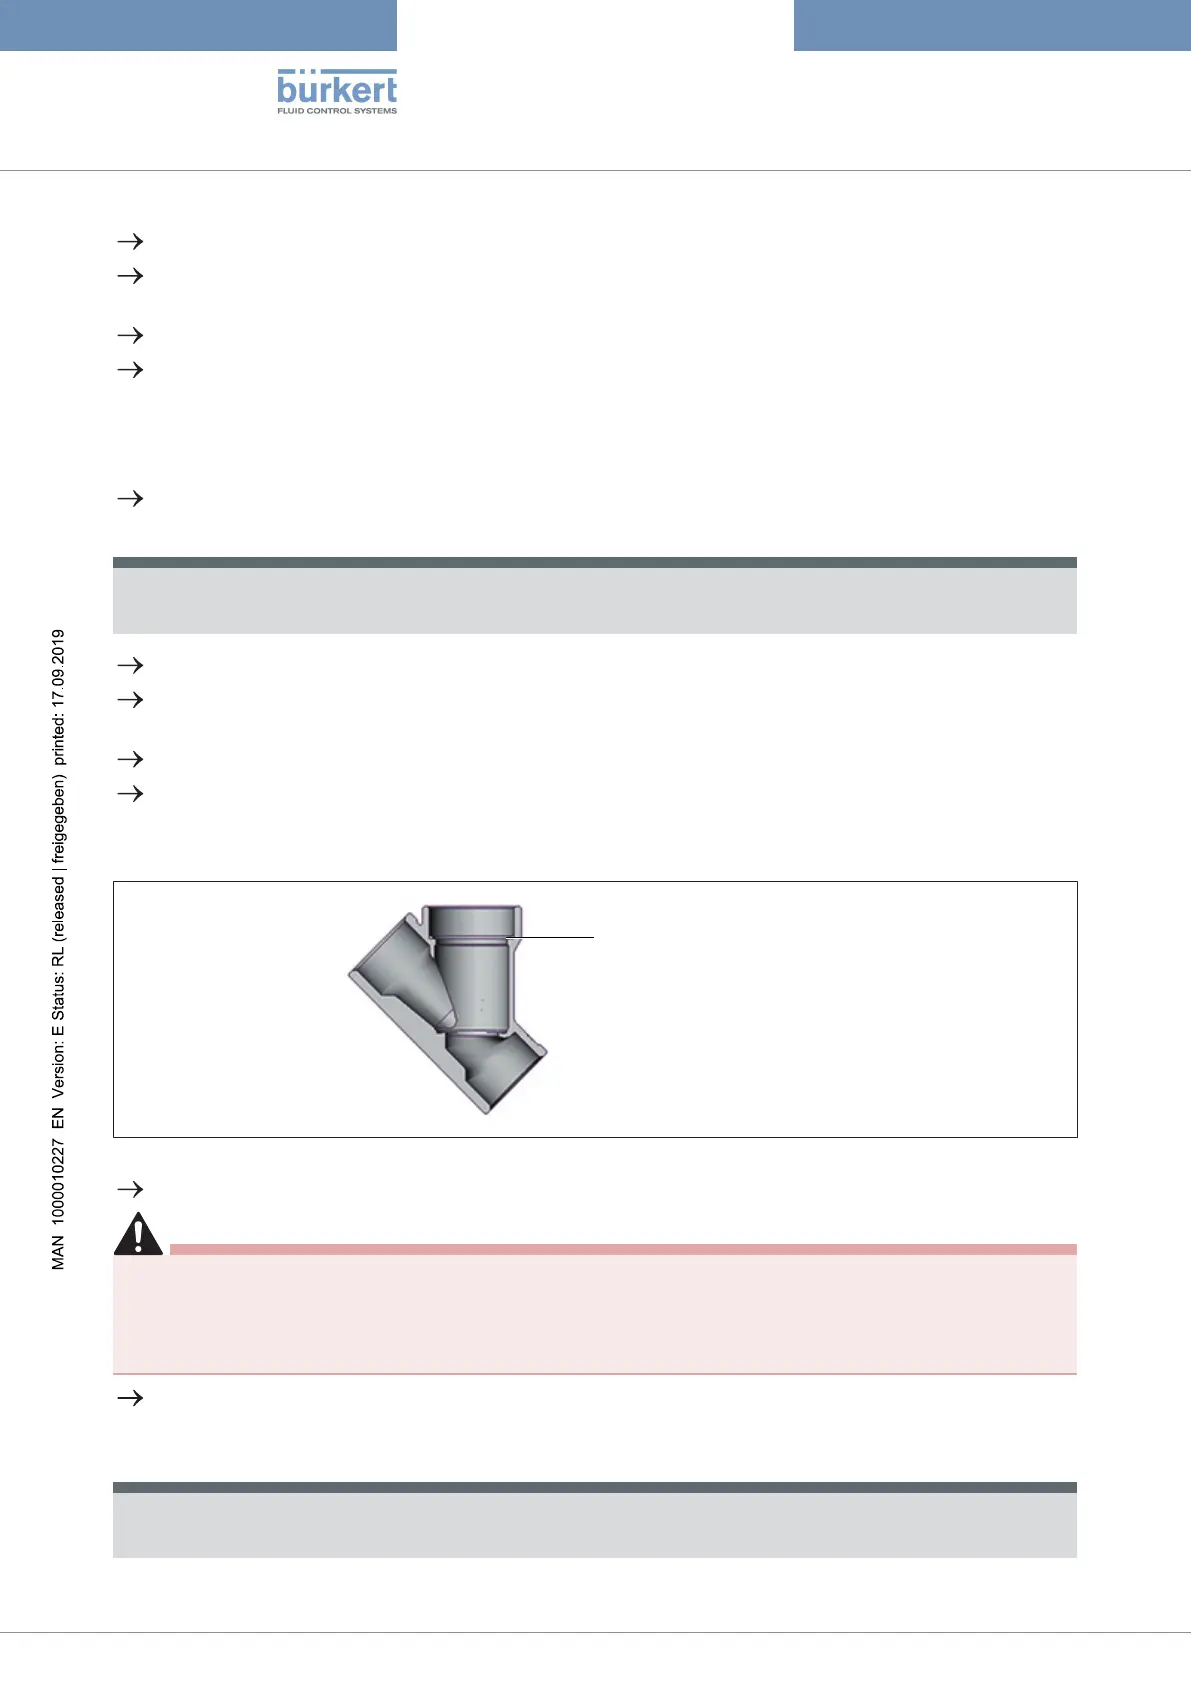
7.4.3 Installing actuator on valve body
Fig.18: Seal
Check seal and replace if required.
DANGER!
Danger due to lubricant.
Lubricant may contaminate the medium. There is a risk of explosion in oxygen applications.
▶ For specific applications use only approved lubricants (e.g. for oxygen applications or analysis applica-
tions).
Before re-installation, grease the thread of the body connection (e.g. with Klüberpaste UH1 96-402 from
Klüber).
ATTENTION!
Damage to the valve seat seal or seat contour.
▶ When installing the actuator, the valve must be in the open position.