16
Installation and wiring
Type 8045
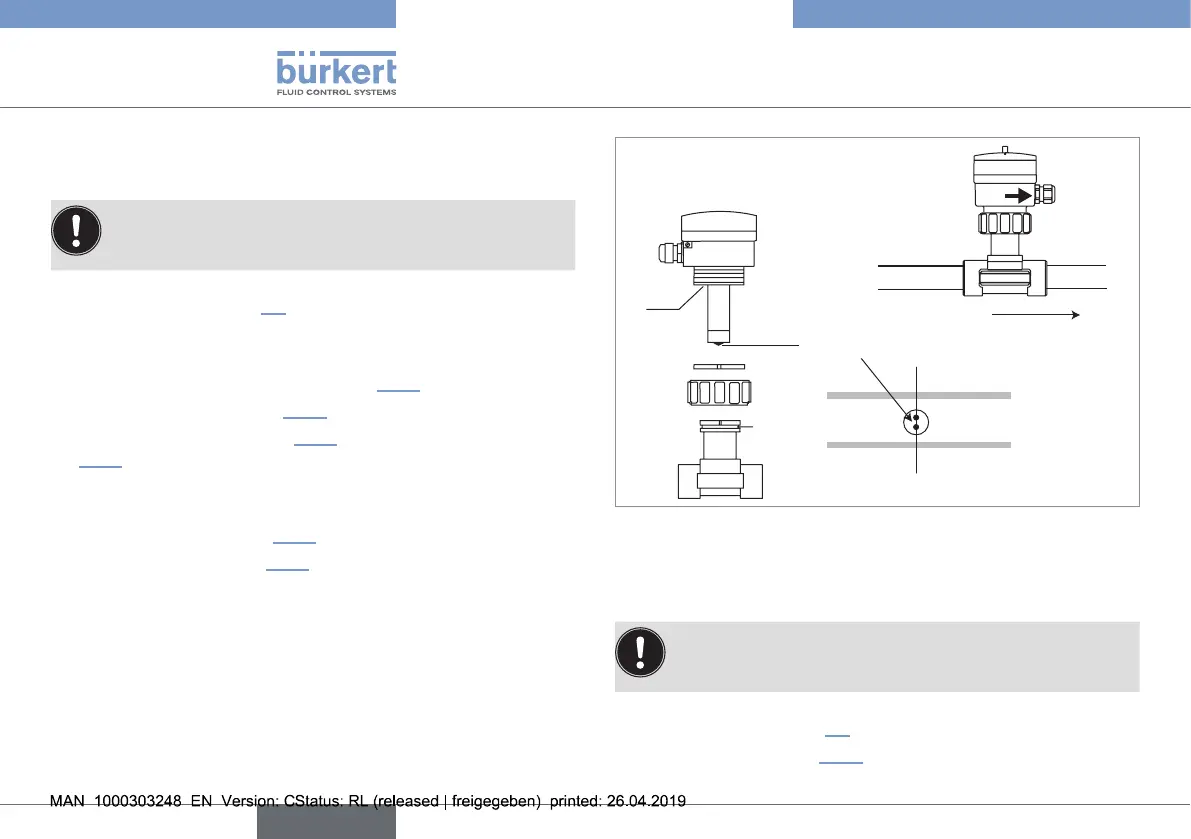
7.3. Installation into the pipe of a
8045 with a G2'' nut
In order to ensure a high accuracy of the measurements and
good stability of the „flow zero“ point, install the device into
the processed medium at least 24 hours before calibration.
→ Install the S020 fitting into the pipe taking into account the rec-
ommendations in chap. 7.2.
→ Check that there is a seal on the fitting and that it is not damaged.
Replace the seal if necessary.
→ Check that there is a seal (see mark 6, Fig. 8) on the flow sensor.
→ Insert the nut (see mark 3, Fig. 8) on the fitting.
→ Insert the snap ring (mark 2 Fig. 8) into the groove (mark 5
Fig. 8).
→ Position the arrow on the side of the device in the direction of the
flow: the totalizers will increment.
→ Insert the device (mark 1 Fig. 8) into the fitting.
→ Tighten the nut (mark 3, Fig. 8) by hand on the device.
1
2
3
5
4
FLOW
flow direction
Electrodes
Fig. 8 : Installation into the pipe of a 8045 with a G2'' nut
7.4. Installation into the pipe of a
8045 with a clamp connection
In order to ensure a high accuracy of the measurements and
good stability of the „flow zero“ point, install the device into
the processed medium at least 24 hours before calibration.
→ Install the S020 fitting into the pipe taking into account the rec-
ommendations in chap. 7.2.
→ Install the seal (mark 3 Fig. 9) on the S020 fitting.
English
 Loading...