A
Angel HoffmanSep 13, 2025
How to fix the value parametered for the pulse output is wrong (generated frequency is > 250 Hz) in Burkert Accessories?
- JJonathan CollinsSep 13, 2025
Increase the value of the PU parameter.
How to fix the value parametered for the pulse output is wrong (generated frequency is > 250 Hz) in Burkert Accessories?
Increase the value of the PU parameter.
What to do if the measured flow rate is above the authorized high limit in Burkert Accessories?
Check the flow rate in the pipe and its consequences on the process. If necessary, clean the flow sensor then calibrate the flow zero point.
What to do if the displayed flow rate is not nil but the flow rate in the pipe is for Burkert Accessories?
If the displayed flow rate isn't nil when the flow rate in the pipe is, verify that the flow rate in the pipe is indeed nil, check for bubbles in the pipe, inspect the chosen filter, and calibrate the flow zero point.
What to do if Burkert 8045 Transmitter displays ‘ERROR‘ - output current 22mA?
If the Burkert Transmitter displays ‘ERROR‘ with an output current of 22mA, and it occurs at start-up, try restarting the device. If the error persists at each start-up or failure at each validation of the menu, return the device.
What if the measured flow rate is negative (although the display shows a positive flow rate) in Burkert Accessories?
Check that the reverse fluid circulation has no consequences on the process. Otherwise, mount the device on the pipe so that the arrow on the housing indicates the flow direction.
What to do if Burkert 8045 Transmitter display fluctuates?
If the Burkert Transmitter display fluctuates, you can try selecting slow mode filtering. Also, if the electrodes are passivated, install the transmitter into the fluid 24 hours before use.
What to do if the current value transmitted on the AO1 current output does not correspond to the displayed flow rate for Burkert Accessories?
Check the configuration of the current output and verify the OFFSET and SPAN parameters of the current output.
What to do if the DO2 and DO3 outputs do not switch whatever the displayed flow rate value in Burkert Accessories?
Check the parameters of the DO2 and DO3 relay outputs, verify the flow rate unit, and check the behavior of the outputs.
What to do if Burkert 8045 programming/testing unavailable?
If programming or testing is unavailable on your Burkert Transmitter, set switch 2 to "unlock".
What to do if the current output transmits 0 mA from Burkert Accessories?
If the current output transmits 0 mA, check the wiring of the current output. Also, check the fuse of the installation, replacing it if necessary, and verify the position of the sink/source switch. If the problem continues, contact the retailer.
Explains warning symbols and icons used in the manual for safety and information.
Clarifies that the term "device" in this manual refers specifically to the flowmeter type 8045.
Specifies the intended use of the 8045 flowmeter for measuring liquid flow rates.
Describes the flowmeter's components, operation principle, and power supply requirements.
Lists the different versions of the 8045 flowmeter and their key specifications.
Specifies ambient conditions, humidity, altitude, and protection class for device operation.
Details the mechanical components and materials used in the flowmeter construction.
Outlines power supply, current consumption, and output specifications for the device.
Provides critical safety warnings and precautions for installation and commissioning.
Details procedures for mounting the flowmeter onto a pipe, including fitting recommendations.
Explains the electrical wiring connections and procedures for the device.
Important safety warnings related to the device's operation and handling.
Describes the Process and Configuration levels for device interaction and settings.
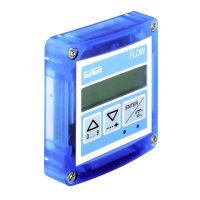
Explains the function of device buttons and status indicators for user interaction.
Overview of configurable parameters and how to access and adjust them.
How to select the preferred language for the device display interface.
Detailed steps for setting up the 4-20 mA analog output for flow rate measurement.
Setting DO1 to switch based on upper/lower flow rate thresholds for control or alarms.
Setting up the digital input to trigger specific device functions remotely.
Overview of diagnostic tests and calibration procedures available for the device.
Calibrating the 4-20 mA output offset and span for improved measurement accuracy.
Procedure to set the zero point for accurate flow measurements, especially after maintenance.
Critical safety warnings specific to maintenance activities and troubleshooting procedures.
Guidelines for safely cleaning the flow sensor components to maintain performance.
Comprehensive guide to resolving common issues, error messages, and LED indicators.
Troubleshooting steps for issues when the device status LED is off.
Troubleshooting steps for red LED status without explicit error messages.
Troubleshooting steps for orange LED status without explicit error messages.
Lists available spare parts, accessories, and their corresponding order codes.
| Model | 8045 |
|---|---|
| Device Type | Transmitter |
| Measurement Principle | Electromagnetic |
| Output Signal | 4-20 mA |
| Material | Stainless steel |
| Lining Material Options | PTFE |
| Electrode Material Options | Stainless Steel, Hastelloy |
| Accuracy | ±0.5% |
| Ambient Temperature Range | -20 to 60 °C |
| Protection Rating | IP65 |
| Certifications | ATEX |