32
1. In all cases, the burner adapter plate carton for the
specied burner will be provided by Burnham.
2. Open Adapter Plate carton and remove contents.
Apply four (4) small dabs of + on rear surface of
adapter plate to temporarily hold gasket in place.
Hold adapter plate in position against burner
mounting plate, align holes and secure with ve (5)
3/8″ lock washers and 3/8″ x 7/8″ lg. cap screws.
3. USE A HOLE SAW OR KNIFE TO CUT
BURNER MOUNTING PLATE INSULATION
TO MATCH HOLE SIZE ON BURNER
ADAPTER PLATE. After cutting, remove any and
all loose pieces of insulation which may become
lodged or interfere with the head of a burner air tube
after insertion.
4. Conrm that hole in insulation ts snugly around
burner blast tube. If hole is oversized, remove
burner mounting plate (with burner attached)
from boiler. Use additional berglass rope gasket
provided with burner to ll in any space between
insulation and blast tube. If additional rope gasket
is not provided with the burner, use 3/8″ berglass
rope rated for 2300°F (provided by others).
Reinstall burner mounting plate when nished.
Failure to properly ll all gaps between the insulation and
burner blast tube may result in damage to the burner.
Le fait de ne pas remplir correctement tous les
espaces entre l’isolation et le tube de souage du
brûleur peut endommager le brûleur.
5. For boilers without tankless heaters, proceed to
Paragraph I (Install Water Trim).
6. For boilers with tankless heaters, install the tankless
heater manifolds according to Figure 31.
H. WATER BOILERS - INSTALL WATER TRIM
Items for water trim are located in the water trim
carton (except for the separately ordered low water
cuto and tankless heater control). Figure 21 shows
the proper tappings for each item.
1. Install the temperature pressure gauge.
2. Install the low water cuto. Follow manufacturer’s
instructions furnished with control.
3. Install the immersion well and mount the aquastat
(limit control) onto the well.
4. Install the safety relief valve as shown in Figure
32b. Relief valve must be installed in vertical
position.
5. Plug extra boiler tappings.
6. Install required bottom blowo/drain valve
(supplied by others) per minimum piping
requirements for water boilers, see Figure 23.
Relief valve discharge piping must be piped to within
six (6) inches of oor, or to oor drain to eliminate
potential of severe burns. Do not pipe in any area
where freezing could occur. Do not install any shut-o
valves, plugs or caps in discharge piping.
La tuyauterie de décharge de la soupape de décharge
doit être raccordée à moins de six (6) pouces du sol,
ou au drain de plancher pour éliminer le potentiel de
brûlures graves. Ne pas installer de tuyaux dans des
zones où le gel pourrait se produire. N’installez pas de
vannes d’arrêt, de bouchons ou de capuchons dans la
tuyauterie de refoulement.
I. BURNER INSTALLATION
Refer to burner manufacturer’s installation manual
for proper installation, fuel piping, wiring, burner
adjustment, burner start-up and service instructions.
Also refer to burner specications and settings sheet in
burner adapter plate carton if provided.
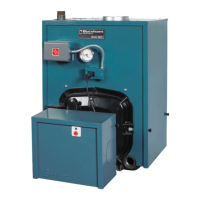
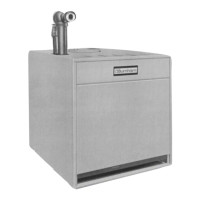
J. PACKAGED BOILER
1. The packaged boiler comes on it’s own shipping
skid (see Figure 22) and the assembled block is
hydrostatically tested at the factory. Once the boiler
is in it’s nal position, perform another hydrostatic
test at 1½ times the working pressure of the boiler.
Before boiler is put into service, all draw up rod nuts
should be loosened and then retighten to nger tight
plus 1/2 turn. The shipping skid can be used as a
housekeeping pad unless local codes say otherwise.
All controls are pre-wired down to the burner. If
burner is equipped with a lead lag panel, lead lag
controls will be shipped loose for header mounting.
The power can be supplied to the burner if equipped
with a control panel. If burner has no panel, the
power is supplied to the J-box on the front jacket.
2. SUPPLY CONNECTIONS - Removal of top
jacket is not required to connect the supply riser(s),
however one may nd it easier. Refer to Figure 23
or 24.
3. RETURN CONNECTIONS - The boiler is secured
to the shipping skid with U bolts and 3″ shipping
nipples. Remove the bolts and nipples. Using
3” plugs and an appropriate pipe sealant, plug
the unused return connections according to the
minimum piping recommendations. Refer to Figure
23 or 24.
4. If the boiler burner unit was factory re tested, the
burner was adjusted to approximately 10% CO2
(gas) or 12% CO2 (oil). Final adjustments should be
made once the unit is installed and adjusted.

 Loading...