Maintenance
Burner Cleaning
The Burner must be completely cool before proceeding further.
The Burner Assembly should be cleaned according to the maintenance
schedule; or more frequently if the signal becomes erratic when
aspirating deionised water.
1. Remove the Mixing Chamber as previously described.
2. Remove the 2 thumbscrews and withdraw the Burner Assembly.
3. The burner can be cleaned as a complete assembly by submerging
the component into a bath of de-proteinizing solution, and/or Decon
90® (2-5% mix with deionised water). DO NOT use organic solvents
or alcohol as they may damage the O-ring.
Alternatively, for stubborn contamination further disassembly is
possible:
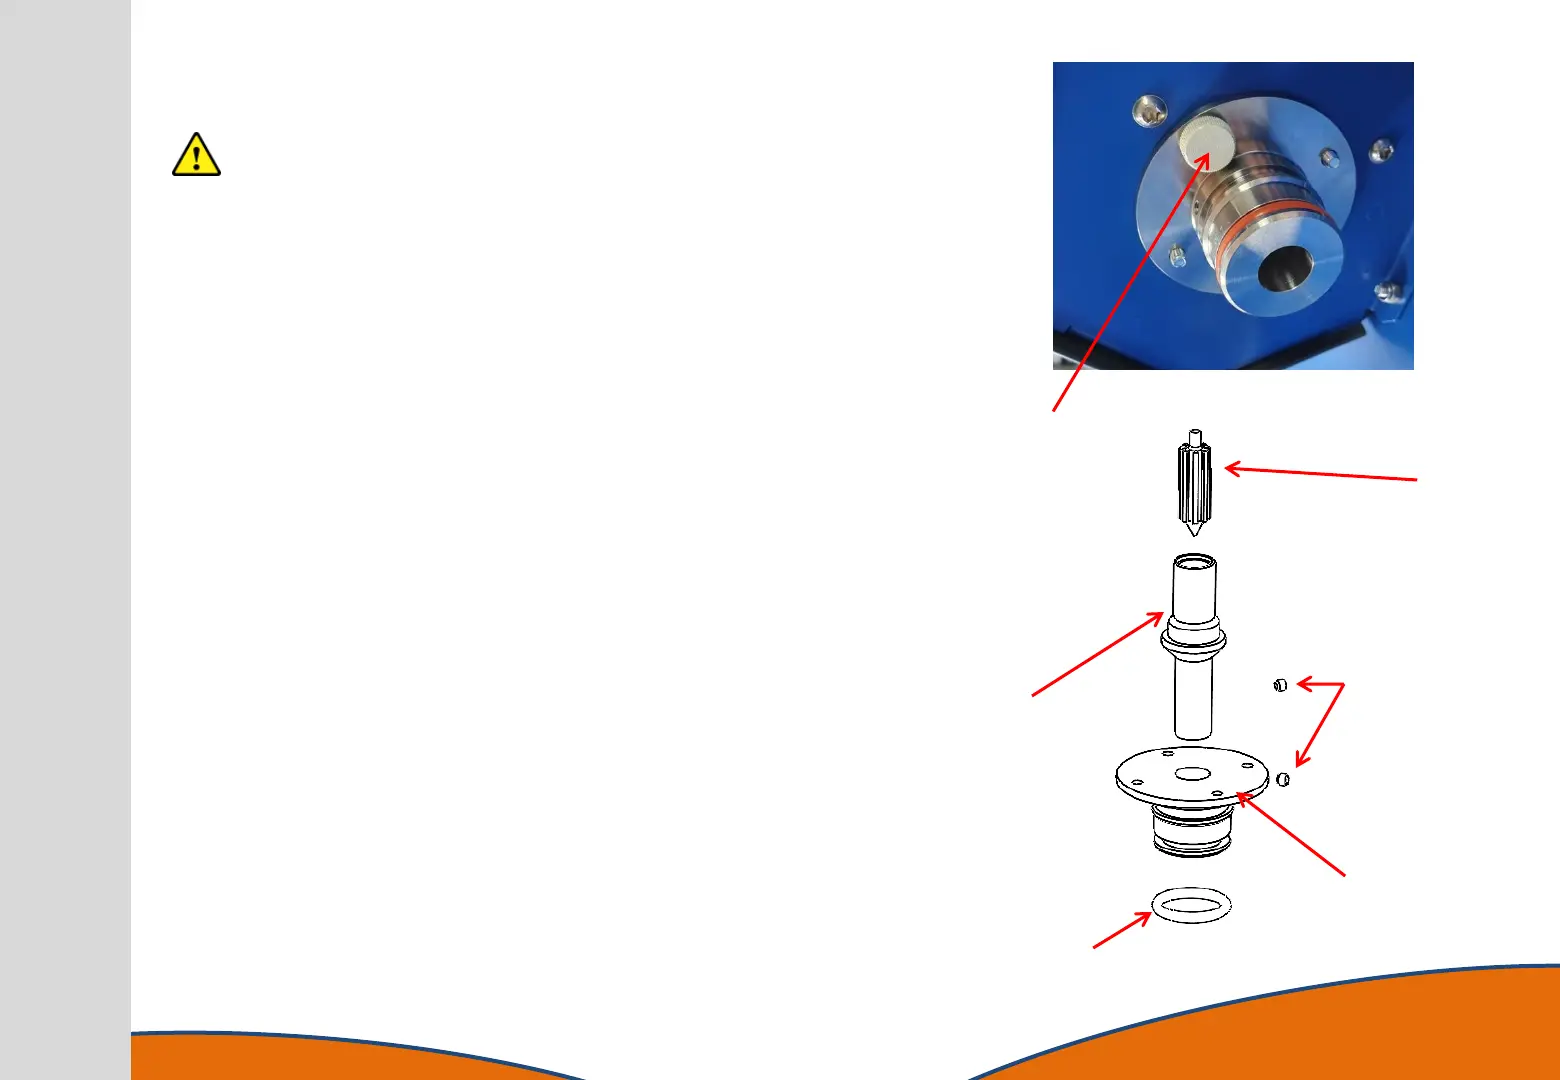
1. Undo the set screw on the Chimney Mount using a 2.1mm AF Allen
Key. Carefully remove the Burner Tube.
2. Remove the Flame Spreader by undoing the set screw using a
2.1mm AF Allen Key.
3. Clean the Burner Tube and Flame Spreader with a detergent
solution, de-proteinizing solution, and/or Decon 90® (2-5% mix with
deionised water). DO NOT use organic solvents or alcohol as they
may damage the O-ring.
4. Inspect the O-ring for signs of deterioration or splitting. Replace if
necessary.
5. Re-assemble ensuring the Flame Spreader pointed end is
downwards and that the set screw is aligned with one of the ridges
in the flame spreader, NOT with a groove.
6. Offer the Burner Assembly up to the Chimney Assembly and refit the
2 retaining thumbscrews.
7. Replace the Mixing Chamber.
46
Flame Spreader
Set
Screws
Burner Flange
O-Ring
Burner Tube
Thumscrew