16 16
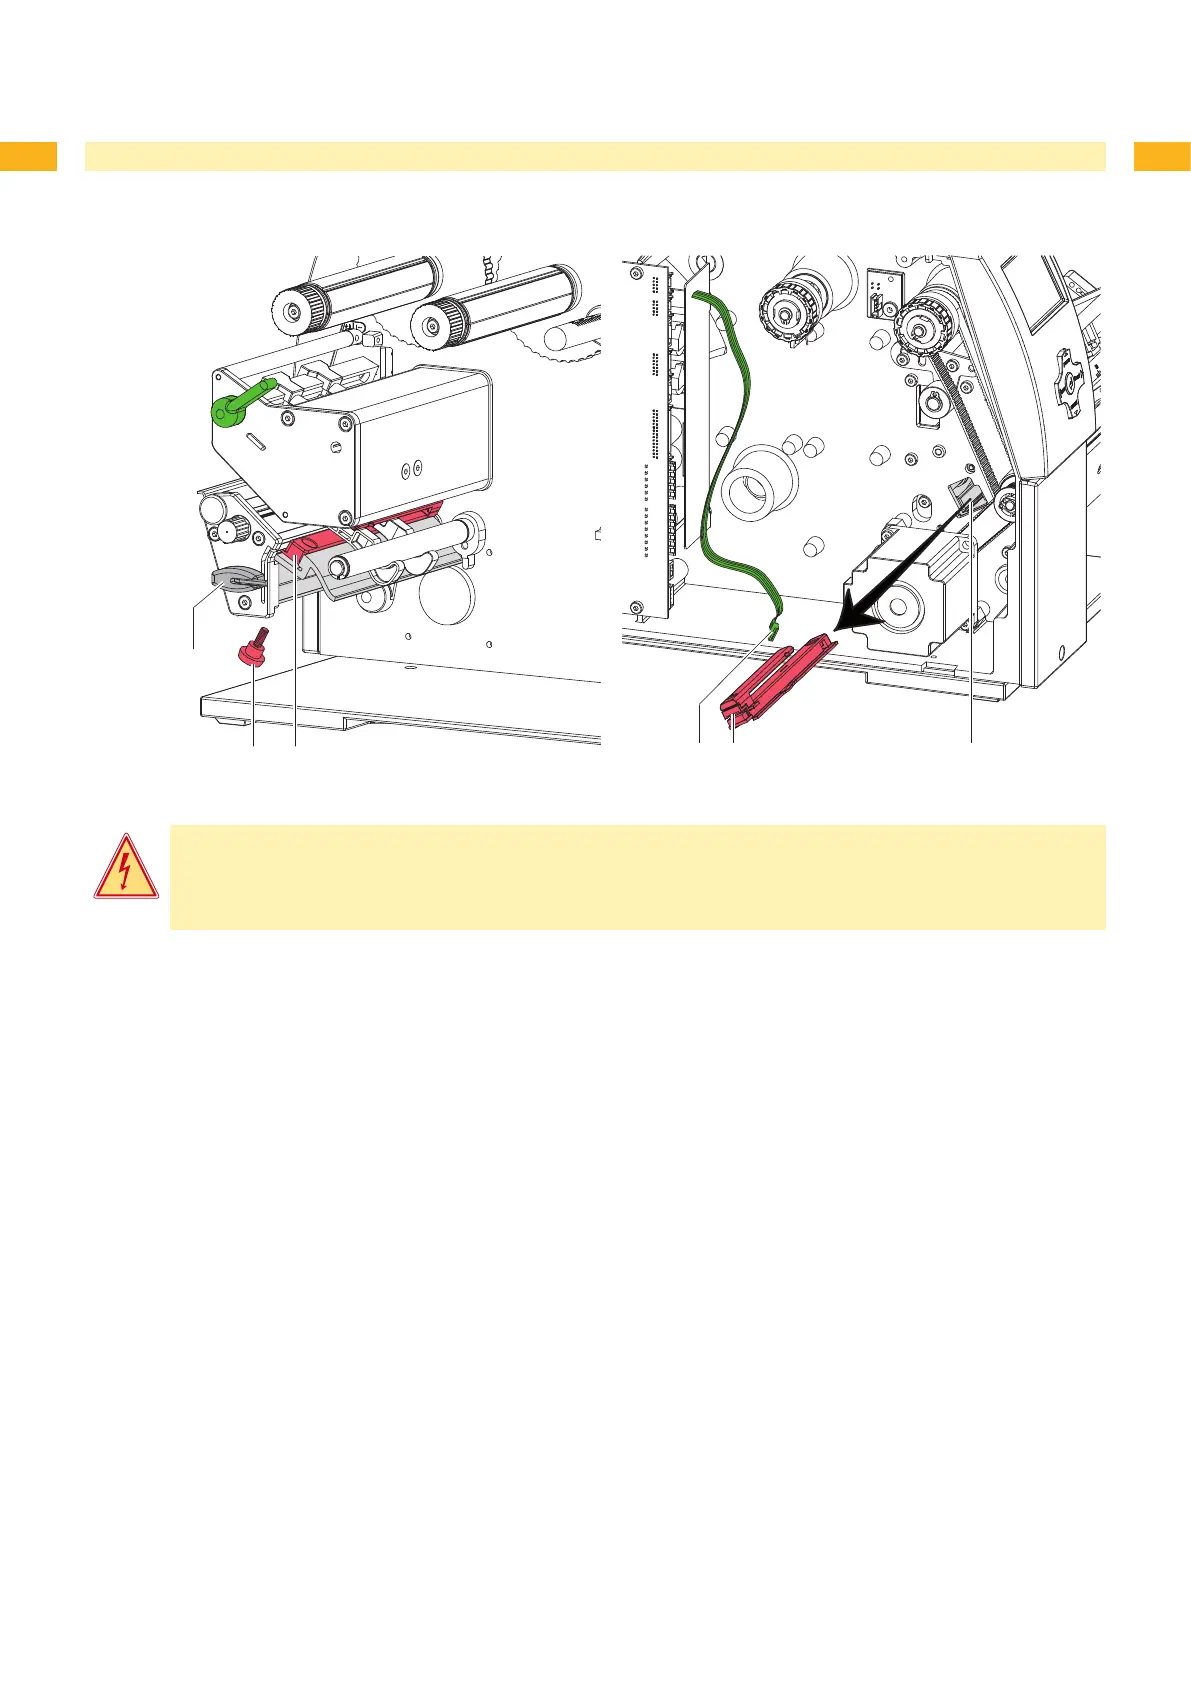
3.6.2 Replacing Label Sensor A4+M
Fig. 15 Replacing the label sensor A4+M
Danger!
Risk of death via electric shock!
Before opening the housing cover, disconnect the device from the mains supply and wait at lease one
minute until the power supply unit has discharged.
Removing the label sensor
Remove the Allen key (5) from its retainer.
Remove the rear cover of the printer.
Unscrew knurled thumb screw (1).
Unplug the cable (3) from the plug on the rear end of the label sensor (2).
Push the label sensor (2) so deep as possible into the guide prole toward the chassis.
Slide out the label sensor assembly (2) toward the back side cover.
Installing the label sensor
Push label sensor back toward the print head side of printer so you can see the hole in the label sensor over the
long hole in the prole (guide).
Connect the cable (3) to the label sensor (2).
Attach knurled thumb screw (1).
Pull the label sensor (2) via knurled thumb screw (1) so far as possible toward cover side. This prevents the cable
(3) from being pinched when installing the rear cover.
Install the rear cover of the printer.
Insert the Allen key (5) into its retainer.
Adjust label sensor operators manual a4+M.
Adjust the label sensor Conguration Manual.
1.
2.
3.
4.
5.
6.
1.
2.
3.
4.
5.
6.
7.
8.
3 Replacing Assembly Units

 Loading...