18 18
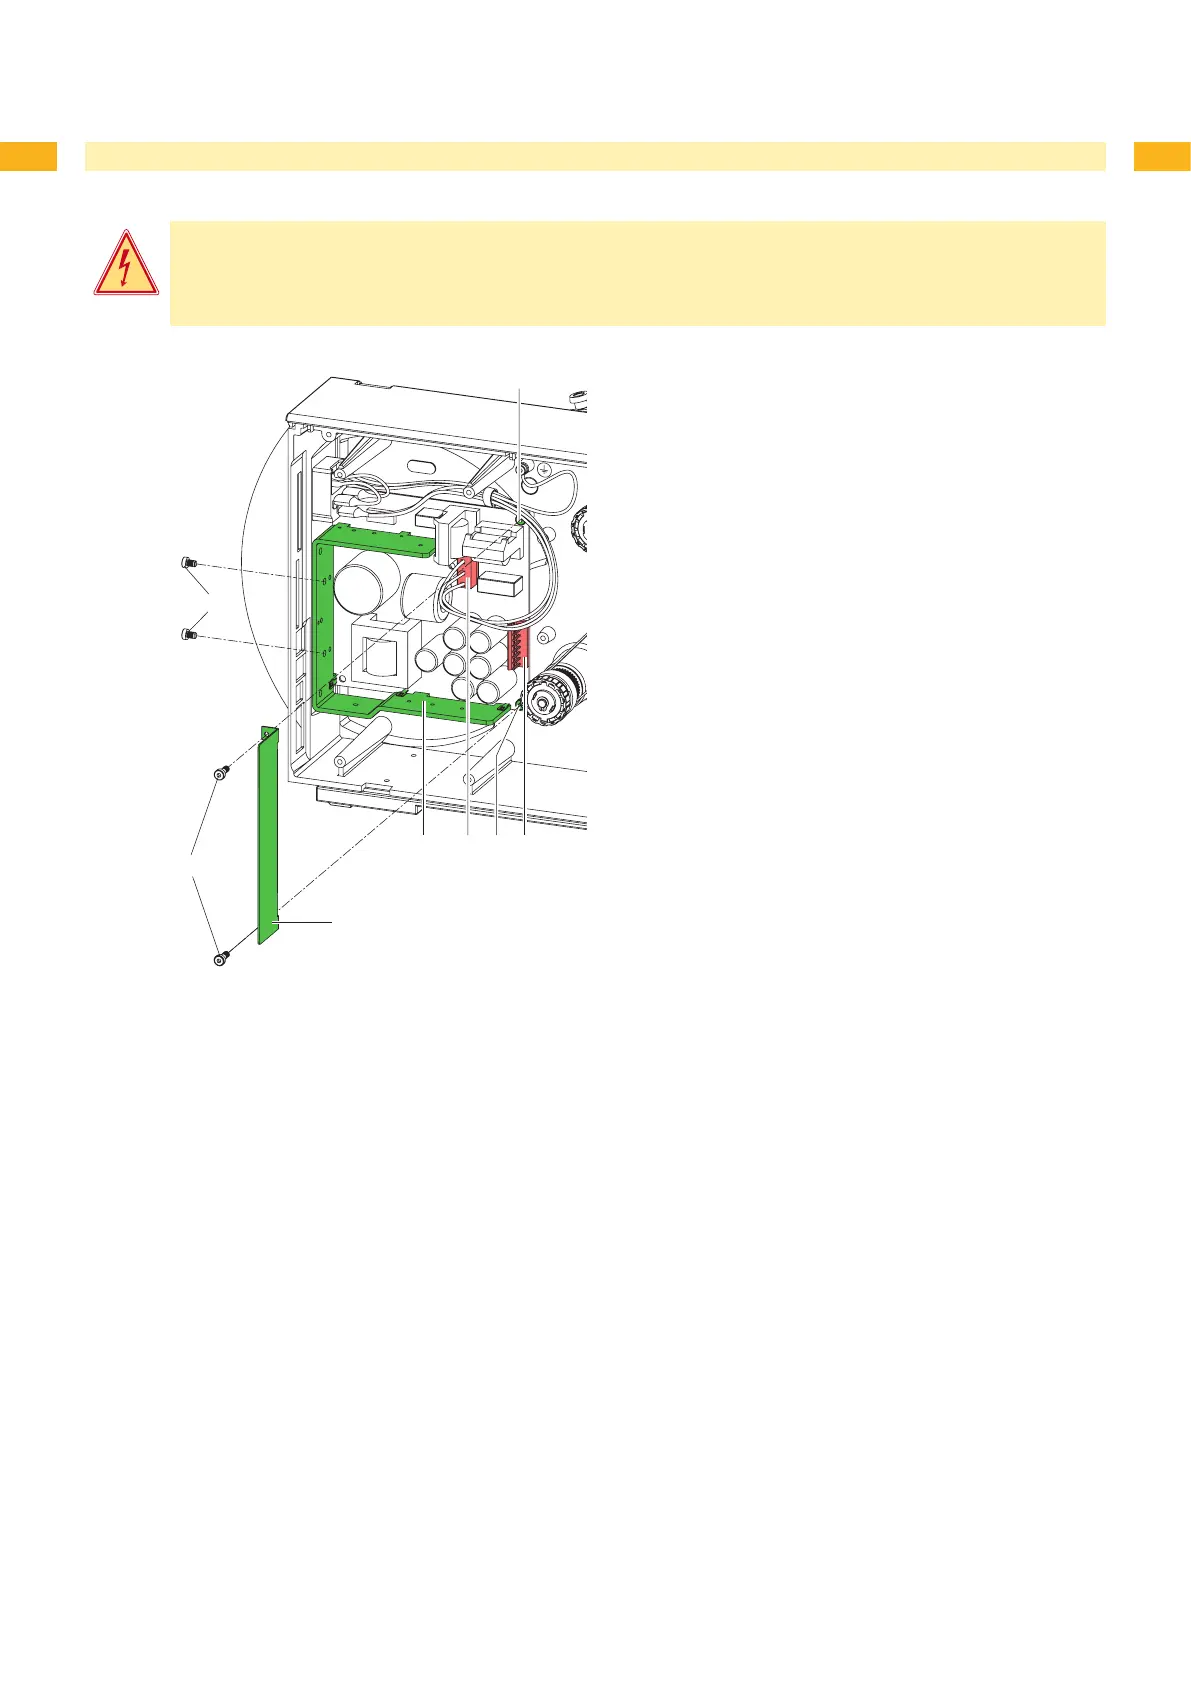
3.8 Replacing the Power Supply Unit
Danger!
Risk of death via electric shock!
Before opening the housing cover, disconnect the device from the mains supply and wait at lease one
minute until the power supply unit has discharged.
Removing the power supply unit
Unplug the printer from the electrical outlet.
Remove the PCB CPU 3.7 on page 15.
Remove the two screws (6) of the cover plate (5).
Remove the cover plate (5).
Unplug the plug at the power supply unit input (3).
Unplug the plug at the power supply unit output (1).
Remove the two screws on the back of the printer (7).
Hold the power supply unit rmly at the metal bracket (4)
and remove the two screws (2).
Remove the power supply unit.
Installing the power supply unit
Insert the power supply unit and secure the PCB with two
screws (2).
Secure the metal bracket (4) of the power supply unit to
the back of the printer with two screws (7).
Connect the power supply unit cable to the power supply
output (1).
Insert the power input cable (3).
Insert the cover plate (5) and secure it with the two
screws (6).
Install the PCB CPU.
1.
2.
3.
4.
5.
6.
7.
8.
9.
1.
2.
3.
4.
5.
6.
Fig. 17 Replacing the power supply unit
3 Replacing Assembly Units

 Loading...