9
2 Replacing Assembly Units
2.4 Removing the Casing
1
2
3
5
1
3
4
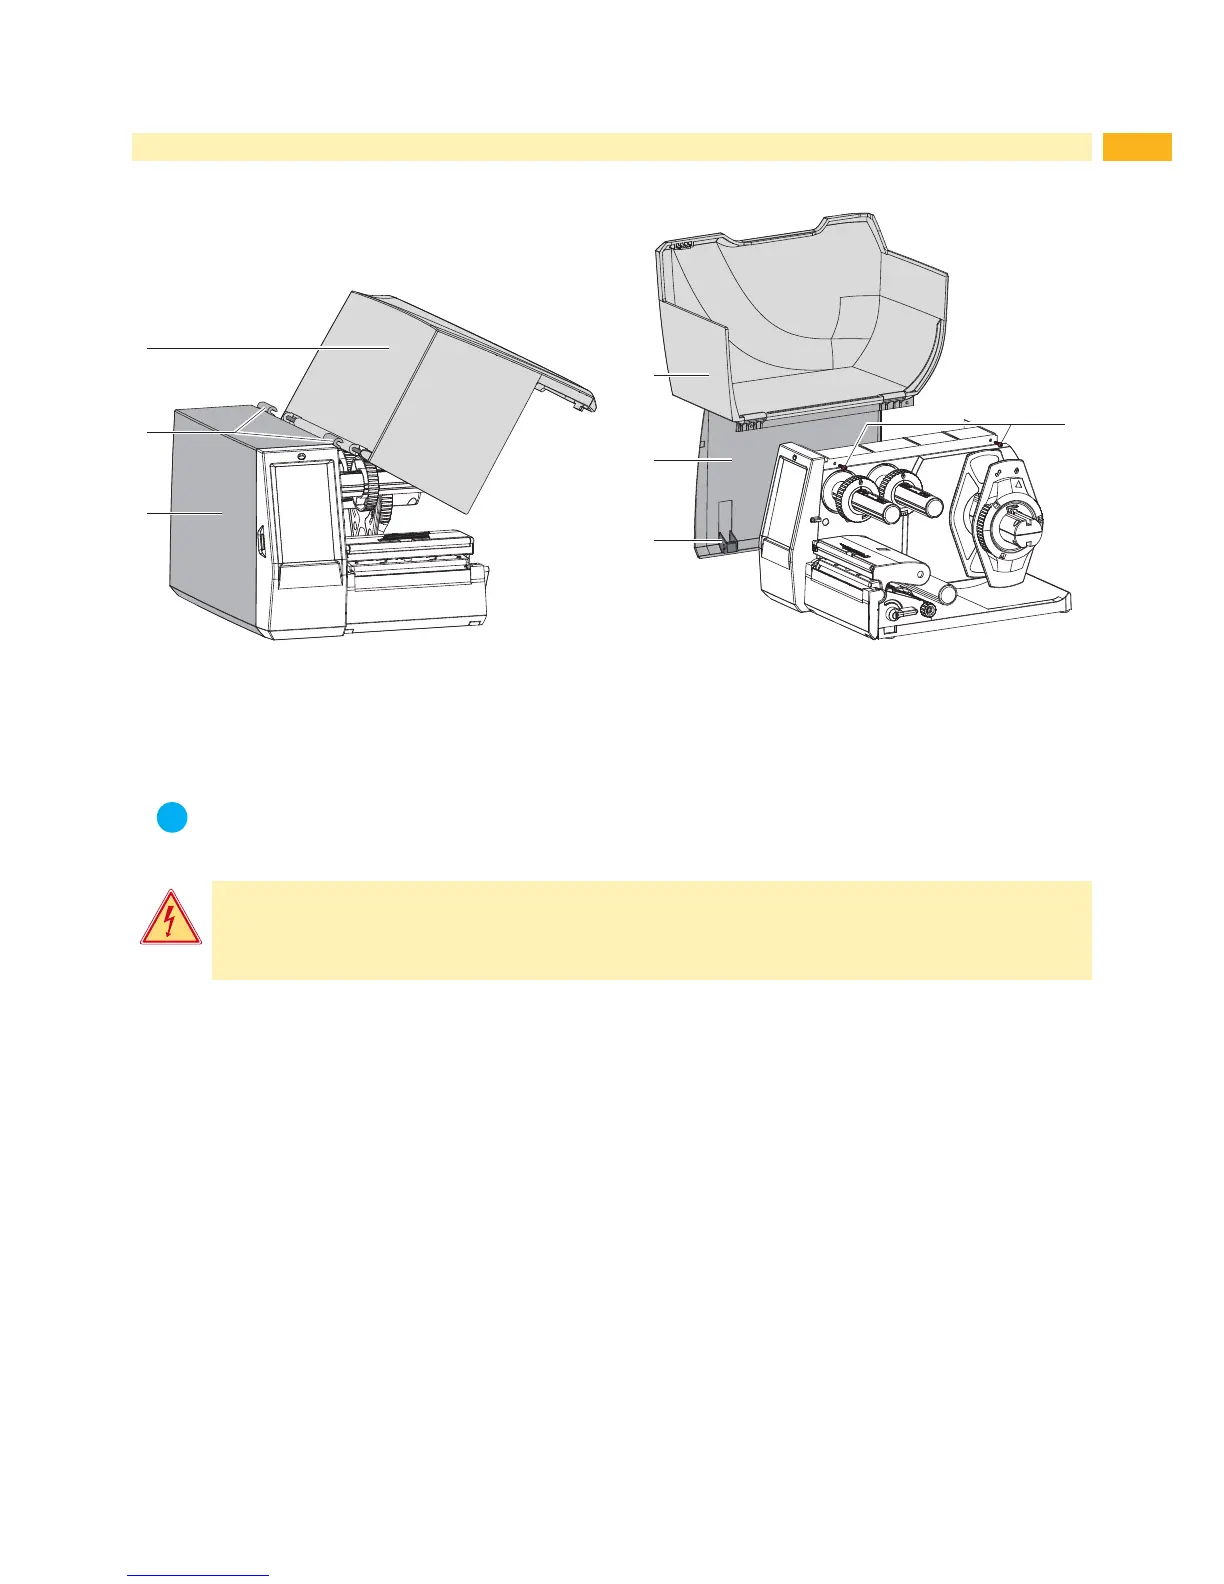
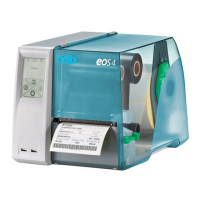
Fig. 3 Removing the cover Fig. 4 Removing / mounting the casing
Removing the cover
Lift the cover (1) by turning by 60°.
Push the cover out of the hinges (2) of the cover plate (3) diagonally to the ground.
Note!
For service work it is recommended to remove the casing consisting of cover (1) and cover plate (3)
connectedly. It is not necessary to separate the cover from the cover plate.
Danger!
Risk of death via electric shock!
Before opening the housing cover, disconnect the device from the mains supply and wait at lease one
minute until the power supply unit has discharged.
Removing the casing
Open the cover (1).
Loosen 2 screws (5).
Push the cover plate (3) with the cover (1) to the connector side.
Lift the cover plate (3) with the cover (1) from the printer.
Mounting the casing
Insert the hooks (4) into the slot of the bottom and push the casing to the control panel side.
Fix the cover plate with 2 screws (5).