14 14
4 Replacing Assembly Units
Installing the slipping clutches on the rewinders
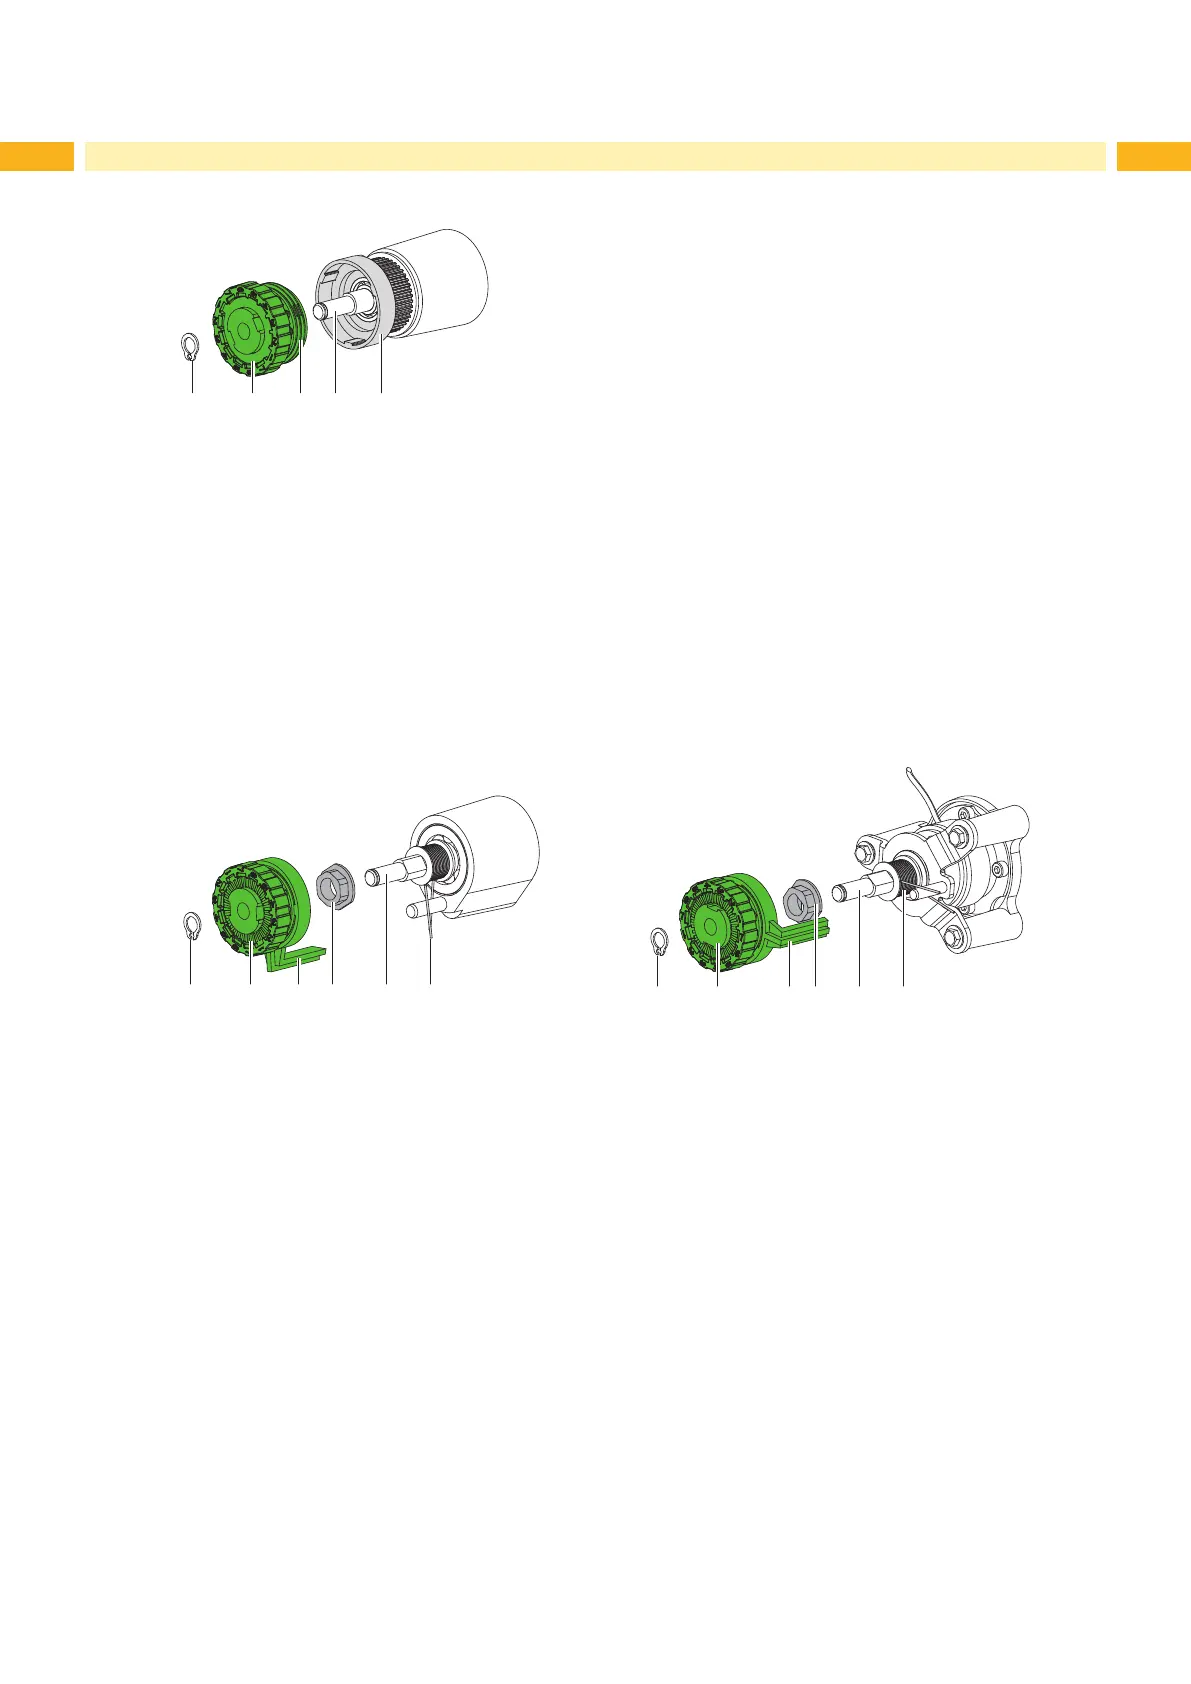
Fig. 11 Slipping clutch on the rewinder
1. Slide coupling (2) onto the winder axis (4).
2. Align grooves in the coupling disks (3) with the guides in the collar of the belt wheel (5).
3. Slide coupling further until it stops.
4. Secure the snap ring (1).
5. Adjust the coupling 5.1.2 on page 21.
6. Install the rear cover.
Installing the brakes on the transfer ribbon supply hubs
1 2 3 4 5 6
Fig. 12 Brakes on the upper (left side) and lower (right side) ribbon supply hubs
1. Check the correct positioning of spring (6) and pin (4) on the winder axis (5).
2. Slide the brake (2) onto the winder axis (5) in such a way that it ts on the hexagonal prole of the pin (4).
3. Ensure that the lever (3) grasps between the two ends of the spring (6).
4. Secure the snap ring (1).
5. Adjust the brake 5.1.2 on page 21.
6. Install the rear cover.

 Loading...