6 6
2 Preparation
2.1 Tools
Do not use any worn of damaged tools.
Only use tools and testing devices that are suitable for the task at hand.
cab special tools:
• Test collar for transfer ribbon winder (cab item number: 5534199)
• Distance caliber 0,1 mm (cab item number: 5961064)
Standard tools:
• Torx screwdriver TX 20
• Hexagon electronic screwdriver 1,5 mm
• Hexagon key 2,5 mm, 200 mm shaft (included in delivery)
• Phillips-head screwdriver, size 1
• Precision circlip pliers A0
• Precision circlip pliers A1
• Cylindrical dynamometer (spring scale), 0 - 10 N
• Digital multimeter
2.2 Removing and Installing the Rear Cover
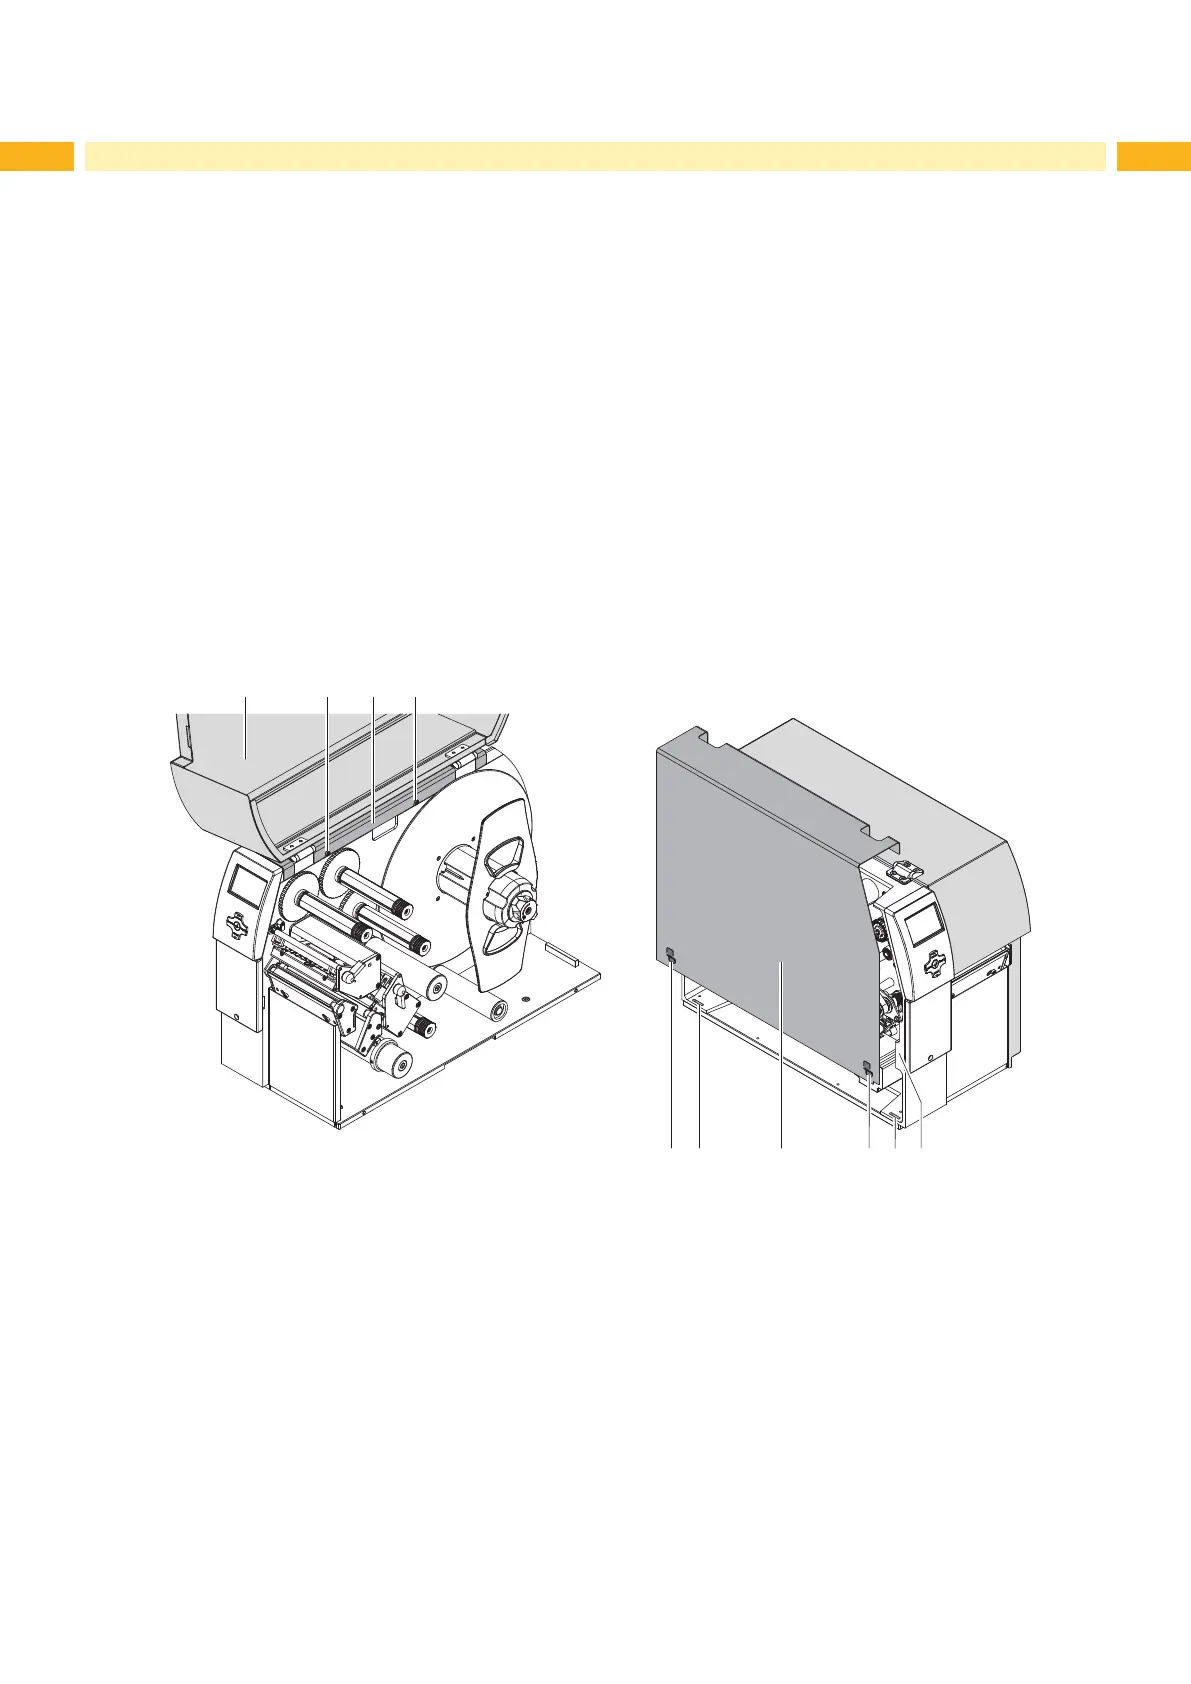
1 2 3 2
4 43 55 6
Fig. 1 Removing and Installing the Rear Cover
Removing rear cover :
1. Open front cover (1).
2. Loosen screws (2).
3. Close front cover.
4. Lift and remove the rear cover (3).
Installing rear cover :
5. Close front cover.
6. Apply the rear cover to the frame (6) and push it downward.
The aps (4) at the inside of the rear cover must grasp into the slots (5) of the frame.
7. Open front cover.
8. Tighten the screws (2).
 Loading...