21
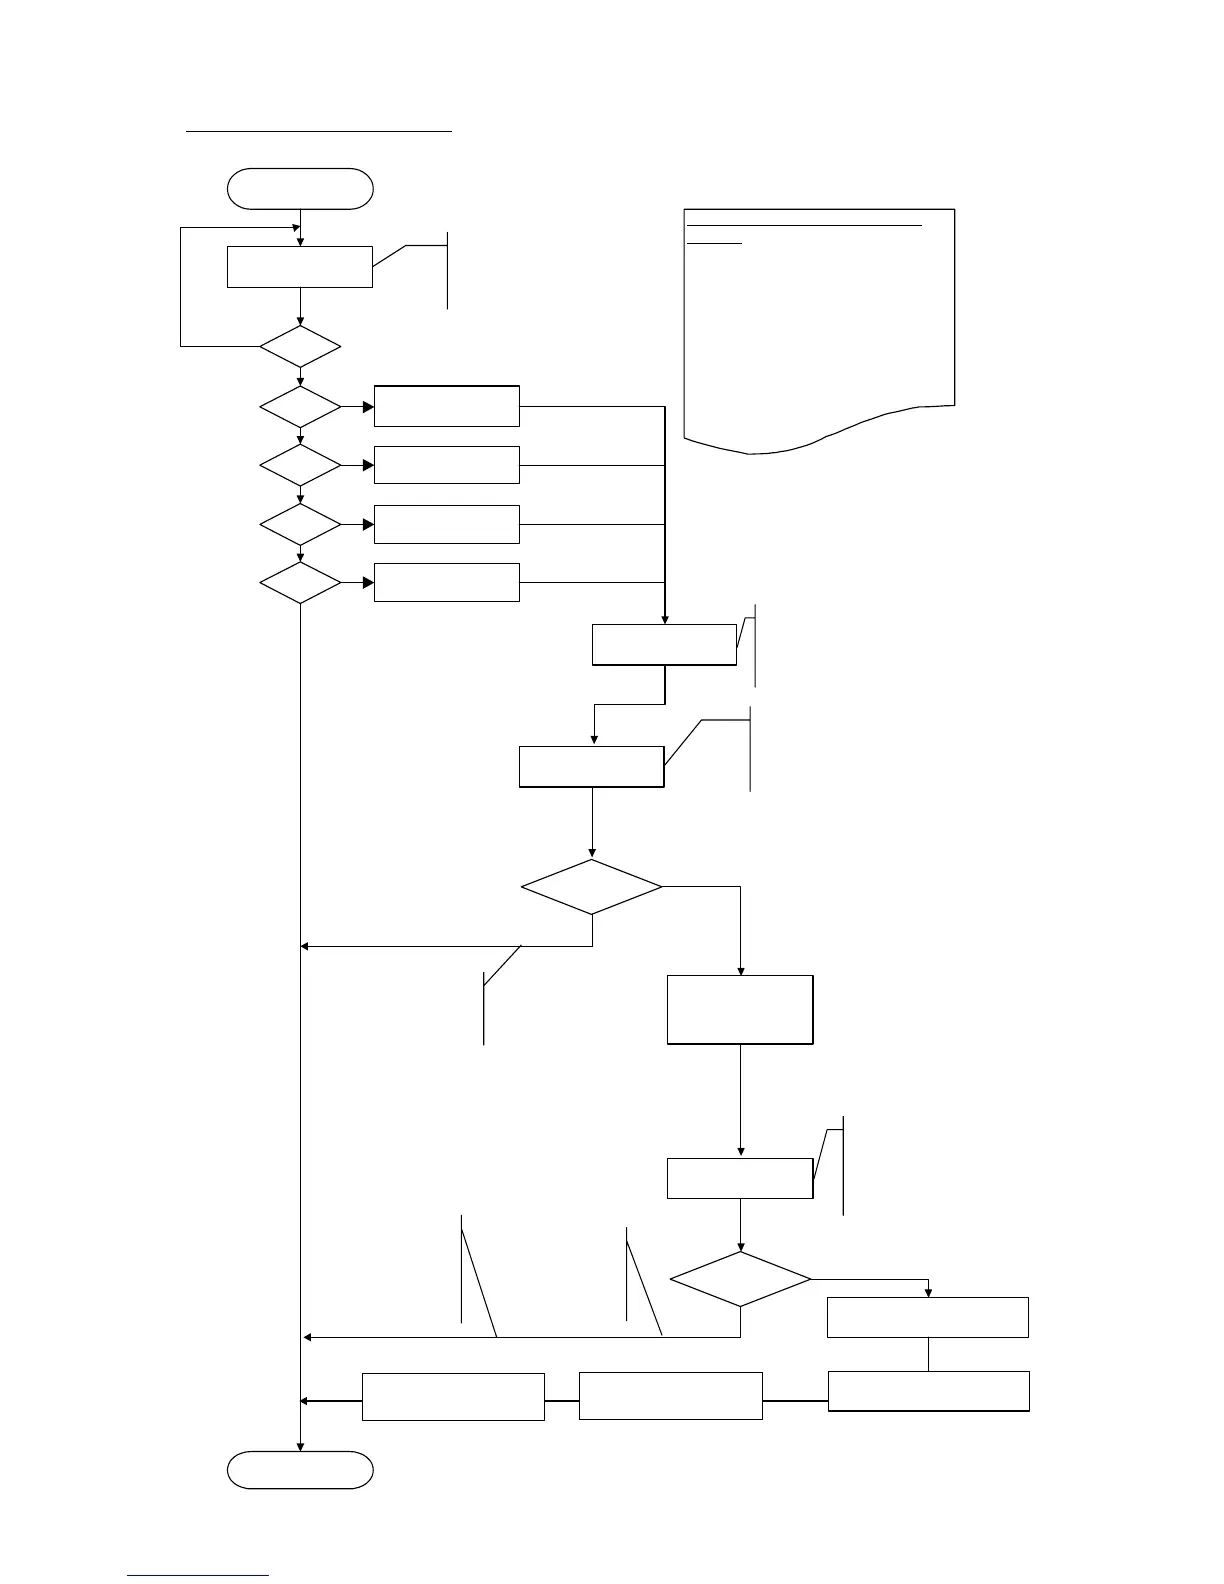
LF / Eject correction flowchart:
START
Key entry (number of times the button is
pressed):
0 times:
The previous entry was wrong.
Return to the previous step.
Specified number:
Set the specified value.
Over the specified number:
Exit the LF / Eject correction mode.
L = 0
Paper selection
Press the Resume/Cancel button
"L" times, then press the Power
button to fix the selection.
L = 1
L = 2
L = 3
L = 4
Yes
No
No
Yes
Yes
Yes
Yes
No
No
No(L>=5)
HR-101
GF-500 / Office
Planner
HP Bright White
Canon Extra,
STEINBEIS
LF / Eject correction
pattern printing
1 sheet of paper is printed.
- LF correction pattern on the left
- Eject correction pattern on the right
Selection of the LF
correction value
Press the Resume/Cancel
button "M" times, then
press the Power button to
fix the selection.
0=<M=<2
Retention of the LF
correction value
END
Yes*
No(M>=3)
Selection of the Eject
correction value
0=<N=<2
Writing of the Eject correction
value to the EEPROM
No(N>=3)
Press the Resume/Cancel
button "N" times, then
press the Power button to
fix the selection.
Yes*
No writing of the LF
correction value to the
EEPROM.
No writing of the
Eject correction
value to the
EEPROM
* Select the Pattern No. in which
streaks or lines are the least
noticeable.
* Select the Pattern No. in which
streaks or lines are the least
noticeable.
Return to the service mode menu selection.
No writing of the
LF correction
value to the
EEPROM
Writing of the LF correction value
to the EEPROM
Disabling of the E-MIP
correction value
Enabling the fixed value of
the endurance correction