Chapter 4
4-14
4.3.6 Cutter
0012-6370
a) Removing the cutter unit
1) When removing the cutter unit, open the top cover, and then remove the cassette, output tray unit, left and right circle covers, tank cover, lower rear cover, left
and right covers, right upper cover, operation panel, left and right front cover, upper front cover, mist filter, filter cover, filter, and lower front cover. Refer to
DISASSEMBLY/REASSEMBLY > Points to note on Disassembly and Reassembly > External Covers.
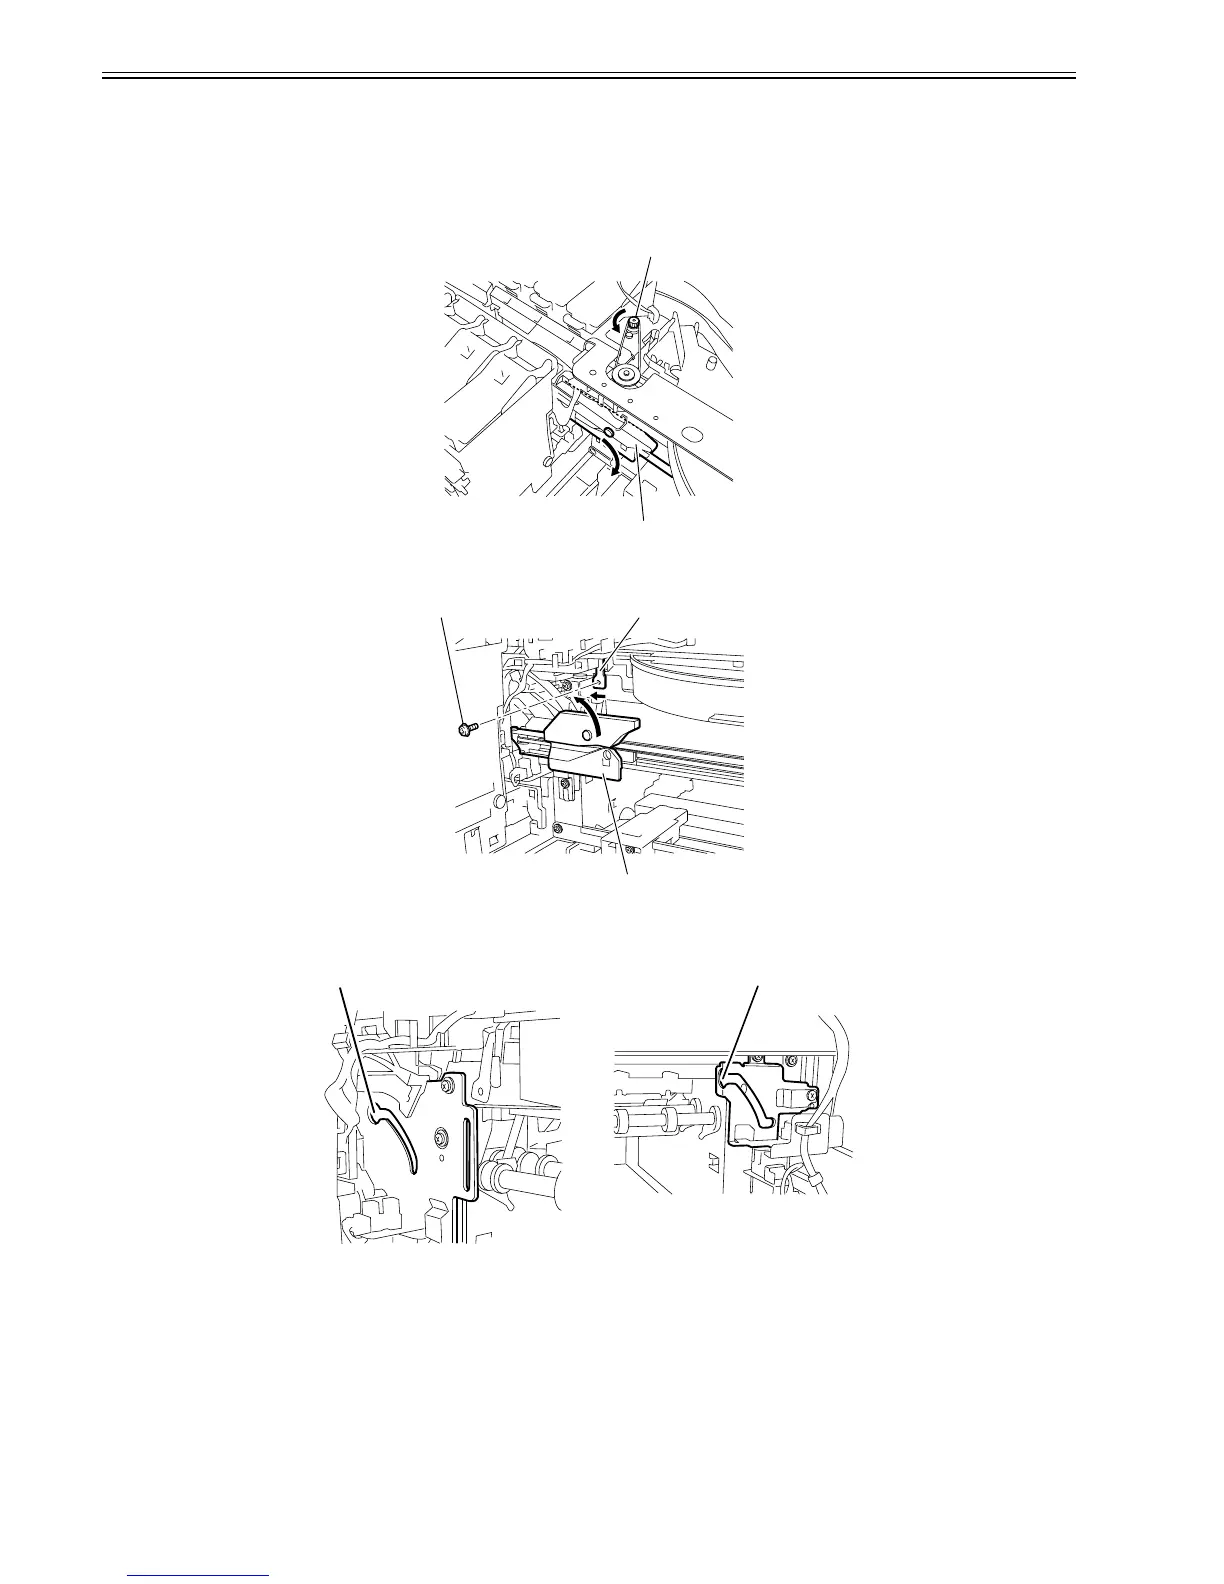
2) Turn the motor pulley[1] in the direction of the arrow to lower the cutter unit[2].
F-4-32
3) Remove the screw[1], shift the stopper[2] to the left, and the slide the cutter unit[3] to upper left to remove it.
F-4-33
b) Points to note on Disassembly an Reassembly of Cutter unit
1) When disassembling or reassembling the cutter unit, align the cutter unit roller with the grooves[1] in the cutter lifter unit and cutter drive unit.
F-4-34
c) Removing the cutter lifter unit
[1]
[2]
[1] [2]
[3]
[1]
[1]




 To Next Page