Enable/disable the e-shredding (Océ Express WebTools)
Procedure
1.
Open a web browser and enter the system URL: http://<hostname>, to open the Océ Express
WebTools
2.
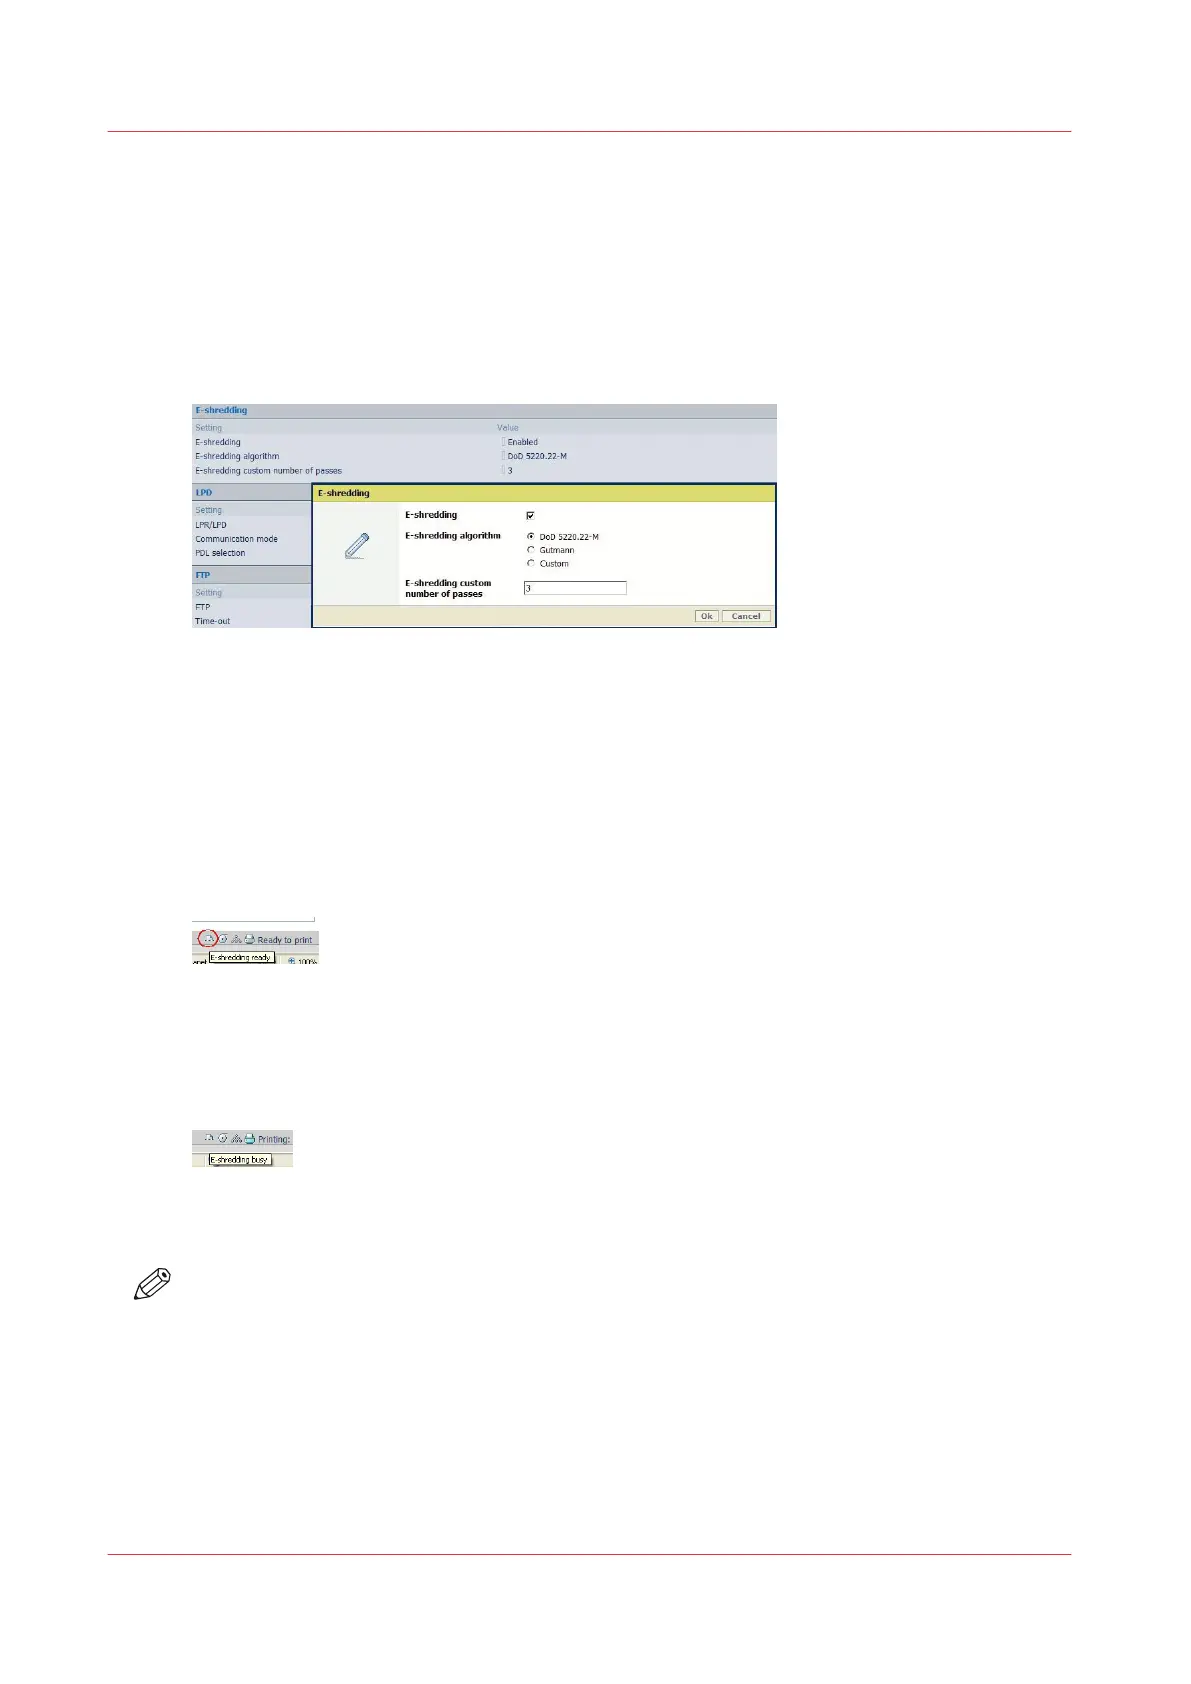
Open the 'Configuration' - 'Connectivity' page and select the 'E-shredding' section
3.
Click Edit
4.
Check 'E-shredding' feature to enable it
5.
Select the algorithm.
When you select 'Custom', set the number of passes
Result
When the E-shredding feature is enabled, an indication is displayed at 2 locations in the system:
• On the printer user panel, an indication is displayed in the System menu: 'E-shredding
enabled'
• In the Océ Express WebTools window, a new icon is added to the list of icons (bottom right)
Each time data (file's content or attributes) is deleted from the system, the e-shredding process
occurs.
For a while, the E-shredding feedback returns as 'busy':
Once the e-shredding data processed is complete, the status comes back to 'E-shredding ready' in
the Océ Express WebTools (roll over the icon) on a workstation or on the controller monitor
NOTE
In case some scanned files have a 'Scan destination file name' composed of more than 256
characters, on the controller or on the remote destination, they will be deleted, but they will not
be e-shredded (too long name).
Enable the e-shredding
80
Chapter 2 - Security on Océ PlotWave 300/350, PlotWave 750, PlotWave 900 and ColorWave 300