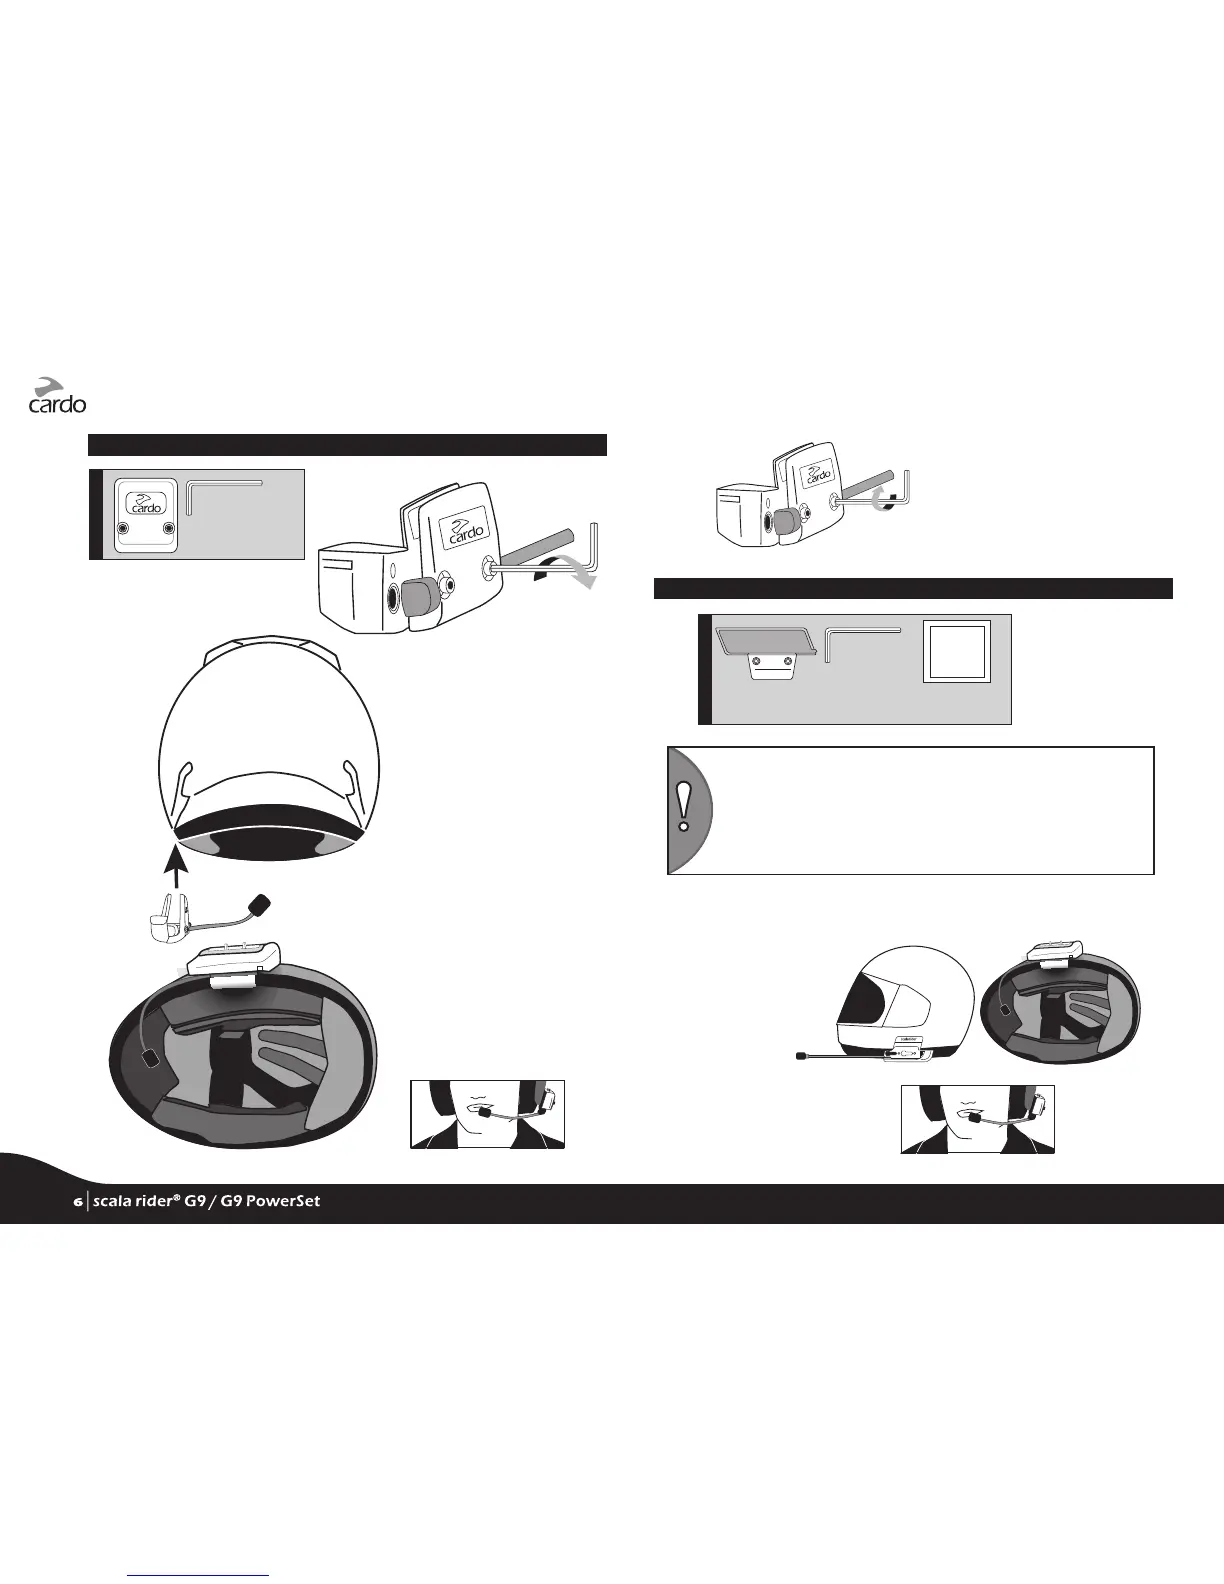
METHOD A: USING THE BACK PLATE
Push the back plate between the helmet’s
outer shell and inner padding
Adjust the clamp’s location so that the
microphone is located opposite
the center of your mouth.
Loosen both screws
Allen
Wrench
Back Plate
➊
➋
➍
Alcohol
Pad
METHOD B: USING THE GLUE PLATE
(This can only be done once!)
Tighten the screws
NOTE: Please read the entire section before proceeding. While we have no
reason to believe that the gluing option might negatively aect any helmet,
Cardo does not assume any responsibility to that eect, irrespective of its
nature and circumstances. The Glue Plate is oered as an option that you
may choose to use at your own risk and subject to renouncement of any
future claims.
Glue Plate Allen Wrench Pre-moistened
Towlette
Adjust the audio kit’s
location so that the
microphone is
located in front of
the center of your
mouth.
Remove the Back Plate by taking out both screws with the Allen Wrench.
6
| scala rider
®
G9 / G9 PowerSet
6
| scala rider
®
G9 / G9 PowerSet