12
ENG
“compactsteam” +0300092IE - rel. 1.2 - 14.01.2021
3. INSTALLATION
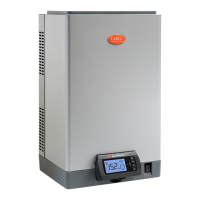
3.1 Positioning
• The compactSteam unit is designed for wall-mounting;
• to ensure correct steam distribution, position the humidier near the
point of steam distribution steam;
• make sure the humidier is vertical, leaving the minimum clearances
(see Fig.3.a and Tab. 3.a for the installation of the duct model and Fig.
3.b and Tab. 3.b for the room model) to ensure safety and allow for the
necessary maintenance operations.
Duct steam distribution
A
B
C
D
E
F
Millimetres Inches
A 150 mm 6“
B 150 mm 6“
C 150 mm 6“
D 150 mm 6“
E 600 mm 24“
F max. 0.2
Tab. 3.a
Fig. 3.a
Direct room distribution
C
D
A
B
Millimetres Inches
A 150 mm 6“
B 1500 mm 60“
C 1800 mm 72“
D 600 mm 24“
Tab. 3.b
Fig. 3.b
Dimensions of the unit (for all models):
A
B
C
Millimetres Inches
A 341 mm 13.4”
B 204 mm 8.1”
C 600 mm 23.7”
kg lb
Empty weight 8 kg 18 lib
Packaged
weight
10 kg 22 lib
Weight in-
stalled + water
12 kg 26 lib
Tab. 3.c
Fig. 3.c
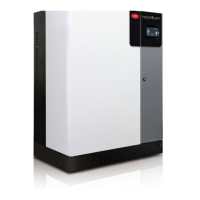
3.2 Mounting
Removing the front cover
The front cover is fastened to the body unit using four Phillips head screws
located in the four corners of the unit. Use a screwdriver to unscrew the
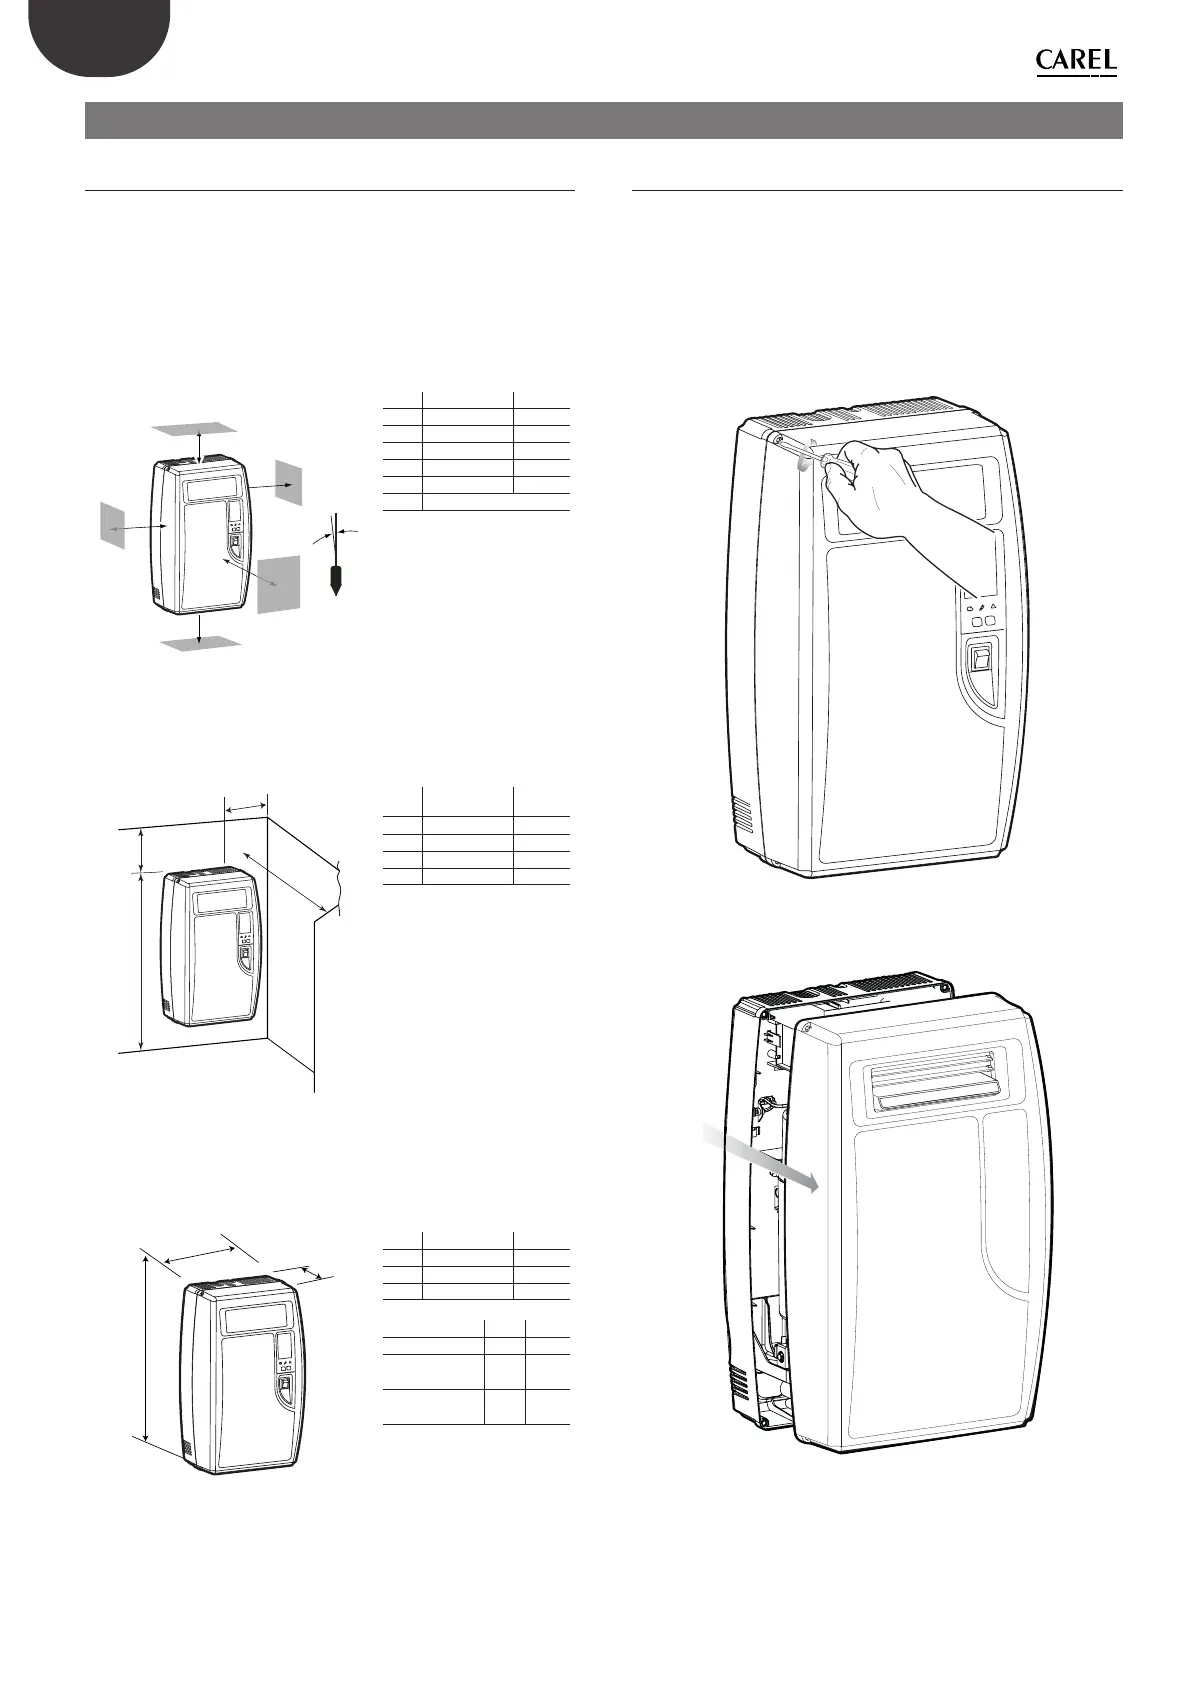
four screws on the cover as shown in Fig. 3.d, then remove the cover
by simply pulling it outwards (Fig. 3.e). To replace the cover, perform the
same operations in the reverse order.
Be careful not to over-tighten the screws.
Fig. 3.d
Fig. 3.e