BT2 user manual - H-5911-9004-02-B Page | 103
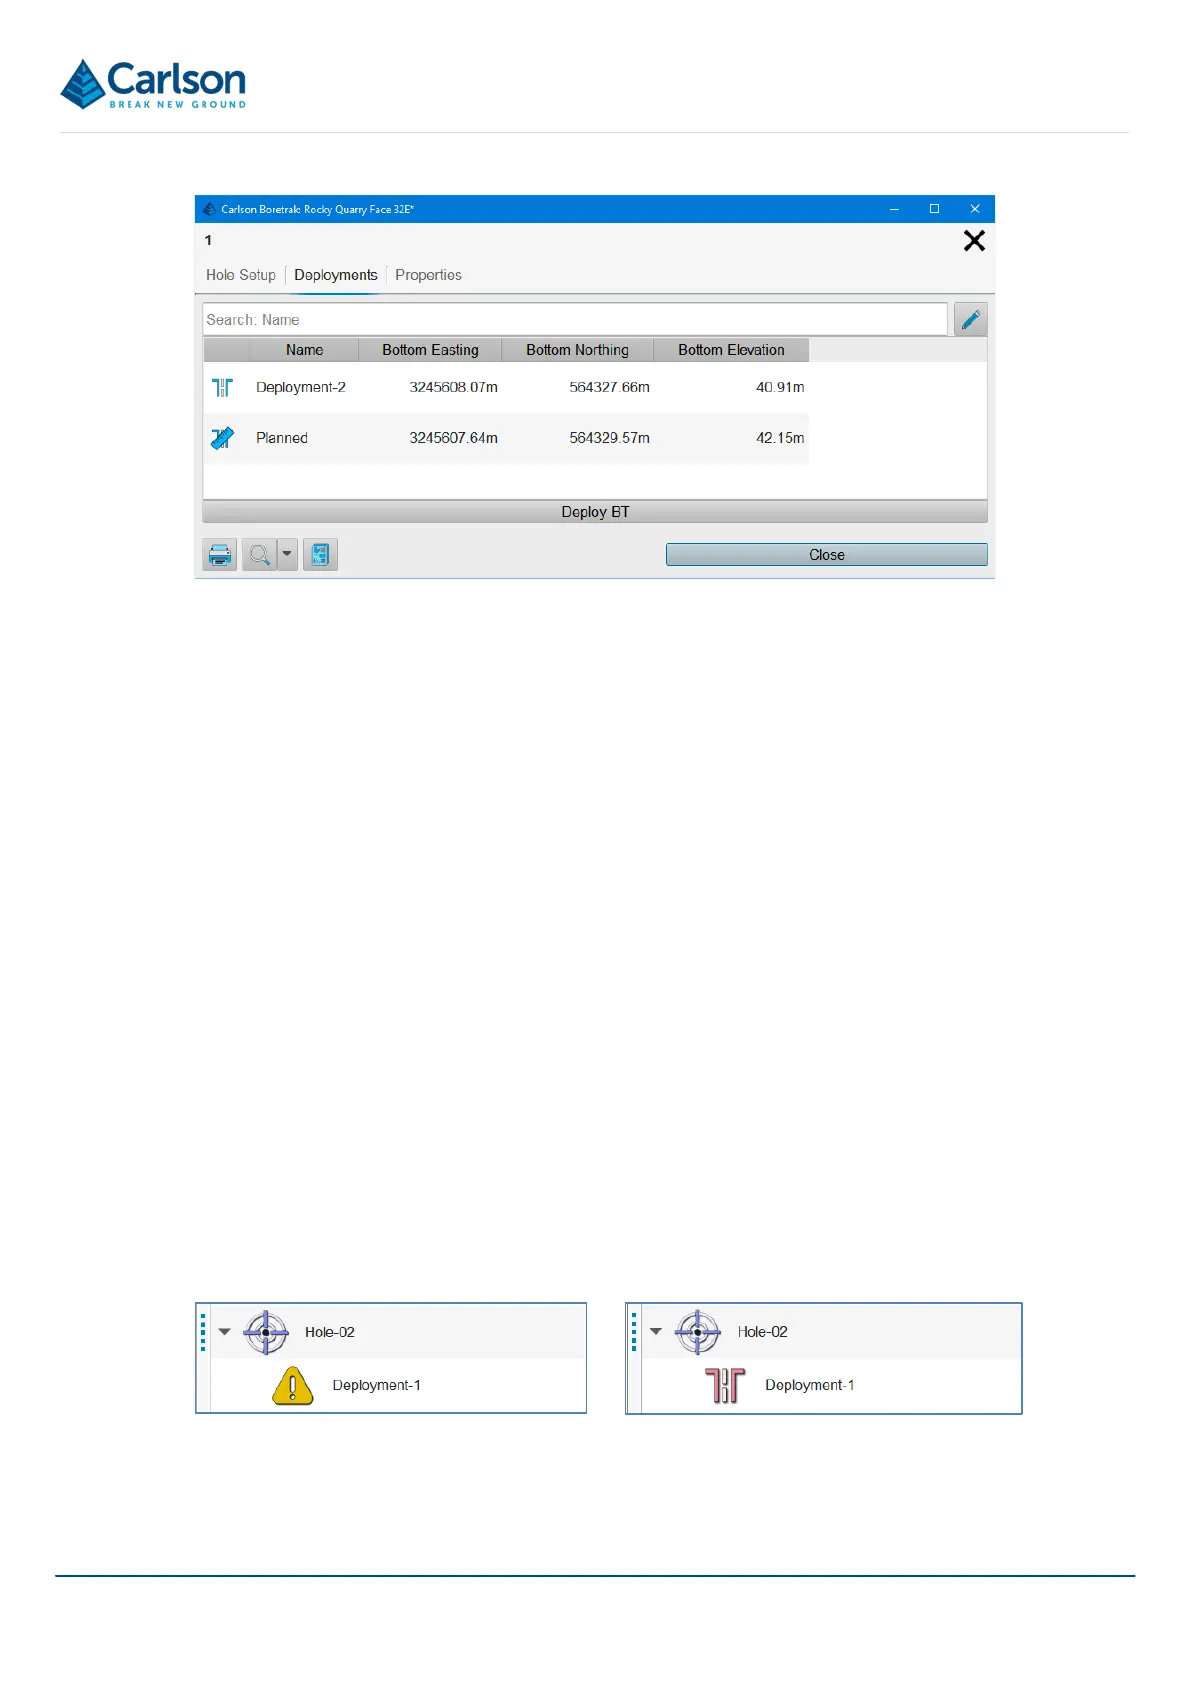
A list of all deployments made from the selected Hole are displayed, as well as the Planned hole, if setup. Each
row in the list of deployments displays the Name of the deployment, the coordinates of the end of the deployment
and a Deploy BT button.
To view details of a deployment in the list, tap on the appropriate deployment to open the Deployment Details
window (see section 14.1.4).
To start a survey from the end of a specific deployment, tap the Deploy BT button next to the appropriate hole. You
may use this option if, for example, the Boretrak2 probe is still positioned in the hole at the end of a deployment
after the operation was interrupted due to power failure. Alternatively, if you return to the site of a previous
deployment, but do not wish to replicate the whole series of Boretrak readings, you can simply deploy down to the
same position and then commence operations from the bottom of the hole.
14.3 Deployment
Each Deployment in a project has its own element in the Project tab. There may be multiple deployments
underneath a single Hole.
• The Deployment Visible / invisible button toggles all these elements on and off in the 3D View.
• The Deployment Zoom button positions the extents of all these elements within the 3D View.
• The Deployment Export button exports data from all these elements.
Note that the Deployment element in the Project tab is shown as a yellow warning icon until all data from that
deployment has been downloaded. Data from any deployment should not be accepted until the warning icon has
changed to the standard Deployment icon.
Tap the Deployment Details button to open the Deployment Details window.
Figure 110 Hole > Deployments
Figure 111 Deployment icon before all data is downloaded (left) and after download (right)
 Loading...