Page | 37
always use the instrument for face profiling and will always require a Horizontal scan, using a Chord interval of 0.4
m, with a Code ID of 50 and using the Fast speed setting. Once selected in the Saved settings screen, these
options do not then have to be selected each time the instrument is used.
Note that if any values are set to Manual, these options will be configurable each time a FastScan operation is
initiated. Therefore, if the Quarryman Pro is regularly used in a variety of different ways, leave all settings as Manual.
The options that can be changed are:
• Units: only configurable from this screen. Options: Metric or Imperial.
• Increment: select Arc, Chord or Manual.
• Scan pattern: select Horizontal, Vertical, Both or Manual.
• Scan speed: select Fast, Medium, Slow or Manual.
• Chord (m): enter a value in metres or feet. This value then appears as the default value when FastScan is
selected, but can be changed as required for each survey. The Chord Length option will not be visible if
Arc increment has been selected.
• Arc (degs): enter a value in degrees. This value then appears as the default value when FastScan is
selected, but can be changed as required for each survey. The Arc Segment option will not be visible if
Chord increment has been selected.
• Scan code: enter a code for the scan. This appears as the default value when FastScan is selected, but
can be changed as required for each survey.
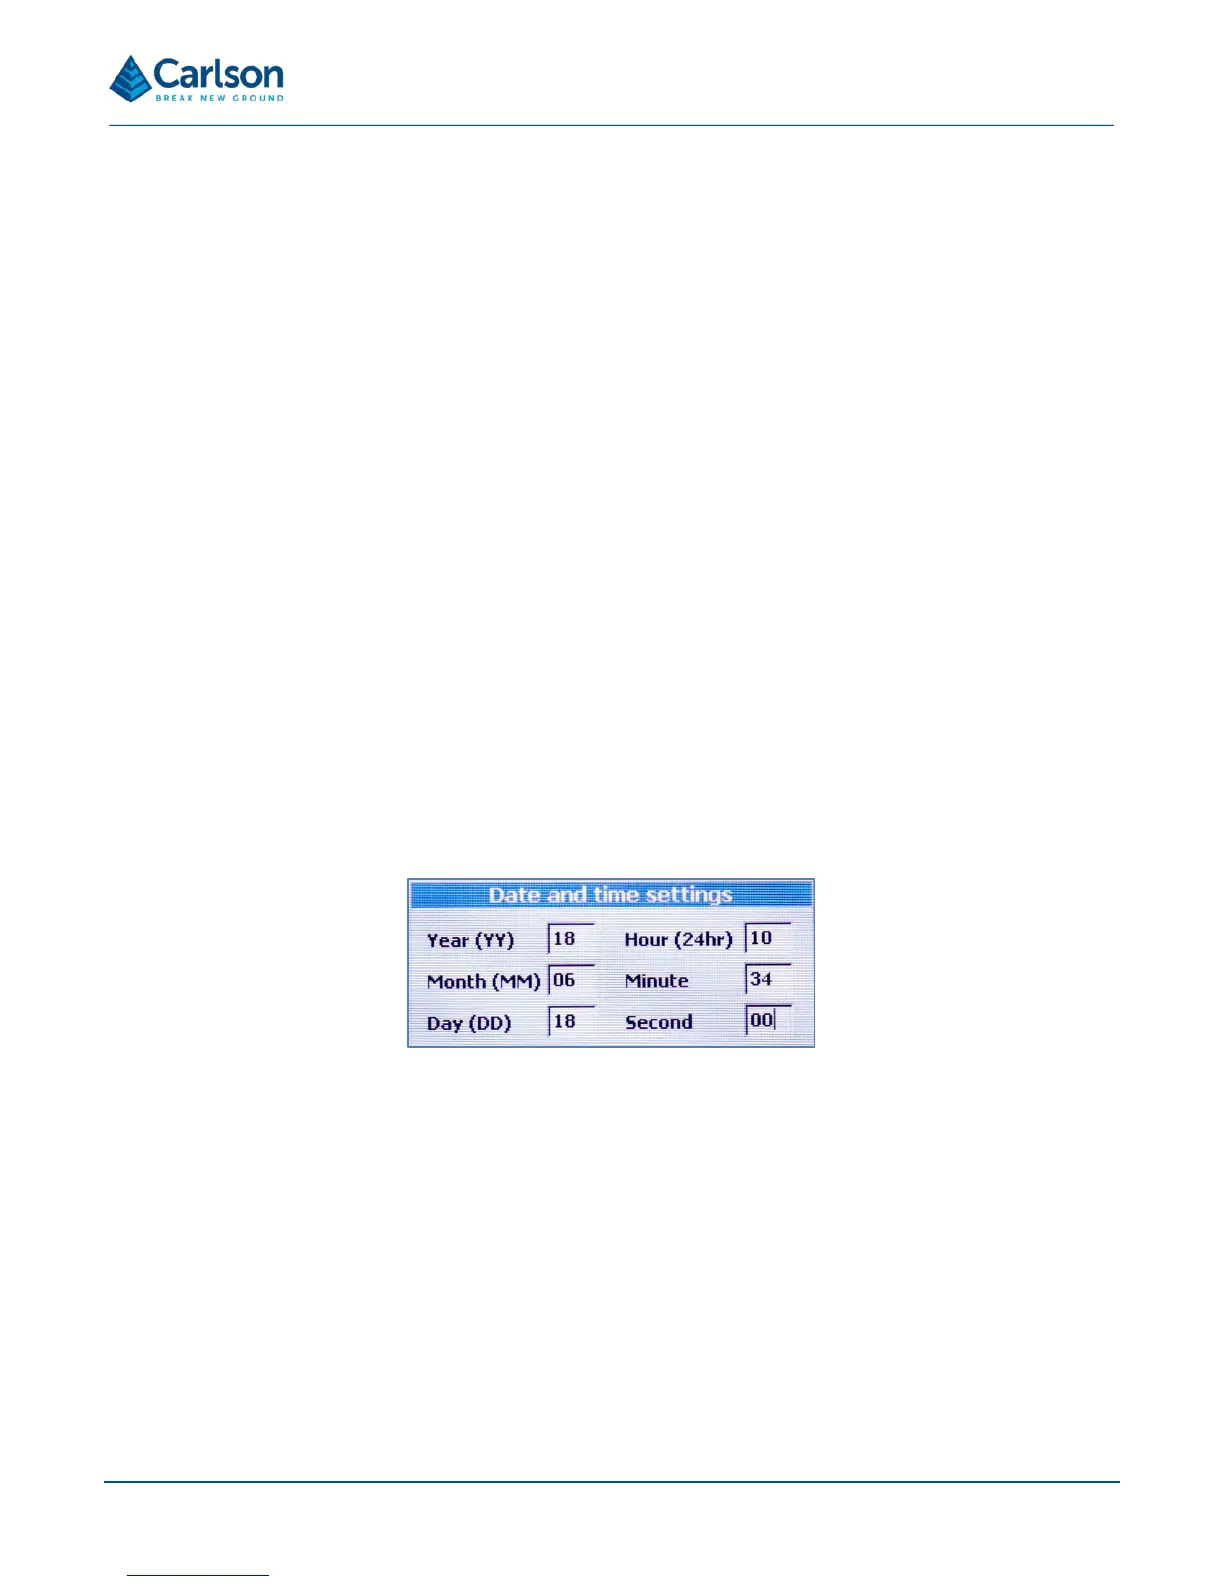
6.8 Date and time settings
Select Adjust date and time to set the current date and time used by the Quarryman Pro
The time and date are set in the factory, but you may need to reset the values if the unit has crossed time zones or
there are daylight-savings time changes.
NOTE: when the date and time has been entered, the Quarryman Pro powers itself OFF to save the selected
configuration. A message appears offering the chance to either save the changes and shut down the instrument, or
to abort any changes and return to the main menu. Press ENTER to continue or HOME to abort.
The following values can be set. Each requires two digits. Press ENTER to accept each value and then ENTER
again to save the values to memory.
• Month: MM.
• Day: DD.
• Year: YY.
 Loading...