64
INSTALLATION
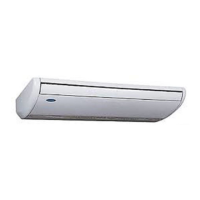
Step 1 — Horizontal Ceiling and Hi-Performance
Ceiling Unit Installation
Anchoring the equipment in place is accomplished by using the
mounting points provided with 3/8 in. allthread rod and other
hardware (not supplied with unit). The unit must be positioned so
that the coil is on a LEVEL PLANE. Care must be taken to ensure
that the drain pan does not slope away from the outlet connection.
Other field-furnished mounting devices such as rubber in-shear or
spring-type vibration isolators selected by the contractor or engi
-
neer may be substituted for the factory grommets and should be
used where factory grommets are not provided. Refer to the device
manufacturer for installation instructions.
Step 2 — Place Units in Position
42C UNITS
Threaded Rod Installation
Refer to the unit product drawings for mounting hole locations
and sizes. On certain units, shipping screws or braces must be
removed after the unit is installed. Be sure to check all tags on the
unit to determine which, if any, of these devices need to be
removed. Refer to Table
4 and Fig. 57-58.
Drip lip installation
1. Locate where the Drip Lip will be installed. The supplied
Drip Lip should be installed on the drain tube side of the coil
assembly for 42CA/CE/CK/CG units with factory supplied
valve packages. (See Fig. 63.) The optional drain pan side
mounting location may be used for 42CA/CE units that do
not have factory supplied valve packages.
NOTE: The mounting holes on the drain pan may be partially con-
cealed by insulating spray foam. Either the round or slotted
through-holes in the Drip Lip can be used for installation.
2. Secure the Drip Lip to the Drain pan using (2) of the included
No. 8 x 3/8 in. (9.5 mm) screws. Refer to Fig. 59-62 of unit
matching your unit drip lip.
Horizontal open coil unit model 42CA may be mounted using the
neoprene grommets provided.
Fig. 57 — Thread Rod Suspension (42CA/CE Units)
SUSPENSION MOUNTING
Channel Mount Suspension
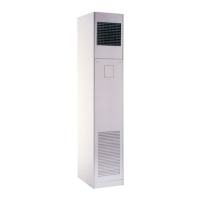
Cabinet unit models 42CK and 42CG may be mounted using four
neoprene grommets provided in the four hanger holes in the case
top. See Fig. 58.
Fig. 58 — Channel Mount Suspension
(42CK Units)
Fig. 59 — Left-Hand Extension Drip Lip
Fig. 60 — Left-Hand Side Drip Lip
(Without Valve Package)
IMPORTANT: It should be noted that unacceptable system
operating characteristics and/or performance may result from
improper or inadequate unit structural support. Adequate clear
-
ance must be provided for service and removal of the equipment
and any accessory components.
NOTE: Unit 42CA shown. Threaded rods and hardware are provides by others.
Table 4 — Threaded Rod Sizing Recommendation
a
a. Threaded rods and hardware are provided by others.
MODEL
ROD DIAMETER
in. (mm)
ROD QTY
42C* 02-12
3/8 (9.5)
4
42D* 06-20
42DC 06-20 6
NOTE: Hanger rails and hardware are provided by others. 42CK unit shown.
 Loading...