3
INTRODUCTION
Carrier fan coil units represent a prudent investment offering
trouble-free operation and long service with proper installation,
operation, and regular maintenance. Your equipment is initially
protected under the manufacturer’s standard warranty; however,
this warranty is provided under the condition that the steps out
-
lined in this manual for initial inspection, proper installation, regu-
lar periodic maintenance, and everyday operation of the equip-
ment be followed in detail. This manual should be fully reviewed
in advance before initial installation, start-up, and any mainte
-
nance. Should any questions arise, please contact your local sales
representative or the factory BEFORE proceeding.
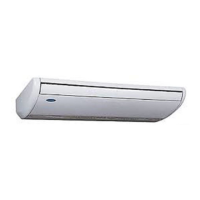
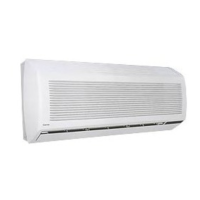
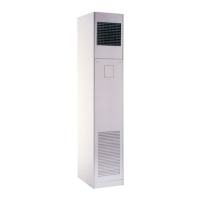
This document contains general installation instructions for the
42C,D,V unit fan coils. Refer to the unit wiring diagram installed
on the blower housing or specific manufacturer literature for any
other type of factory-mounted controls.
See drawings for unit configurations, dimensions, clearances, and
pipe connections. Refer to unit wiring label for all electrical con
-
nections; follow NEC (National Electrical Code) and local codes.
PHYSICAL DATA
Component weight data, shipping weights, and filter data of the
42C, D, V units are provided in Tables 1-3.
PRE-INSTALLATION
Unpack and Inspect Units
All units are carefully inspected at the factory throughout the man-
ufacturing process under a strict detailed quality assurance pro-
gram, and, where possible, ALL major components and
sub-assemblies are carefully tested for proper operation and veri
-
fied for full compliance with factory standards. Operational testing
of some customer-furnished components such as electronic con
-
trol valves and digital controllers may be a possible exception.
Each unit is carefully packaged for shipment to avoid damage
during normal transit and handling. Equipment should always be
stored in a dry place, and in the proper orientation as marked on
the carton. All shipments are made F.O.B. (Free On Board) facto
-
ry and are the responsibility of the receiving party to inspect the
equipment upon arrival. Any obvious damage to the carton and/or
its contents should be recorded on the bill of lading, a claim should
be filed with the transportation company, and Carrier should be
advised. After determining the condition of the carton exterior,
carefully remove each unit from the carton and inspect for hidden
damage. At this time, check to make sure that “furnished only”
items such as thermostats, grilles etc. are accounted for whether
packaged separately or shipped at a later date. Any hidden damage
should be recorded and immediately reported to the transportation
company, a claim should be filed with the transportation company,
and Carrier should be notified. In the event a claim for shipping
damage is filed, the unit, shipping carton, and all packing must be
retained for physical inspection by the transportation company. All
equipment should be stored in the factory shipping carton with
internal packing in place until installation.
At the time of receipt, the equipment type and arrangement should
be verified against the order documents. Should any discrepancy
be found, the local sales representative should be notified immedi
-
ately so that proper action may be taken. Should any questions
arise concerning warranty repairs, the factory must be notified
BEFORE any corrective action is taken. Where local repairs or al
-
terations can be accomplished, the factory must be fully informed
of the extent and expected cost of those repairs before work is be
-
gun. Where factory operations are required, the factory must be
contacted for authorization to return equipment and a Return Au
-
thorization Number will be issued. Unauthorized return shipments
of equipment and shipments not marked with an authorization
number will be refused. In addition, any claims for unauthorized
expenses will not be accepted by the manufacturer.
Unit Protection from Damage
All equipment is designed and fabricated with robust materials
and presents a rugged appearance. Still, great care must be taken
to assure that no force or pressure is applied to the coil, piping, or
drain stub-outs during handling. Depending on the options and ac
-
cessories, some units may contain delicate components that may
be damaged by improper handling. All units shall be handled by
the chassis or as close as possible to the unit mounting point loca
-
tions. In the case of a full cabinet unit, the unit must be handled by
the exterior casing. This is acceptable provided the unit is main
-
tained in an upright position, and no force is applied that may
damage internal components or painted surfaces.
The equipment must always be properly supported. Temporary
supports used during installation or service must be adequate to
hold the equipment securely. Equipment should always be stored
in the proper orientation as marked on the carton. To maintain
warranty, protect units against hostile environment (such as rain,
snow, or extreme temperatures), theft, vandalism, and debris on
jobsite. Equipment covered in this manual is not suitable for out-
door installations. Do not allow foreign material to fall into drain
pan. Prevent dust and debris from being deposited on motor, fan
wheels and cooling/heating coils. Failure to do so may have seri-
ous adverse effects on unit operation, and in the case of the motor
and blower assembly, may result in immediate or premature fail-
ure. Manufacturer's warranty is void if foreign material is allowed
to be deposited on the motor or blower wheels of any unit. Some
units and/or job conditions may require some form of temporary
covering during construction.
Prepare Jobsite for Unit Installation
To save time and to reduce the possibility of costly errors, set up a
complete sample installation in a typical room at jobsite. Check all
critical dimensions such as pipe, wire, and duct connection
requirements. Refer to unit clearances in Fig.
2-4. Refer to job
drawings and product dimension drawings as required. Refer to
Fig.
5-56 and Fig. I in Appendix A for wiring diagram. Instruct all
trades in their part of the installation.
Identify and Prepare Units
Be sure power requirements match available power source. Refer
to unit nameplate and wiring diagram.
1. Check all tags on unit to determine if shipping screws are
to be removed. Remove screws as directed.
2. Rotate the fan wheel by hand to ensure that the fan is
unrestricted and can rotate freely. Check for shipping dam-
age and fan obstructions. Adjust blower motor as
required.
3. Perform a “dry fit” of valve assembly that may be shipped
unattached to unit coil assembly. Should any questions
arise on fit-up, please contact your local representative.
4. Horizontal plenum type 42CE units may be shipped with a
bottom return-air inlet. These units may be converted to
rear return as outlined in Appendix C on page 89.
5. High-performance plenum-type 42DC units may be
shipped with a bottom return-air inlet. These units may be
converted to rear return as outlined in Appendix C on
page 89-90.
 Loading...