12
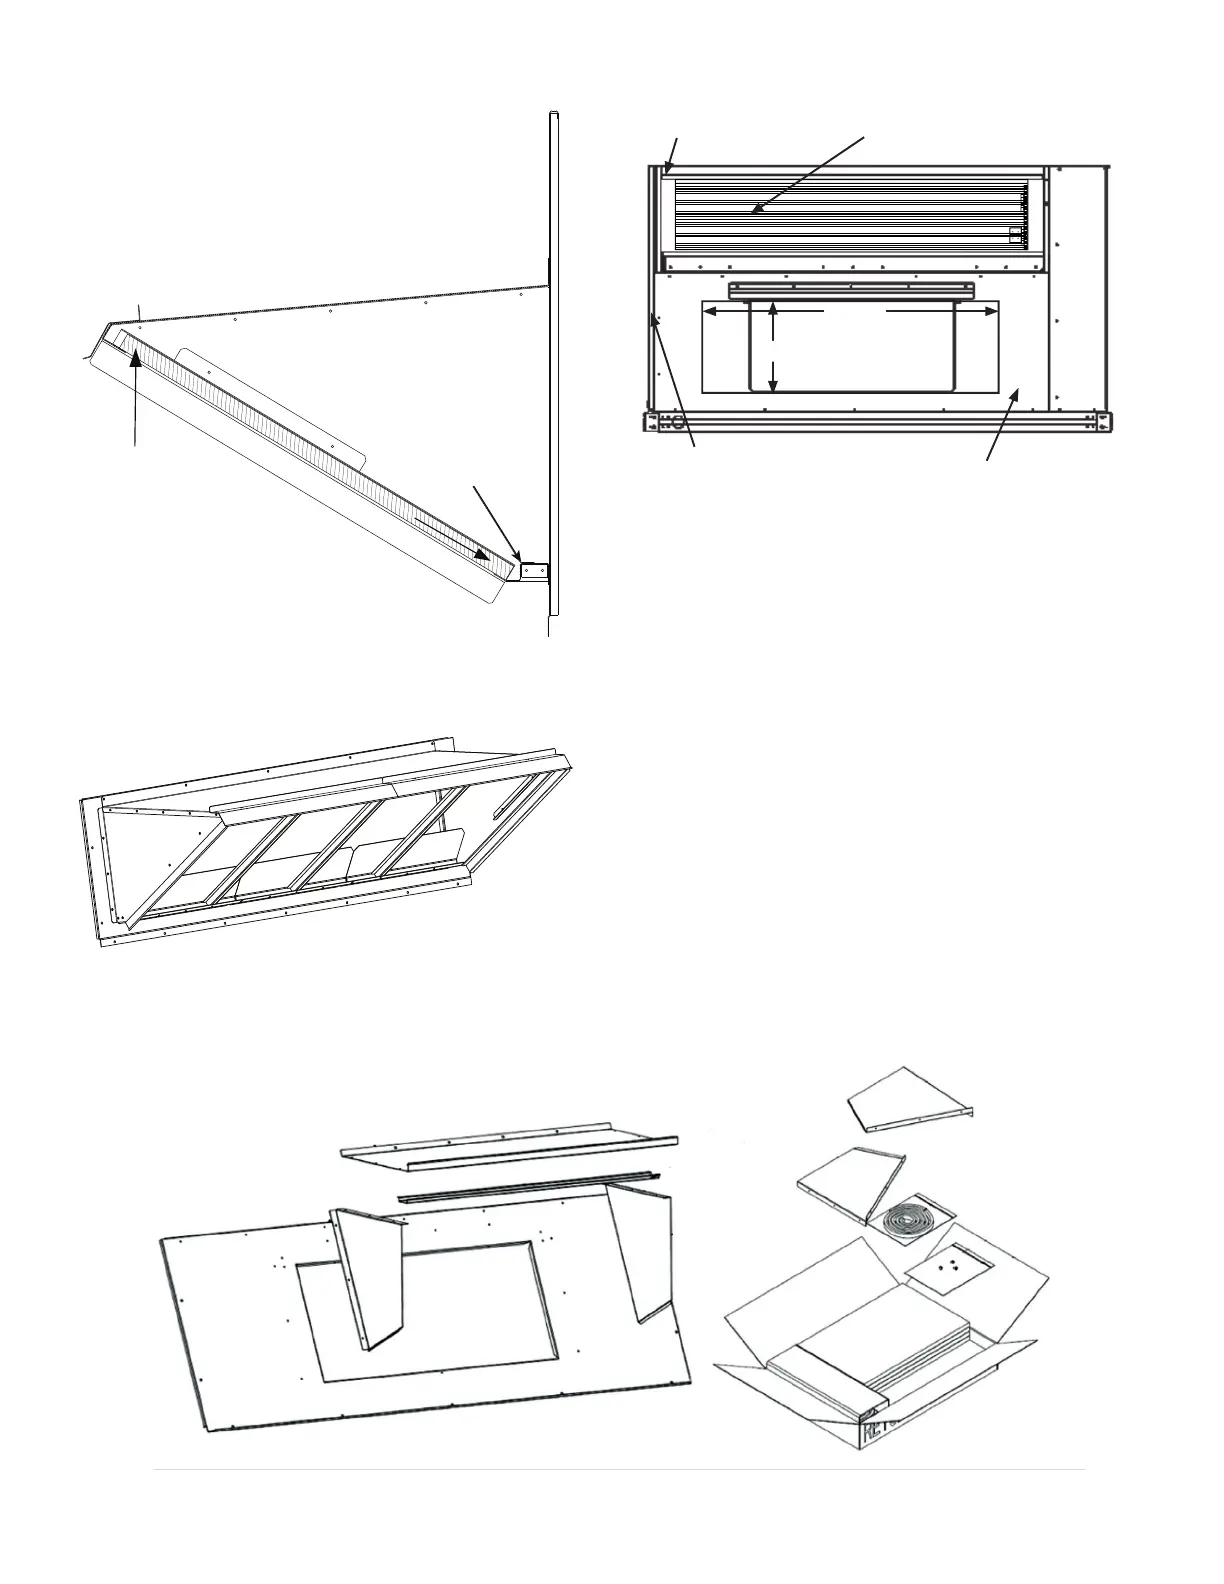
Fig. 27 — Outdoor Air Screen Installation
Fig. 28 — Completed Hood Assembly
Fig. 29 — End View
Barometric Hood Assembly
The barometric hood can be assembled in vertical or horizontal
configuration. Figure 30 illustrates the barometric hood parts.
BAROMETRIC HOOD (VERTICAL CONFIGURATION)
1. Remove the hood top panel from its shipping position on the
unit end. (See Fig. 31.)
2. Remove the side panels located in the hood parts box (see
Fig. 32).
3. Install parts as shown in the following exploded view (see
Fig. 33) using the seal strip and screws provided in the parts
box. Figure 34 illustrates the installed barometric hood parts.
Fig. 30 — Barometric Hood Parts
Insert
Air Screen
Slide
Into
Position
18 3/8"
Provided
Upper panel
Economizer outside
Air damper
Economizer actuator
Access through left
Side panel
Provided bottom panel
With return duct opening
61 9/16"
 Loading...