EN-58
Getting Ready
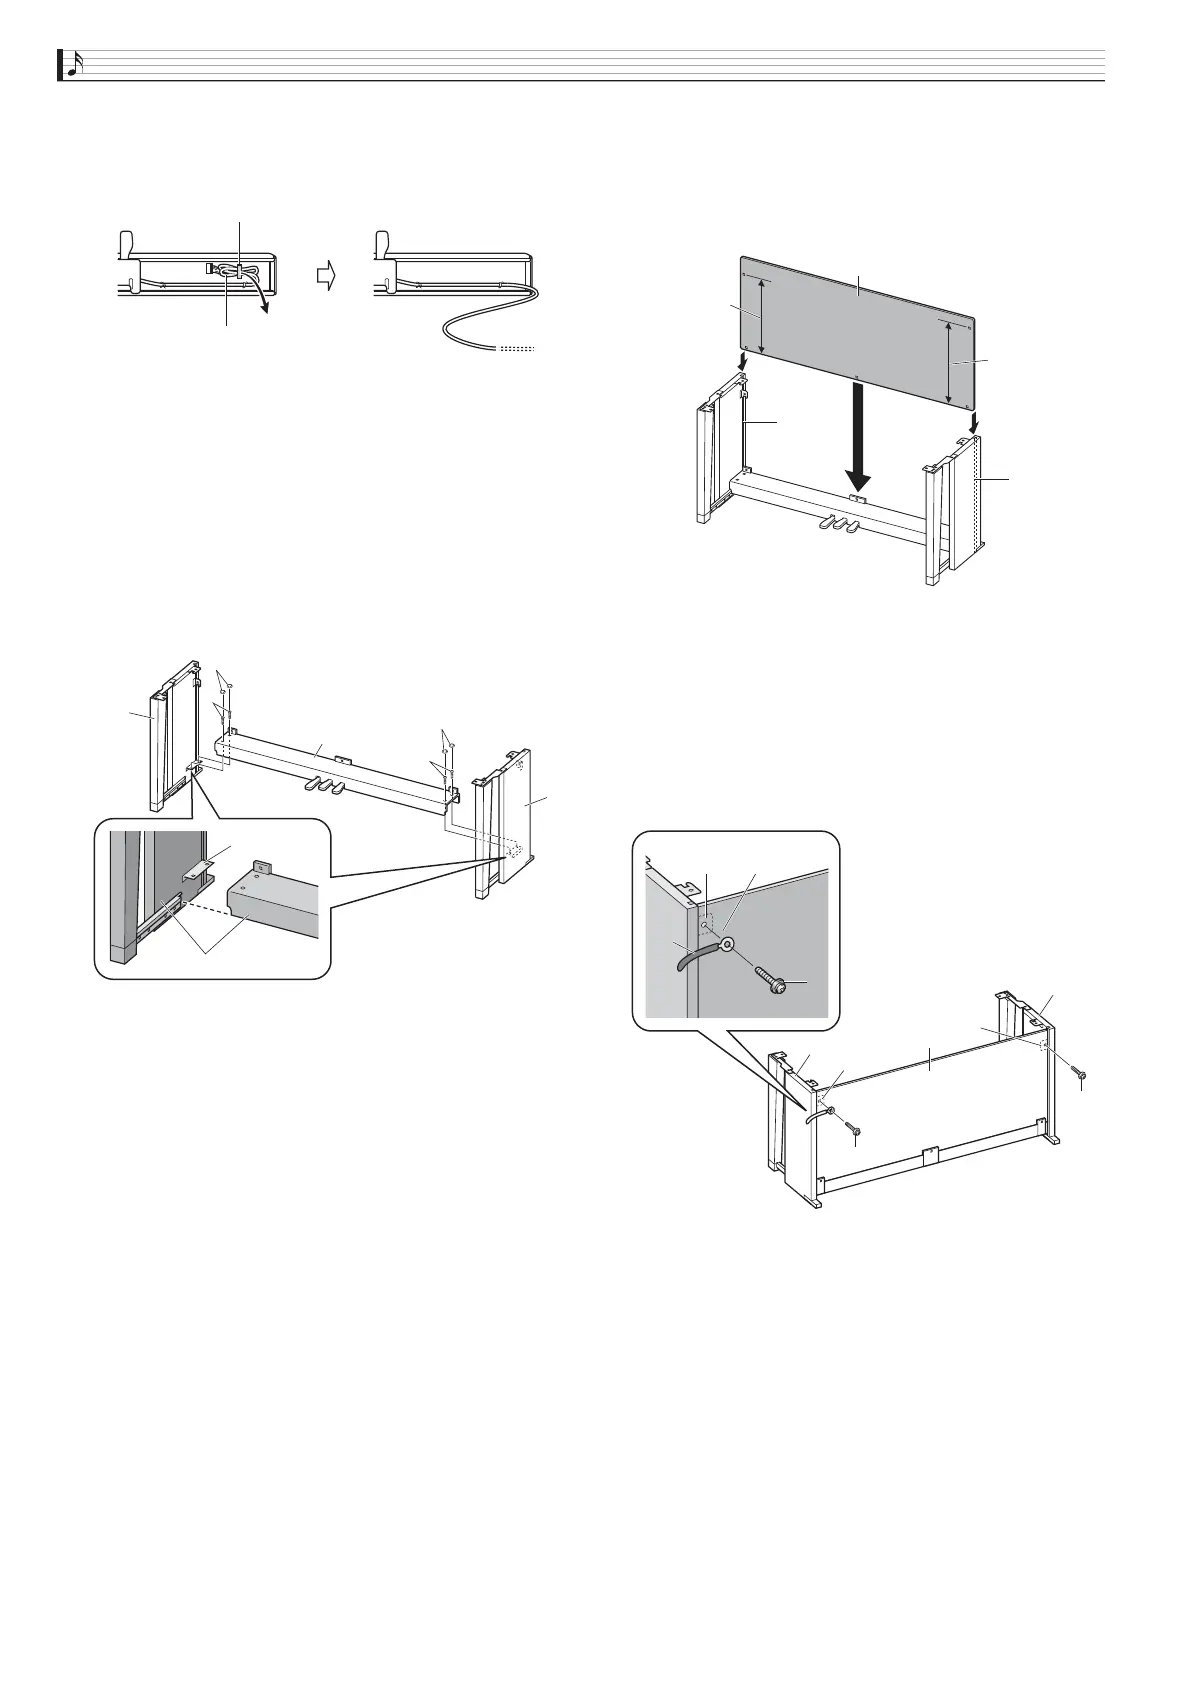
1.
Unfasten the band
that bundles the pedal
cable to the back of crosspiece
and pull
the pedal cord out from the crosspiece.
2.
Attach side panels
and
to crosspiece
. Secure the side panels using four screws
.
• When installing parts
, slide the brackets
into
the slots in either end of crosspiece
. If the brackets
are not inserted into the ends of the crosspiece
as far as they will go, the screws
will not be able to
enter into the screw holes of the brackets
, which
can strip the threads of the screws.
• Cover the screw heads with the caps
.
3.
Slide back panel
into the grooves
of
the side panels.
• When installing back panel
, make sure that the
high screw holes of the back panel are to the right,
and the low screw holes are to the left.
4.
Attach the left side of back panel
to the
bracket
of side panel
, and the right
side to side panel
. Partially tighten two
screws to hold the back panel in place
temporarily.
• At location
, slip the clip
onto to the screw
before installing the screw.