14-17
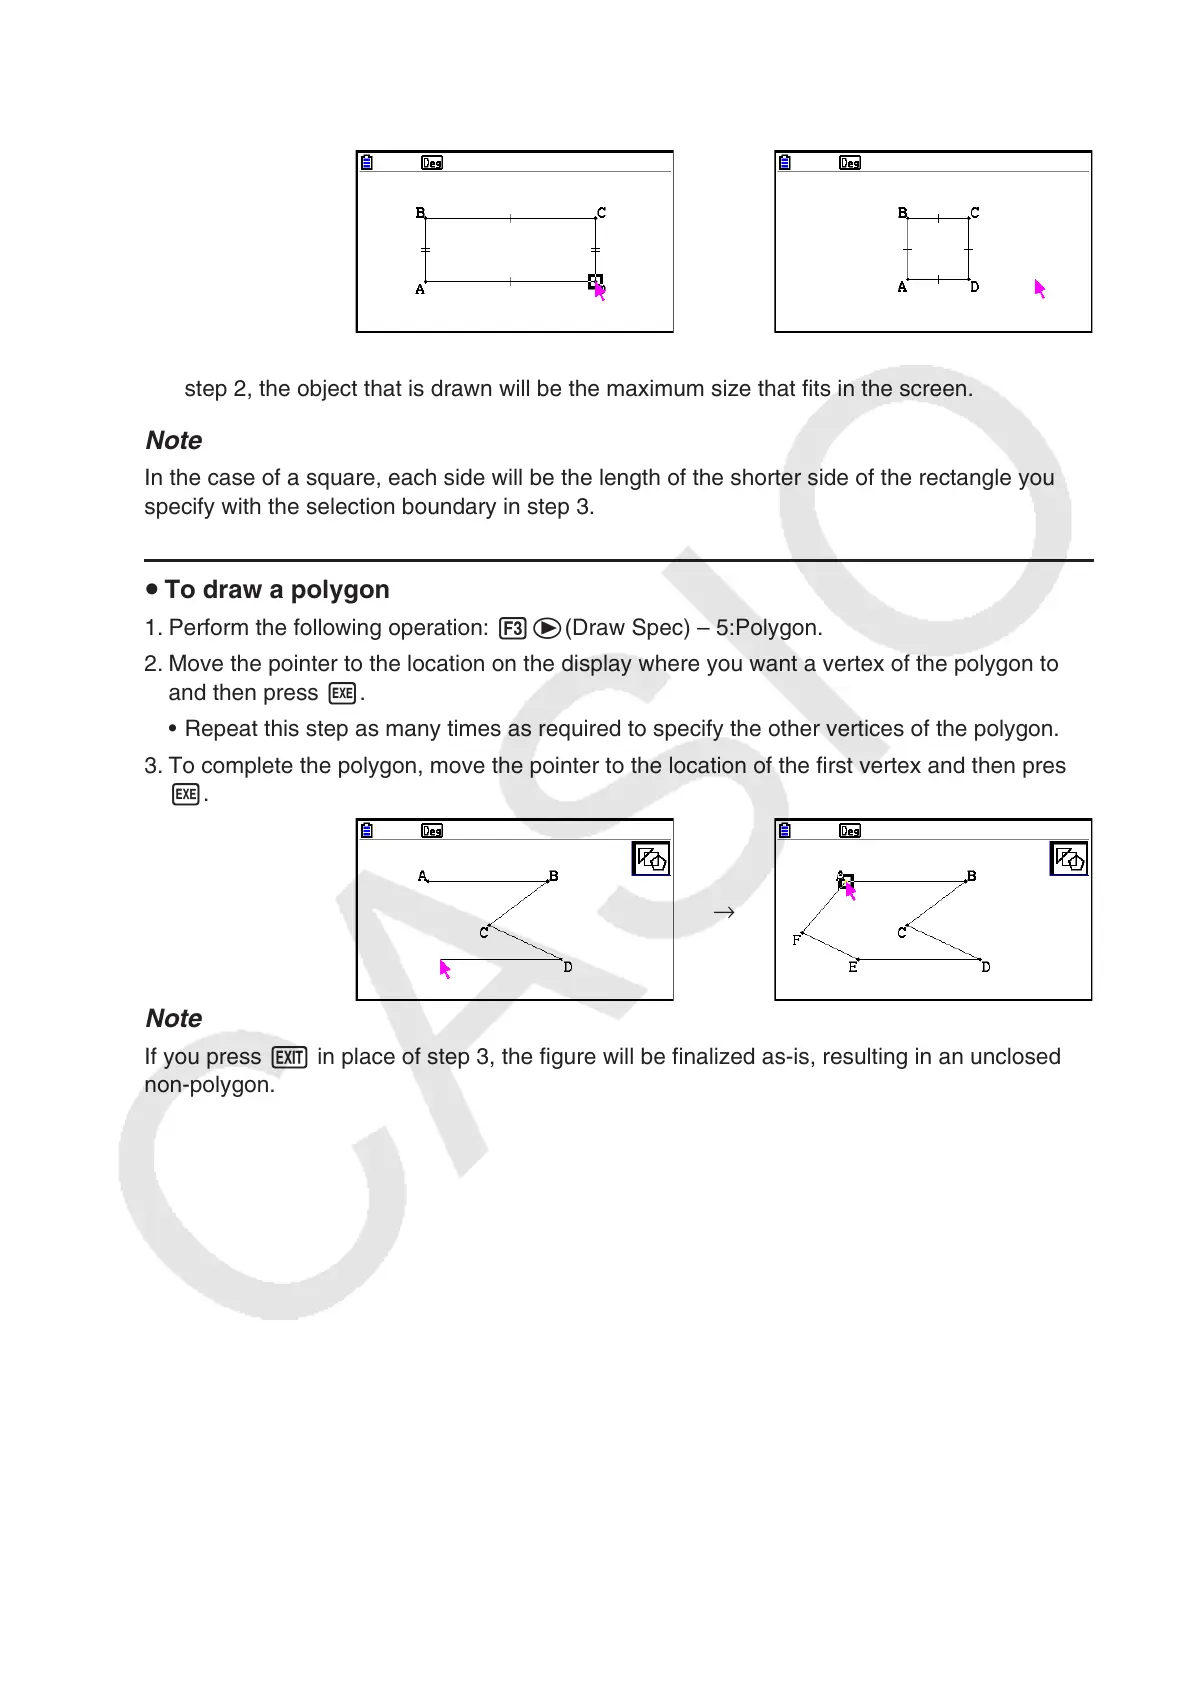
4. Press w.
• This draws a rectangle or square.
• If the location of the pointer when you press w is very close to the point you specified in
step 2, the object that is drawn will be the maximum size that fits in the screen.
Note
In the case of a square, each side will be the length of the shorter side of the rectangle you
specify with the selection boundary in step 3.
u To draw a polygon
1. Perform the following operation: 3e(Draw Spec) – 5:Polygon.
2. Move the pointer to the location on the display where you want a vertex of the polygon to be
and then press w.
• Repeat this step as many times as required to specify the other vertices of the polygon.
3. To complete the polygon, move the pointer to the location of the first vertex and then press
w.
→
Note
If you press J in place of step 3, the figure will be finalized as-is, resulting in an unclosed
non-polygon.