ε-23
Using a Custom Probe
7. Using a Custom Probe
The sensors shown in the CASIO, Vernier, and CMA sensor lists under “4. Selecting a
Sensor” are E-CON4 mode standard sensors. If you want to sample with a sensor not
included in a list, you must configure it as a custom probe.
Registering a Custom Probe
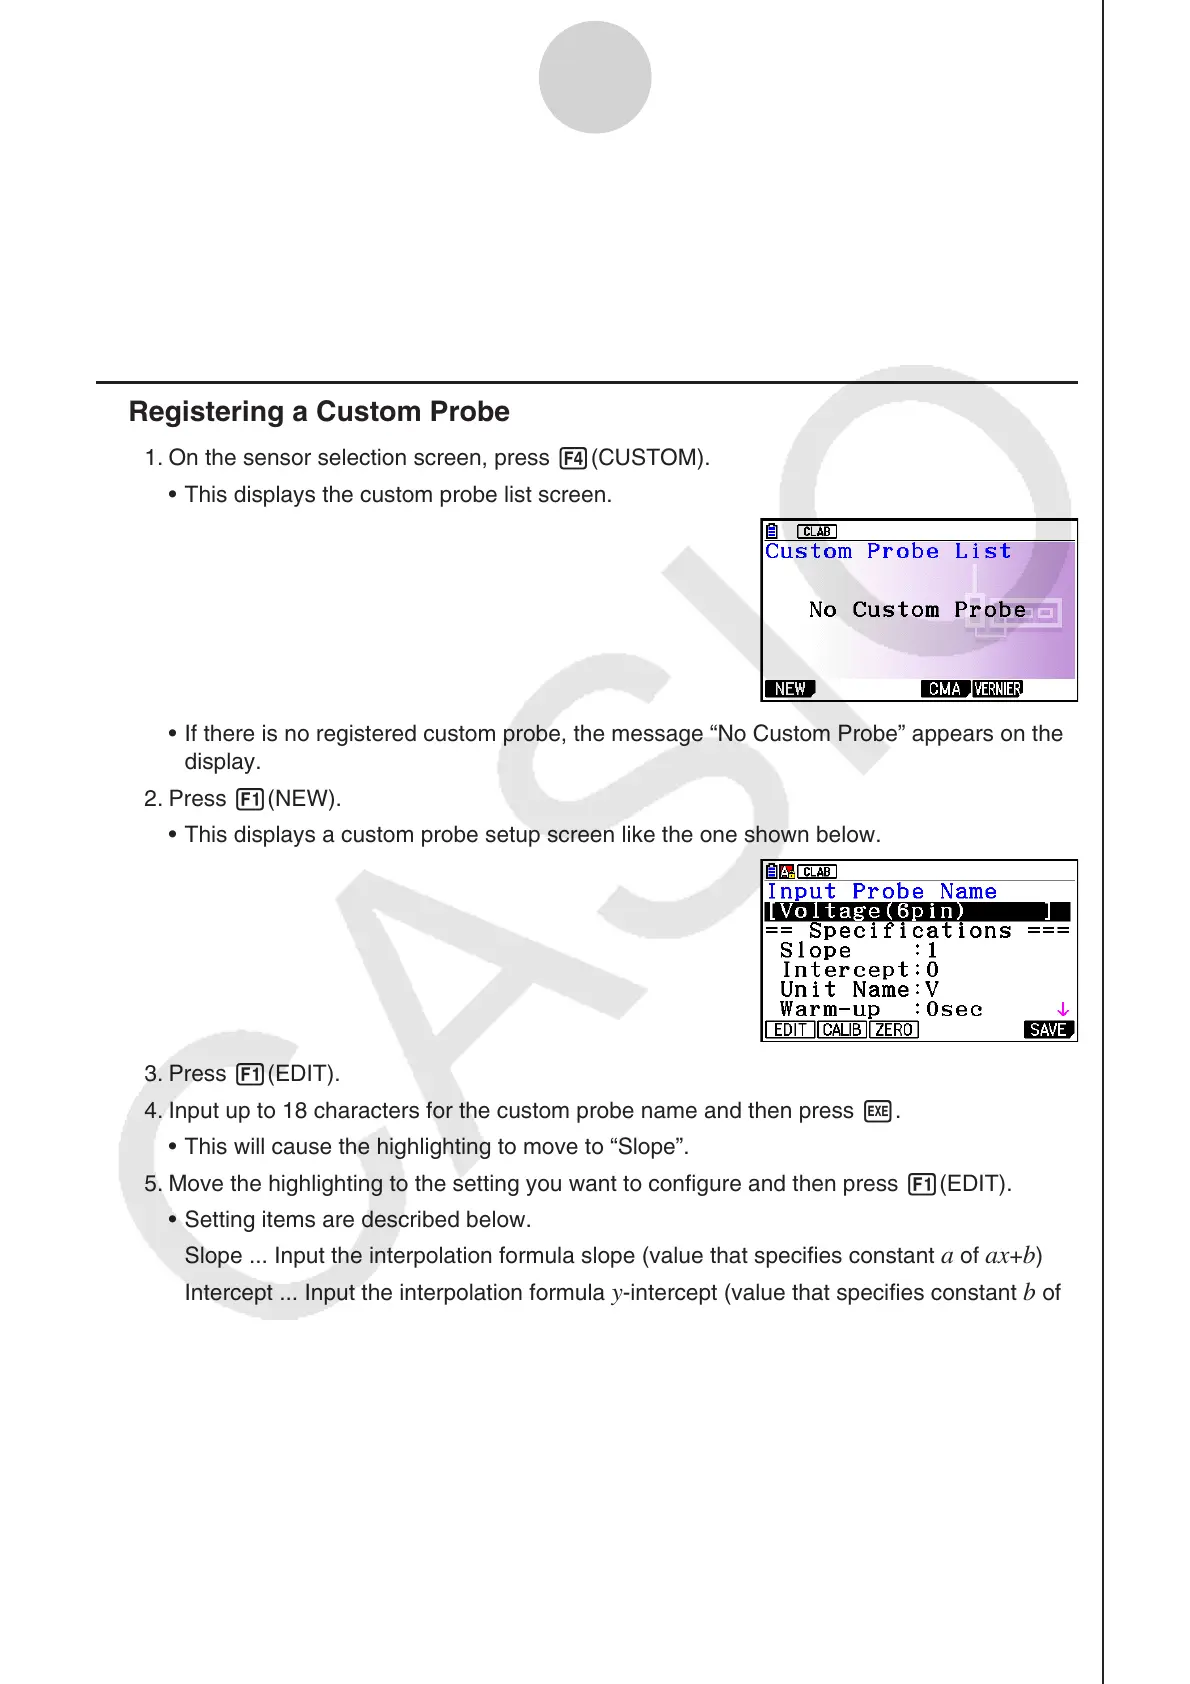
1. On the sensor selection screen, press 4(CUSTOM).
This displays the custom probe list screen.
If there is no registered custom probe, the message “No Custom Probe” appears on the
display.
2. Press 1(NEW).
This displays a custom probe setup screen like the one shown below.
3. Press 1(EDIT).
4. Input up to 18 characters for the custom probe name and then press w.
This will cause the highlighting to move to “Slope”.
5. Move the highlighting to the setting you want to configure and then press 1(EDIT).
Setting items are described below.
Slope ... Input the interpolation formula slope (value that specifies constant
a of ax+b)
Intercept ... Input the interpolation formula
y-intercept (value that specifies constant b of
ax+b)
Unit Name ... Input up to eight characters for the unit name.
Warm-up ... Specify the warm-up time.
Type ... Select the sensor type (“0-5V” or “±10V”). Press 4(0-5V) or 5(±10V).
6. Perform auto calibration and zero adjustment of the custom probe as required.
Press 2(CALIB) to perform auto calibration of the custom probe. See “Performing Auto
Sensor Calibration” (
page
ε-20).
Press 3(ZERO) to perform zero adjustment of the custom probe. See “Performing
Sensor Zero Adjustment” (page
ε-21).
k
•
•
•
•
•
•
•