moving money forward
This function is available by pressing the PRINT button while being on the report screen. If a printer is
connected to the machine, a detailed printout of the counting report will be produced.
Cassdia recommends using the Universal Cash Handling Thermal Printer that comes with all the necessary
cables to work with Cassida’s products.
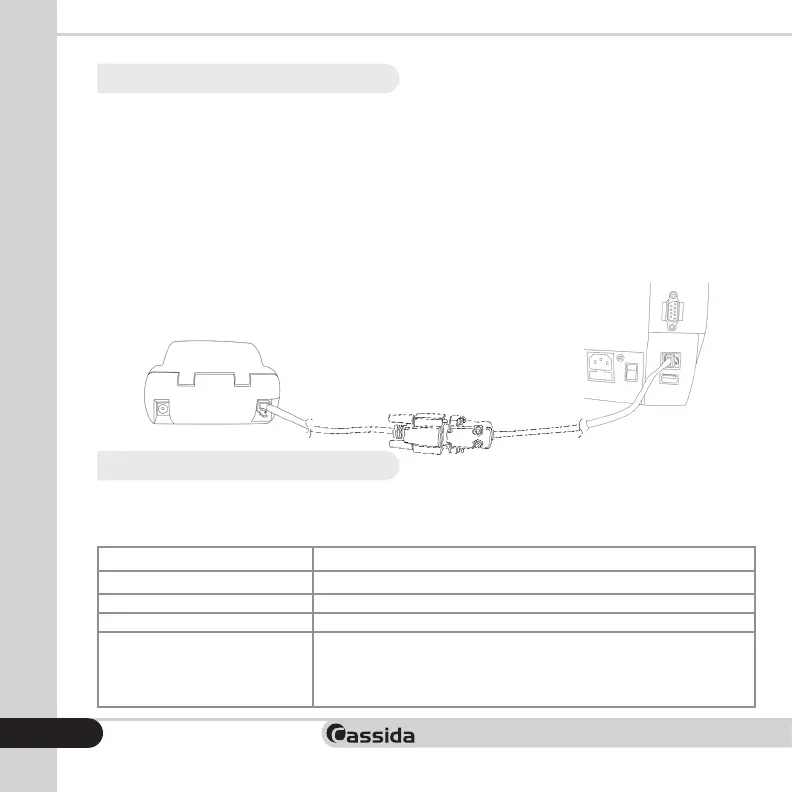
The Cassida 8800R has a printer port in the back on the machine ( RJ11 Port), refer to section 1.5 VIEWS
OF THE CASSIDA 8800R to see its location. Connect the adapter cable to the printer port (RJ11), and then
connect the adapter cable to the printer cable (comes with the Cassida Thermal Printer). Finally connect the
other end of the printer cable to the printer. See illustration below.
Ensure the printer power is ON before printing.
The Menu can be accessed by pressing the MENU button. To navigate and choose the sub-menu, use the
arrow buttons to go up and down in the Menu, right arrown to select and left arrow to go back.
4.3 Print
4.4 Menu
1. Settings
- UI Color
- Display Brightness
- Username
Accesses 8800R’s settings
Sets interface background color.
Sets the display brightness (Low, Medium, High).
Sets the username displayed on the home screen and the printed
receipt. Use keypad to enter the username, ‘’Del’’ to delete a number
or a letter. Press START/STOP button to save the username and the
left arrow to go back.
Sub-Menu Description
18
*Pinter NOT included.