17
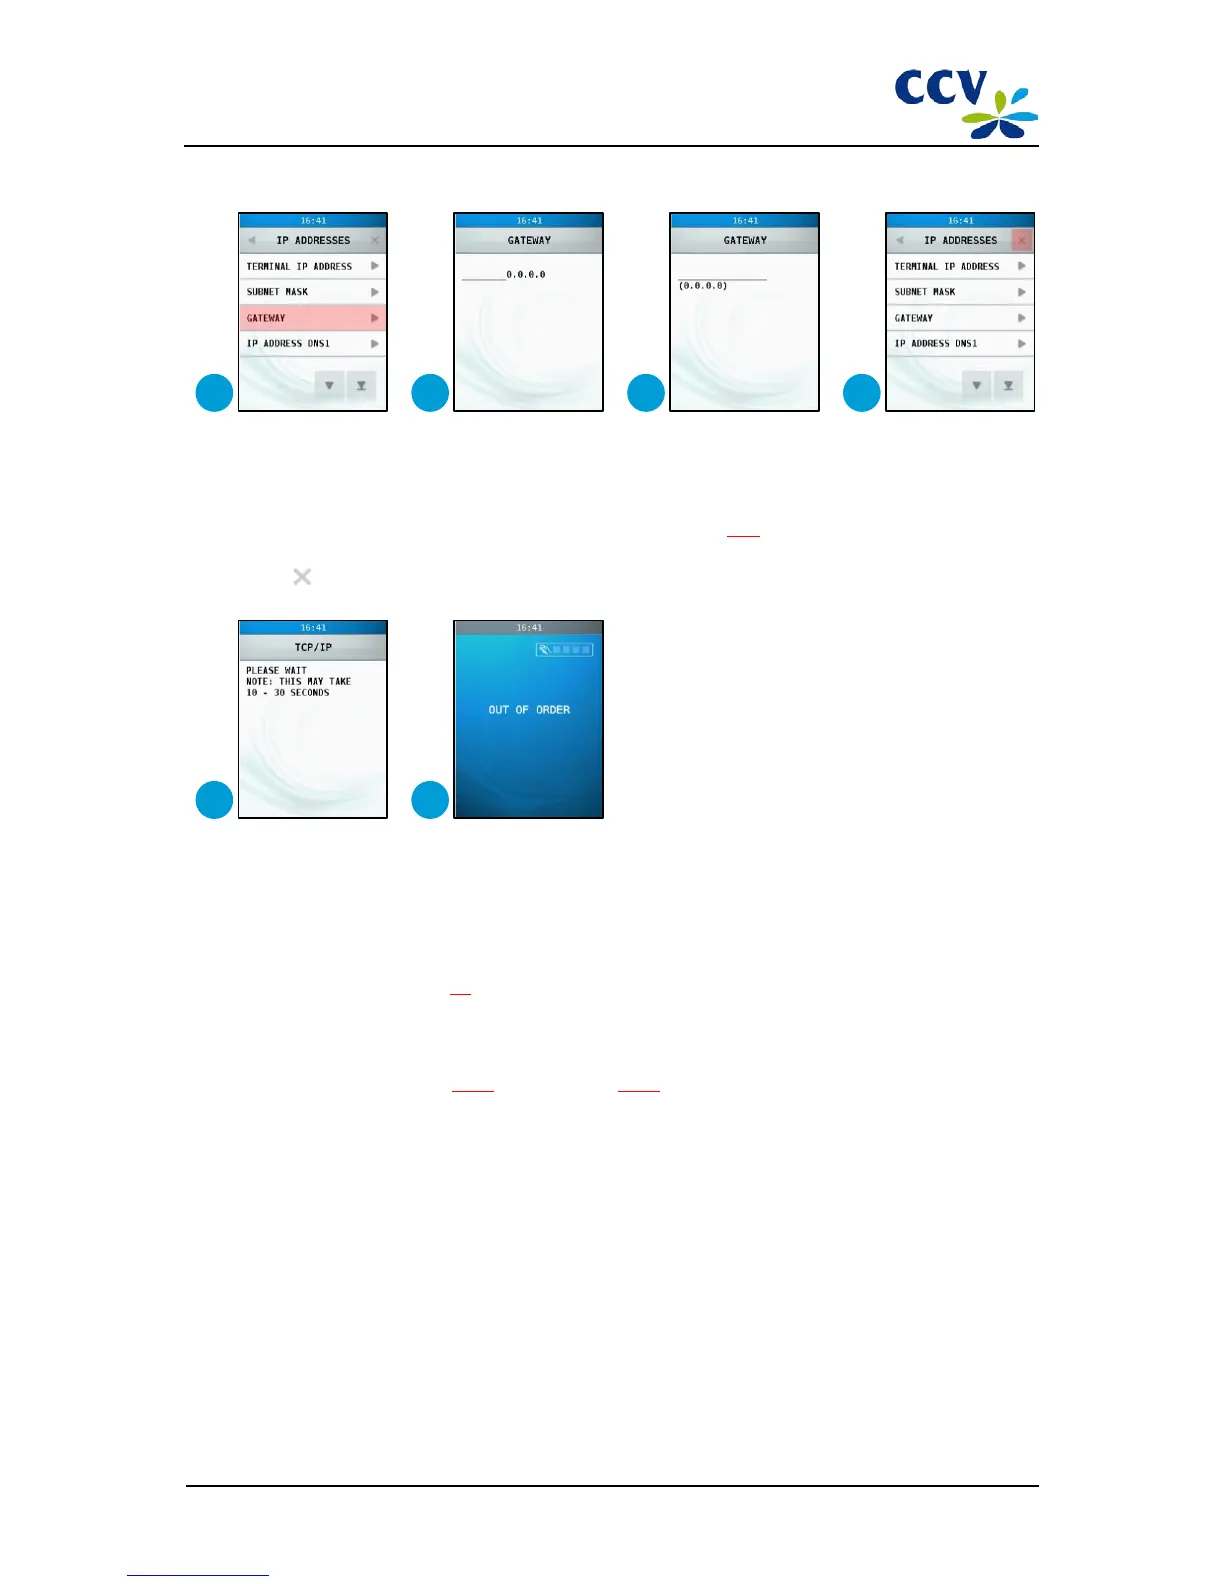
Choose menu option <GATEWAY>.
18
Press <CORR>.
19
Enter the gateway and confirm with <OK>. To enter the gateway, you must enter multiple full stops (.).Enter this
punctuation mark by entering <1> several times. Refer to sub-section 3.3.1 for more information about the
entering of alphanumerical characters.
20
Choose .
21 Wait until the communication settings have been configured.
22 The communication settings of the PIN pad have now been configured.
2.9 Step 4: connecting the PIN pad to AdminLight
Add the PIN pad in AdminLight. For more information about adding PIN pads to AdminLight, please refer to the
AdminLight user manual (see section 1.6).
2.10 Step 5: installing the PIN pad with AdminLight
The installation process differs for a new PIN pad and a PIN pad that has allready been installed and used at a customer.
Follow the instructions in sub-section 2.10.1 (new PIN pad) or 2.10.2 (used PIN pad) to install the PIN pad.