7
During welding the VRD LED turns RED, which does not indi-
cate any malfunction on the welding machine, but that the VRD
device has been deactivated to allow welding.
Accessory functions
“Energy saving”
This function manages correct functioning of the cooling fan
that only runs when strictly necessary, to guarantee lower en-
ergy consumption, that is:
•
During welding or for an adequate period of time after this
is finished.
•
When the thermostat intervenes or for an adequate period
of time after it has just been reset.
Hold
During welding the operator can decide whether to display the
VOLTAGE and CURRENT values on the DISPLAY by simply
pressing the DISPLAY SELECTION Key.
When welding ends for about 15 seconds the DISPLAY mem-
orises the last parameter values (VOLTAGE and CURRENT)
selected / regulated (HOLD FUNCTION).
These values can be seen by simply pressing the DISPLAY
SELECTION Key.
To interrupt the display before the 15 seconds are up, simply
rotate the ENCODER Knob.
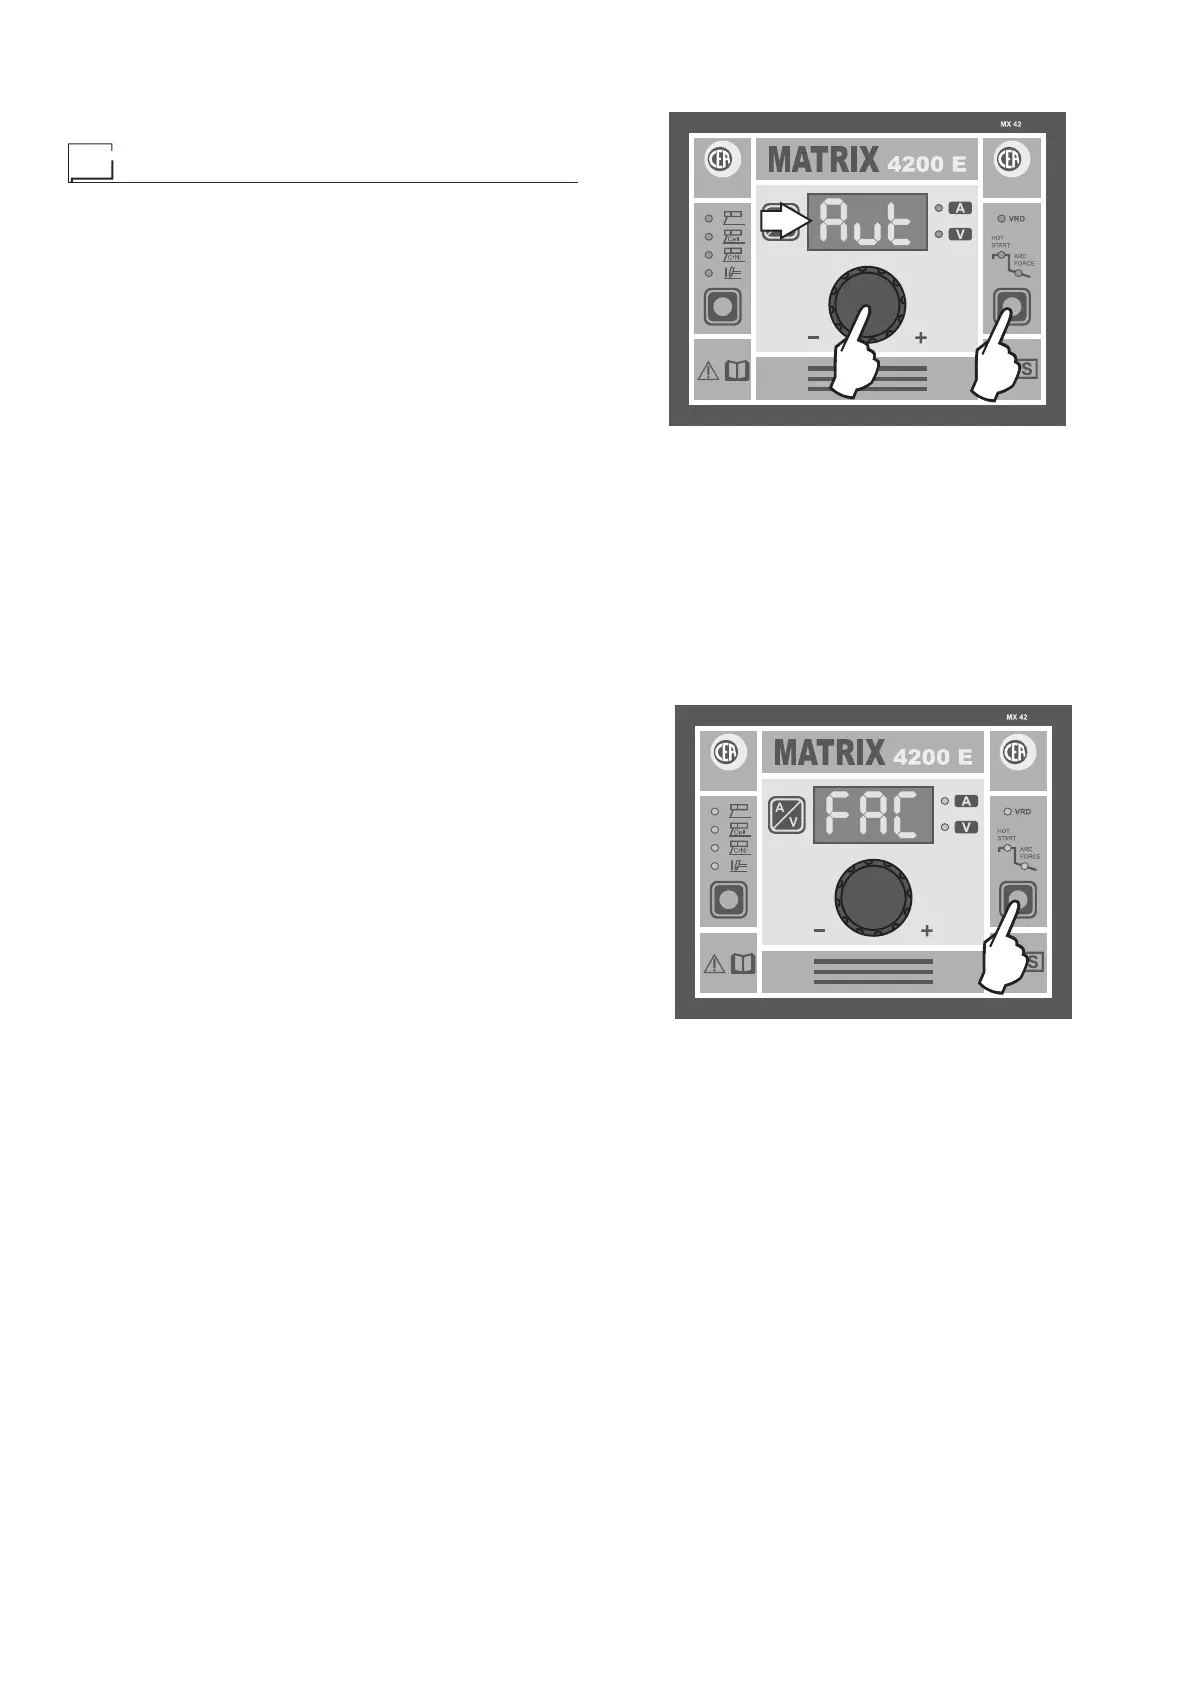
Aut - rEm - LoC
Matrix generators can be fitted with a manual remote control
that allows the welding current to be remote controlled (value
adjustable according to the model of the MX control panel you
are using). When this is on, the welding machine’s DISPLAY
will show the current value set previously using the same re-
mote control.
The MX control panel allows the operator to choose between
3 different parameter adjustment modes, by means of this sim-
ple procedure:
1) Switch off the welding machine by turning the main switch
to position 0.
2) Hold down the SELECT FUNCTION (T2) key and simulta-
neously switch in the welding machine by turning the main
switch to position I.
3) Now, when the ENCODER knob (E) is rotated the DISPLAY
(D) will provide the following indications and the operator
can choose between:
•
Aut - Automatic recognition of the manual remote control
connected up (DEFAULT setting) and therefore allowing
the current to be adjusted.
• rEm - Automatic recognition of the manual remote con-
trol connected up and therefore allowing the current to
be adjusted.
PLEASE NOTE: The welding machine does not work if
the remote control is not connected to it!
•
LoC - The welding current may only be adjusted from the
welding machine’s control panel.
WARNING: The remote control does not work, even if
connected up correctly!
4) Hold the SELECT FUNCTION (T2) key down to confirm
the choice made previously.
D
T2
E
NOTE: The MX control panel has a STAND-BY function that,
when the remote control is on, switches off the inverter when
the minimum welding current value is reached (to reinstate nor-
mal, correct functioning of the machine, increase the welding
current value by rotating the remote control knob).
Factory default
WARNING: This operation results in complete resetting of all
parameters to the factory settings (FAC).
To reset the settings hold the FUNCTION SELECTION Key
(T2) down for at least 5 seconds, until the DISPLAY reads FAC.
T2
2000HA90
At this point the welding machine carries out a short MACHINE
CHECK (all the LEDs switch on and off, one at a time, follow-
ing a preset, established start-up procedure). The reset proce-
dure has now been completed successfully.