ENGLISH
40
Maintenance and care
• CEDIMA
®
• Technical Documentation • All rights reserved as per ISO 16016 • Subject to modications due to progressive development •
6.6 Maintenance work on the CF-2116 D
ATTENTION!
Observe the safety instructions of this
operating manual!
ATTENTION!
Use genuine parts!
Only be using genuine parts of spare parts
approved by CEDIMA
®
the operational safety of the
CF-2116 D can be guaranteed.
6.6.1 Measures concerning health,
accident prevention and
environment protection
• Avoid any lengthy contact with oil, carefully clean the
skin from any clinging oils!
• Especially avoid contact with liquid uids at a tem-
perature of above 60°!
• Oil contact with the eyes needs an immediate, careful
and thorough rinsing with drinking water and eventu-
ally a visit to a doctor!
• Take care when using pressurised uids! There is a
risk of injury through escaping hydraulic oil (under
pressure). Any sort of manipulation on the hydraulic
system should be avoided!
• Oil leakage should be removed or treated straight
away with a binding agent!
• Oil should not be allowed to seep in to the ground or
in to open drains!
• Used oils should be collected and stored properly,
until collected by a qualied rm, competent in han-
dling used oils!
Pay attention and follow the valid laws and regulations
concerning handling and disposal of oils in the
respective country where operations are carried out!
Information can be obtained from the appropriate ofce
in question.
6.6.2 Tensioning the cutting shaft V-belts
For tensioning the four cutting shaft V-belts proceed as
follows:
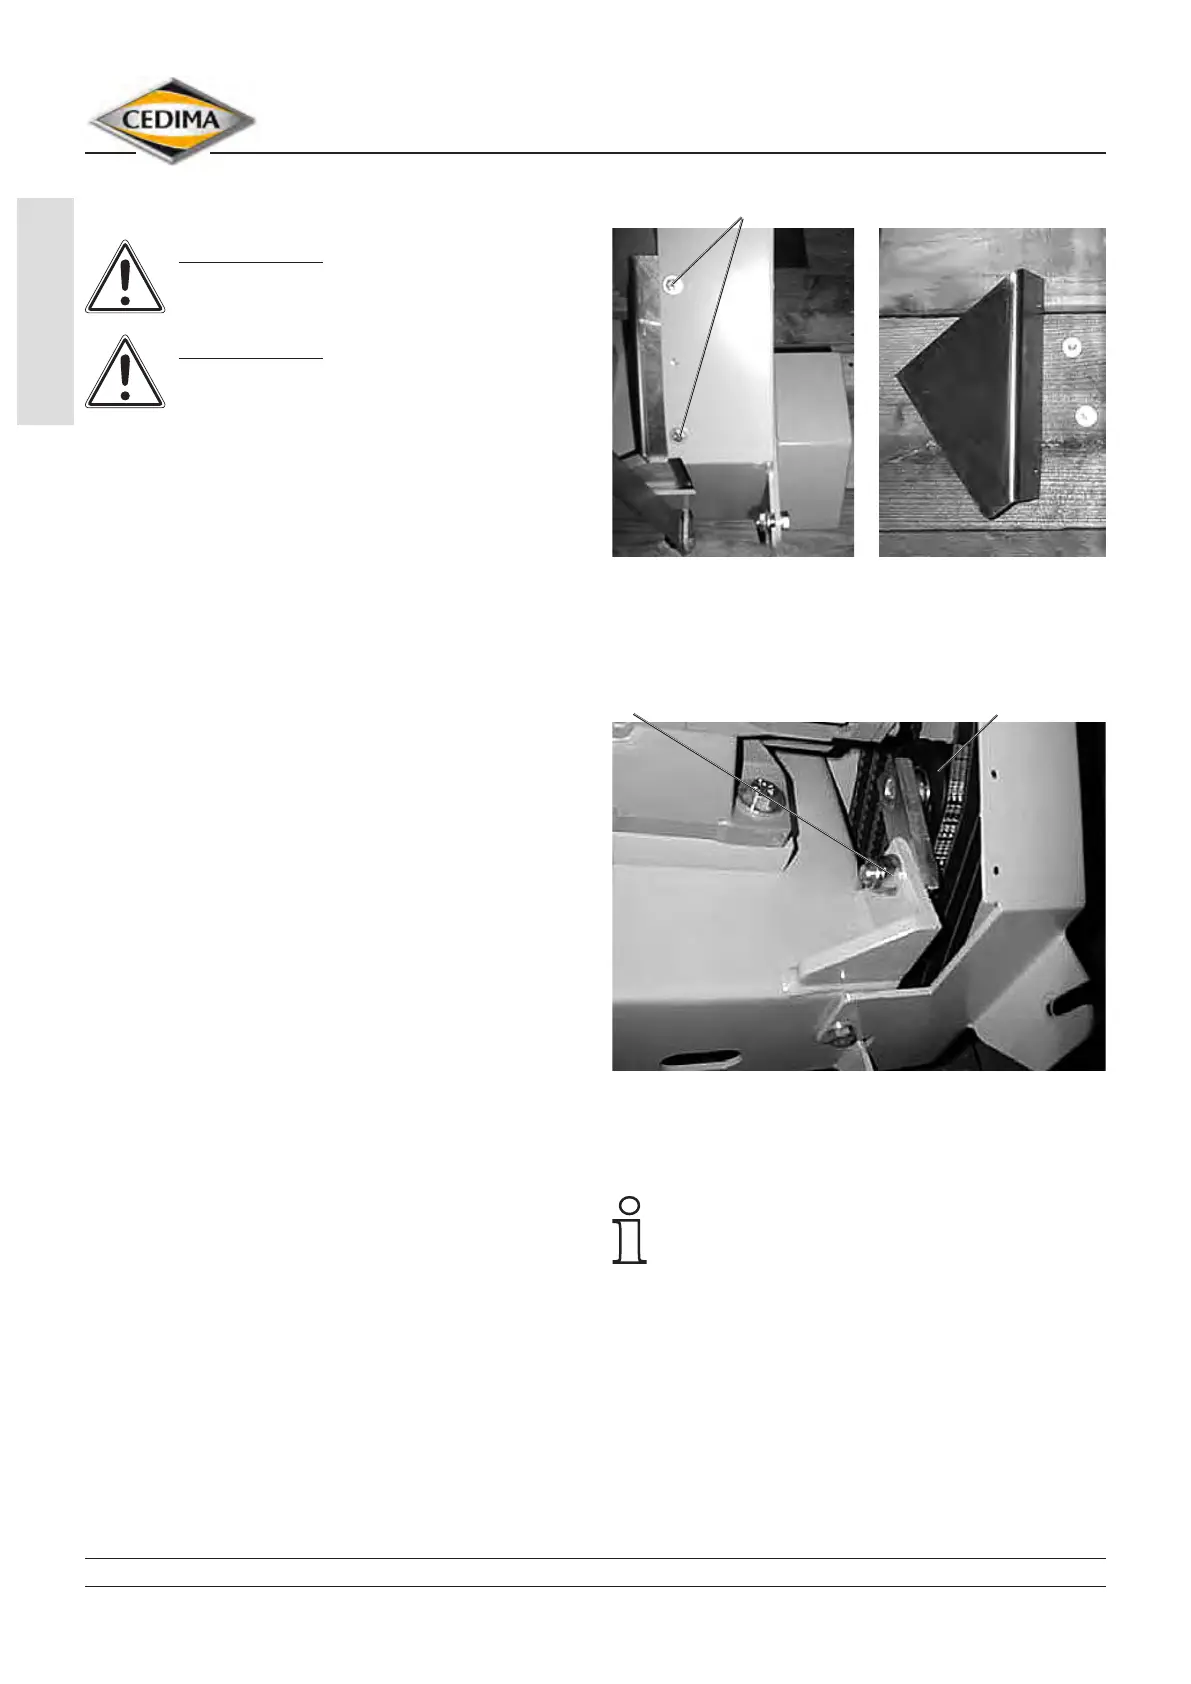
1. Dismount the cover sheet over the V-belt tensioning
device in front of the V-belt cover (g. 4.4, 6.1 and
6.2). For this, loosen and remove the two screws
(size 10 mm) with washers.
Cover sheet at the fore of V-belt cover Fig. 6.1
screws with washers
2. Loosen the nut at the V-belt tensioning device (g.
6.2).
Dismounted cover sheet at the fore of V-belt cover Fig. 6.2
nut at V-belt tensioning device V-belt tensioning roll
3. Pull the V-belt tensioning roll upwards and/or push it
up against the V-belts (g. 6.2).
Place a suitable open-ended spanner (rear) on
the V-belt tensioning arm.
Press the V-belt tensioning roll with the V-belt
tensioning arm against the cutting shaft V-belts.
Do not damage the V-belts with a pointed or sharp-
edged tool!
4. Hold the V-belt tensioning arm (tensioning roll) and
re-tighten the nut at the V-belt tensioning device (g.
6.2).