EAGLE CONTROLLER – INSTALLATION & COMMISSIONING INSTRUCTIONS
EN1Z-0970GE51 R0918 34
M-Bus Connection Procedure
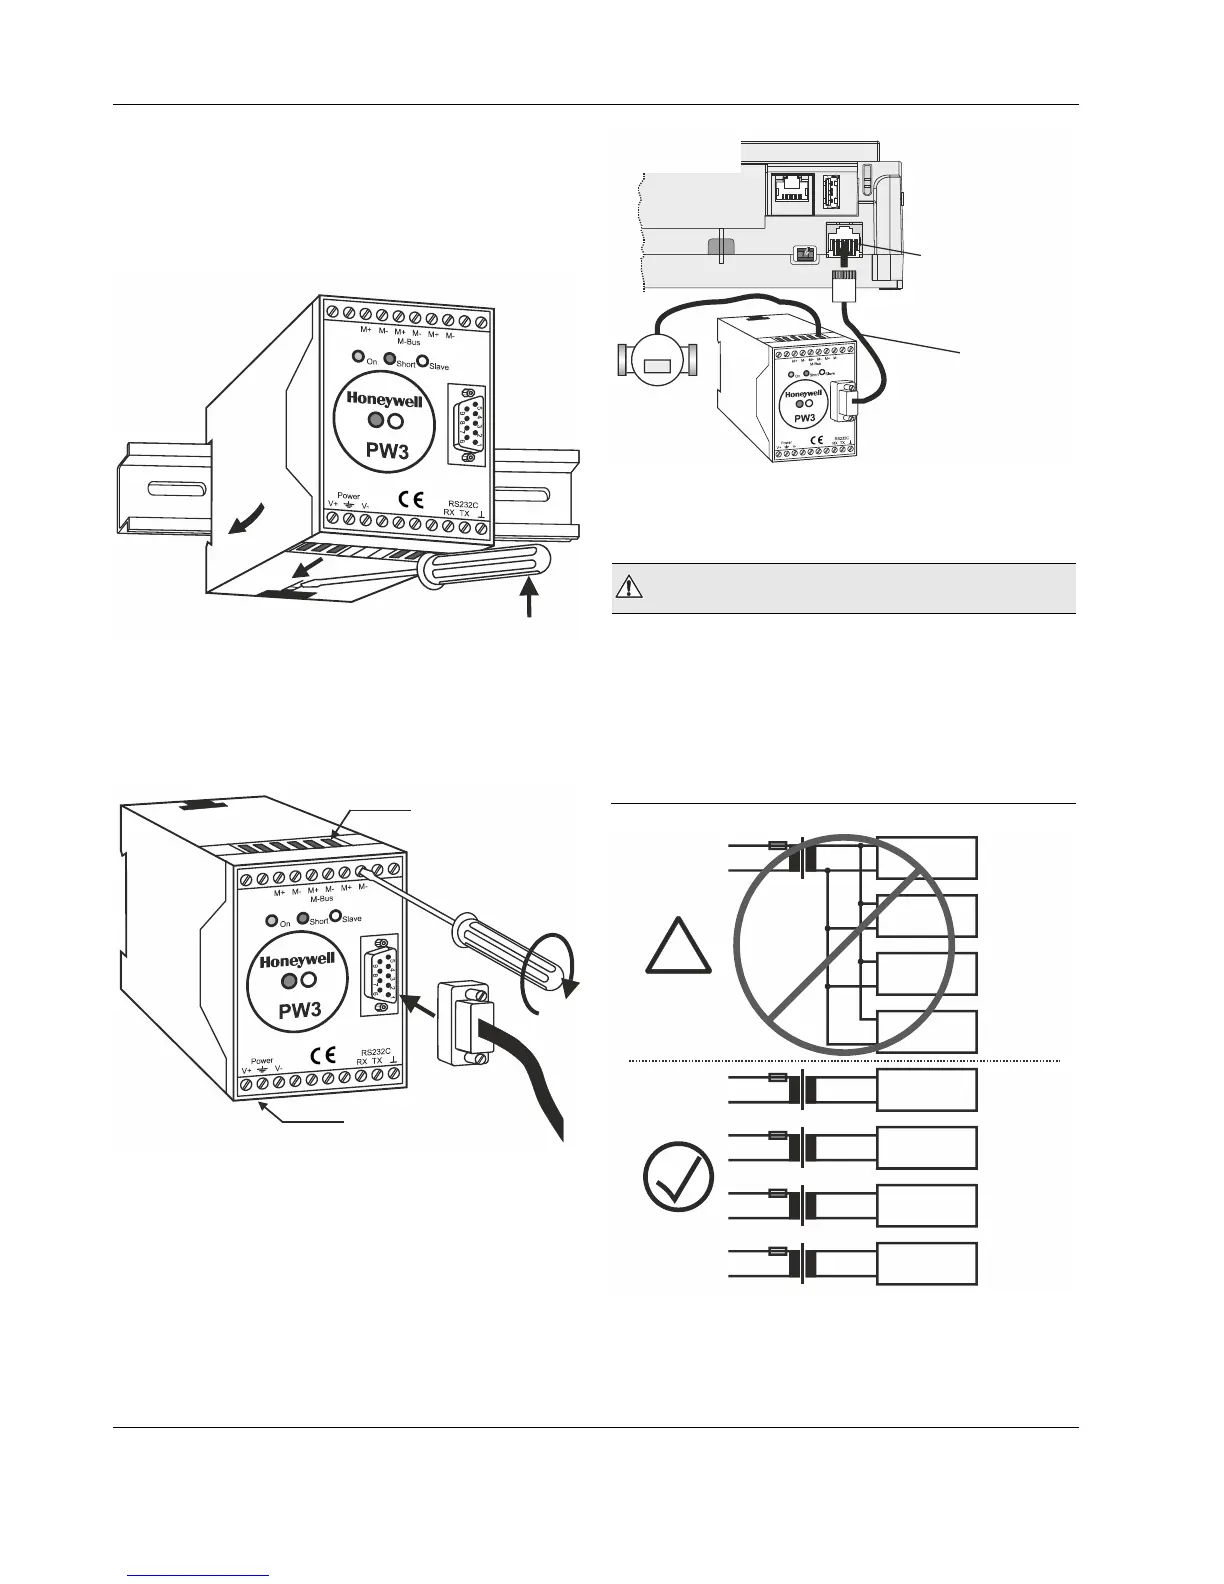
1. Install the PW M-Bus Adapter on DIN rail. Insert a
screwdriver into the slot in the DIN rail clamp on the
underside of the PW and pry downward to loosen clamp
until the unit snaps onto the rail.
1
2
3
DIN RAIL
Fig. 52. Mounting of PW (PW3 shown here)
2. Connect the M-Bus devices to the PW M-Bus Adapter.
All M+ and M- terminals are connected in parallel in the
PW M-Bus Adapter.
XW586
INSERT
METER-BUS
WIRES
INSERT POWER
SUPPLY WIRES
Fig. 53. PW M-Bus adapter connections
3. Connect the PW M-Bus Adapter to the RS232 / RJ45
socket of the EAGLE using the XW586 cable.
J1 J8
XW586
EAGLE
RS232 / RJ45
SOCKET
M-BUS
DEVICE
Fig. 54. Connecting the EAGLE to the PW M-Bus adapter
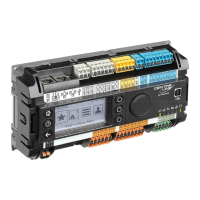
4. Connect 24 V power to the M-Bus Adapter.
WARNING
Risk of electric shock or equipment damage!
► Due to the risk of short-circuiting (see Fig. 23), it is strongly
recommended that the EAGLE controller be supplied with
power from a dedicated transformer. However, if the
EAGLE controller is to be supplied by the same trans-
former powering other controllers or devices (e.g., the PW
M-Bus Adapter), care must be taken to ensure that correct
polarity is observed.
CLEAxxxxxx
CLEAxxxxxx
PANTHER,
TIGER, LION,
etc.
PANTHER,
TIGER, LION,
etc.
PW3, PW20,
PW60, etc.
PW3, PW20,
PW60, etc.
!
CLEAxxxxxx
CLEAxxxxxx
230 VAC
120 VAC
230 VAC
120 VAC
230 VAC
120 VAC
230 VAC
120 VAC
24 VAC
0 V
24 VAC
0 V
24 VAC
0 V
24 VAC
0 V
Fig. 55. Connecting power to the PW M-Bus adapter